Ever wished you could add a floating shopping cart to WooCommerce? With a WooCommerce floating cart icon, shoppers can quickly view what’s in their cart without needing to direct their attention elsewhere.
With Registration Magic’s Magic Popup Button and WooCommerce Integration extensions, you can make your shoppers’ carts, as well as their account details, never more than a single click away.
Previously, I showed you how to add custom form fields to the WooCommerce registration form. Today, I’m going to show you how to use Registration Magic’s Magic Button to create a WooCommerce floating cart icon.
So What is This Magic Popup Button Thing?
Magic Button is a feature offered in the premium version of Registration Magic. It adds a floating WooCommerce shopping cart icon to the bottom right of your users’ screens. By default, that icon looks like this:

When users click on it, a menu option slides up with a number of registration-focused features:
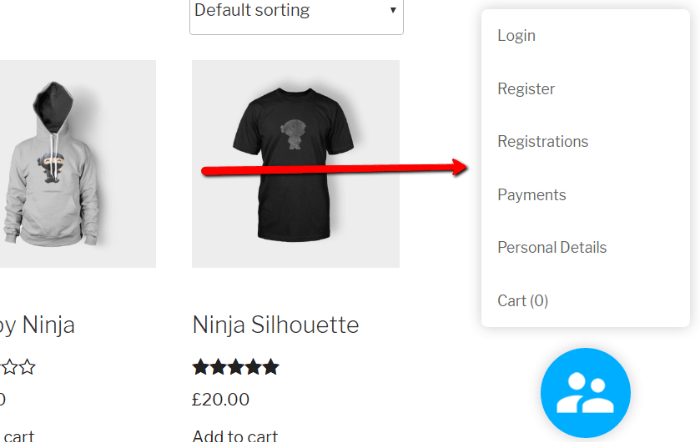
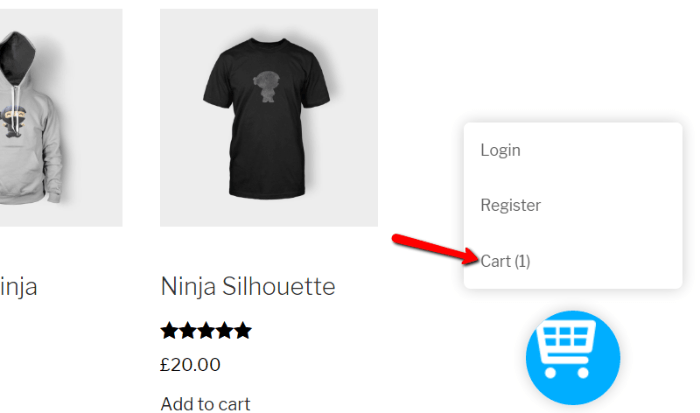
When enabled, one of those options is a user’s WooCommerce cart. Users can click the cart button to expand their cart:
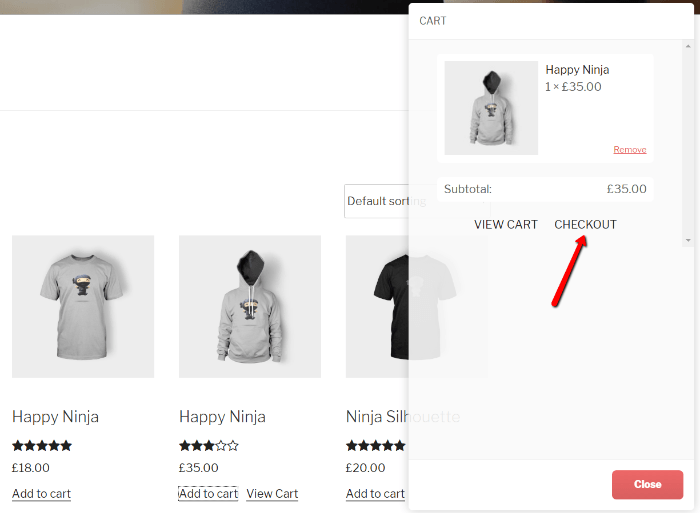
Then, they can click the checkout button directly from the Magic Button! That means no matter what theme you’re using, your shoppers’ carts (and your checkout process!) will always be right there.
Interested? Here’s how you can get your very own Magic Button.
How to Set Up Magic Button Shopping Cart
First off, you will need the Premium version of Registration Magic to get started. The WooCommerce Integration extension is required for this functionality. So if you haven’t already upgraded to premium, you’ll need to get that taken care of first.
Then, you’re ready to dig into Registration Magic’s settings to get everything all set up.
Step 1: Turn on Shopping Cart Magic Button
First, you need to enable the Magic Button shopping cart option in your WooCommerce integration settings. Then, you can configure the rest of your Magic Button in the next step.
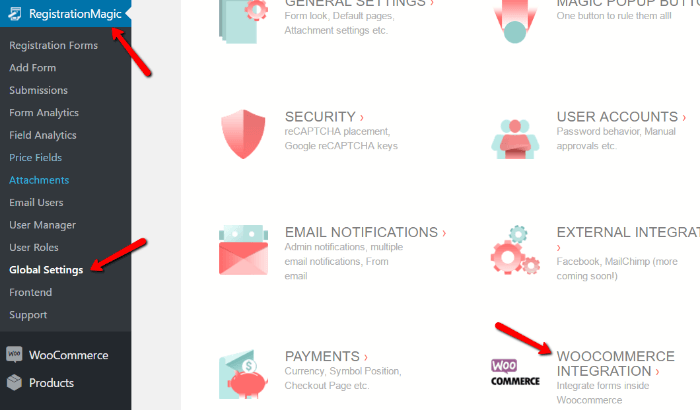
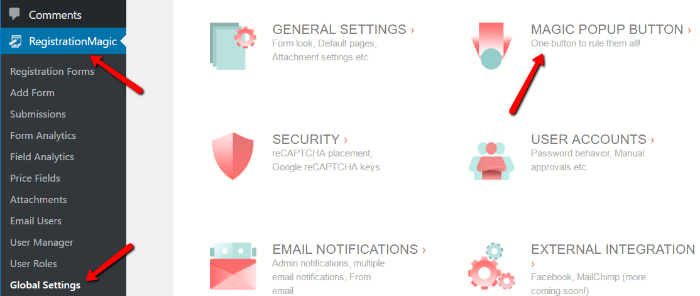
Get started by going to Registration Magic → Global Settings. Then click on the WooCommerce Integration option:
Next, make sure that the SHOW CART ON POPUP MENU box is checked:
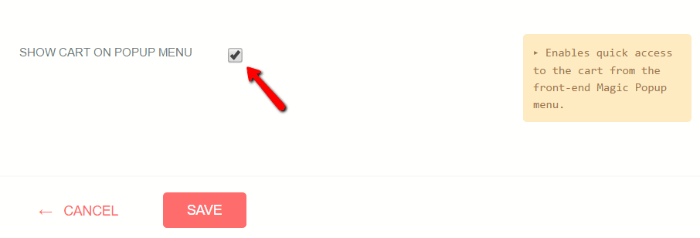
This enables the shopping cart feature for your Magic Button.
Step 2: Configure Magic Button
Now you’re ready to configure your Magic Button! Go back to Registration Magic → Global Settings and choose the Magic Popup Button option.
Make sure you check the SHOW MAGIC POP-UP BUTTON, MENU AND PANELS:
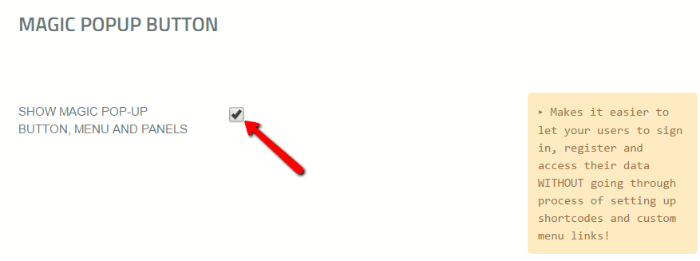
That’s all you technically need to do! But if you want to configure the options and look of your Magic Button, you can also do that on this page.
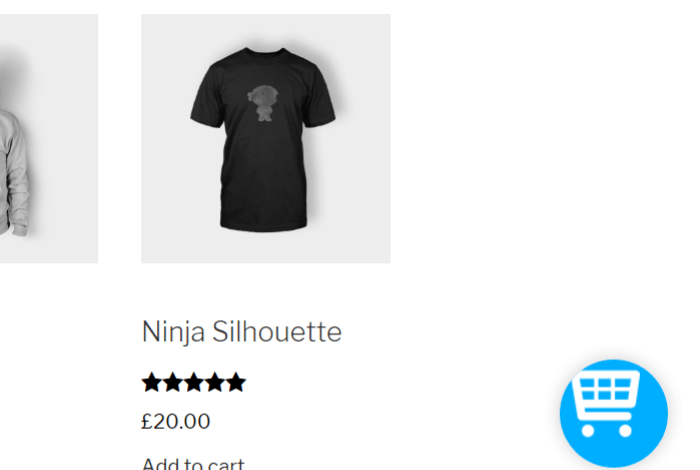
First off, you can customize the WooCommerce shopping cart icon used on your Magic Button. For example, if you want to give your Magic Button a shopping cart icon, you can download a free shopping cart icon (there are plenty of free WooCommerce shopping cart icon sites!) and upload that:

Doing so will give you something more like this:
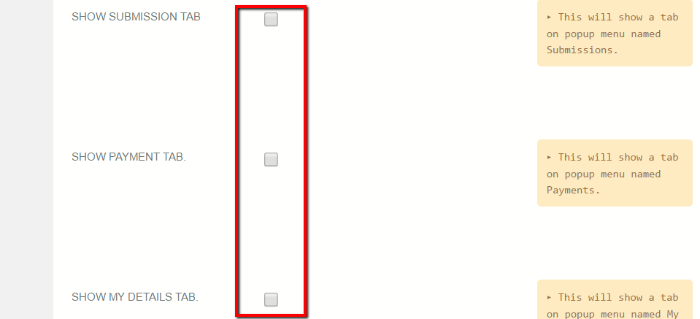
And finally, you can also customize the links which appear on your Magic Button popup. You can both remove links and add new custom links.
If you want to really focus on highlighting a shopper’s cart, you may want to disable the other links:
Doing so will make your Magic Button look like this when your visitors click on it:
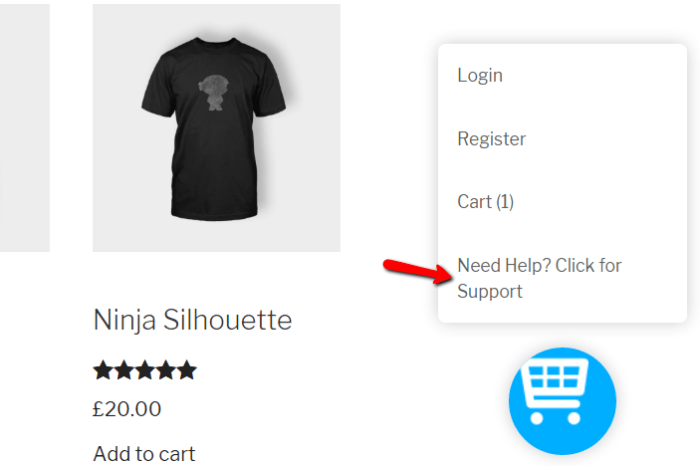
One cool use for the Custom Links option would be to add a support link beneath a user’s cart. That way, shoppers can instantly get help if there’s anything preventing them from buying right away:
Wrapping Things Up on WooCommerce Floating Cart
Setting up the Magic Button WooCommerce cart integration literally takes ten seconds! Your visitors will appreciate the quick access to their shopping cart. And your sales may well just increase as a result!
- How to Add Custom Form Fields to WooCommerce Registration Form - August 31, 2022
- How to Save PDF Copies of WordPress Form Submissions to Dropbox - May 19, 2017
- How to Add Variable Quantities and Total Price to Registration Form Payments - April 23, 2017
- How to Quickly Create a Multi-Page Form in WordPress - March 27, 2017
- How to Add Extra Fields to the WordPress Registration Form - February 10, 2017
- How to Add a Floating Shopping Cart Button to WooCommerce - January 29, 2017
- How to Customize the WordPress Register Form Style - December 17, 2016
- How Long Should Contact Forms Be? [Breakthrough Ideas] - December 1, 2016
- How to Change the WordPress Register Form URL - November 28, 2016
How do I turn off the OTP function? I want to require that users wither register or log in with their registered username/password??
OTP function is based on widgets, you may remove widgets from page. Registered user will be available inside User Manager section
Login details will be available inside Form Analytics. You will need to select login form from top right dropdown.