Creating a student registration form on a WordPress website is essential for enrolling students in courses, classes, scholarships, and extracurricular activities. These online forms streamline new student registration, personal information collection, and online payments. They are versatile, serving purposes like webinars and conference registration. Often, these forms offer file attachment options. From K-12 to higher education, these forms benefit institutions in many ways.
How to create a student registration form easily?
Before going ahead make sure to ‘Install’ and ‘Activate’ RegistrationMagic plugin on your website using this link.
RegistrationMagic is a versatile and free WordPress plugin for creating customizable forms. It offers essential fields and bulk email functionality with admin control. Integrated with Google Maps for location search, it also supports WooCommerce, making it ideal for student registration and online course sales.
To know more about the features this plugin has, try the free version of RegistrationMagic.
Try RegistrationMagic for Free.
Learn to create student registration forms with this step-by-step guide.
Simple steps to create a student registration form
For creating a new registration form,
Step 1: Click on the “RegistrationMagic” plugin
- On your dashboard homepage, search for the RegistrationMagic plugin.
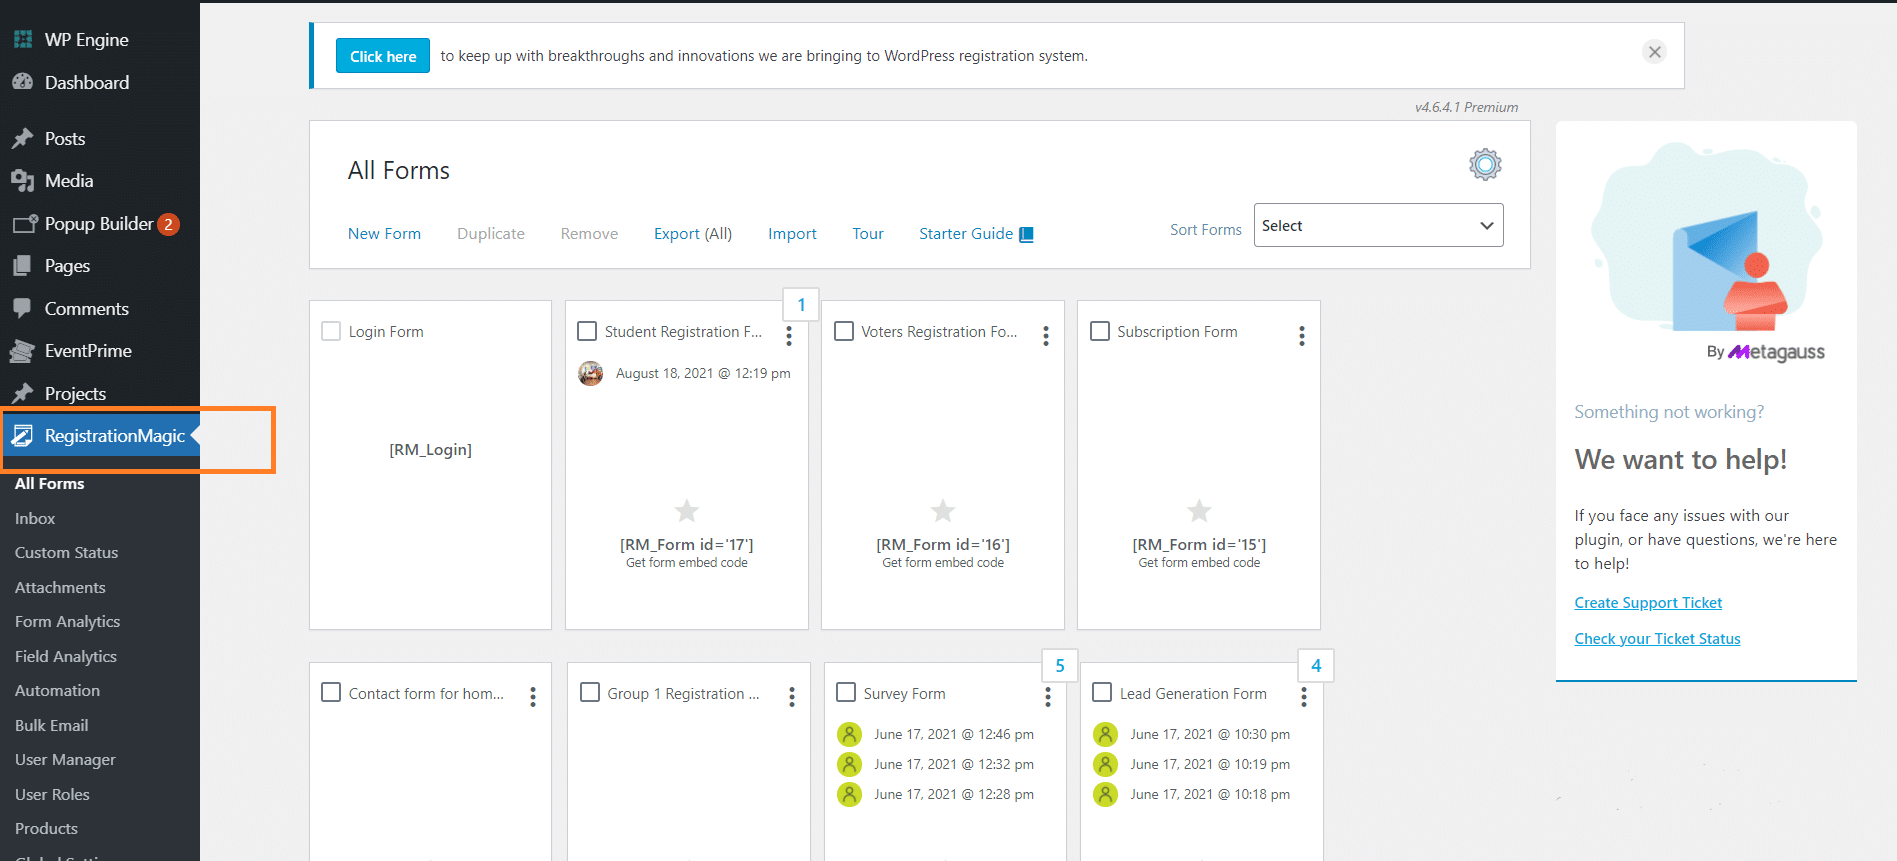
- A dropdown menu will appear that has various options.
- Select the “All Forms” option present at the top.
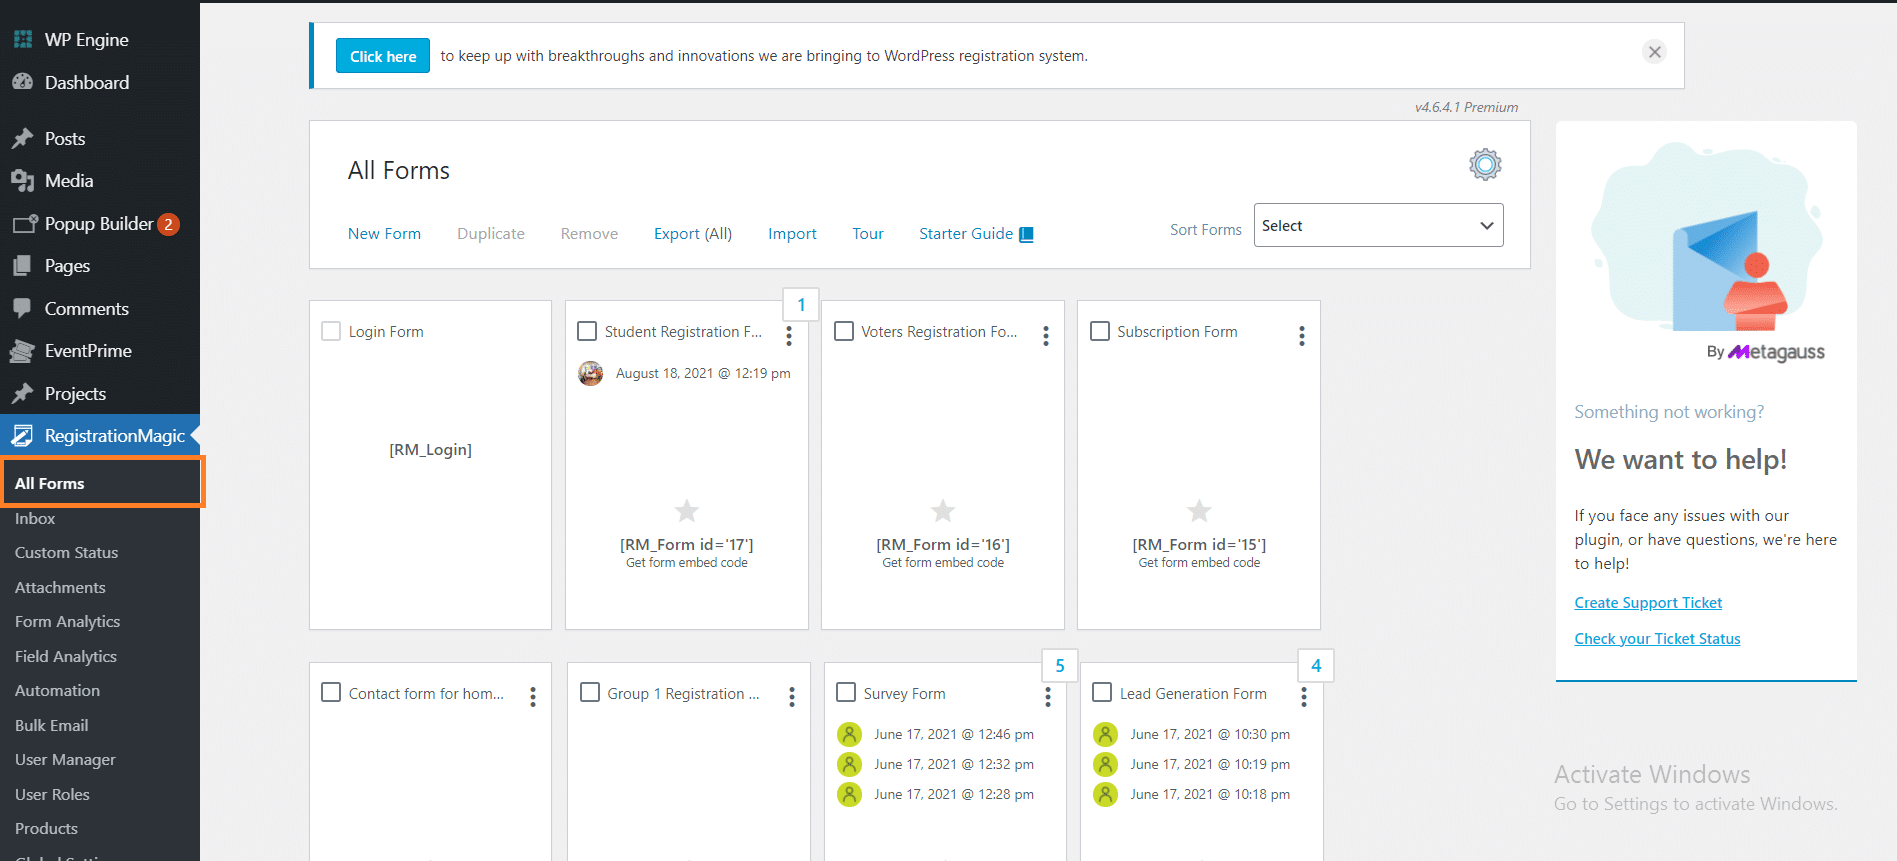
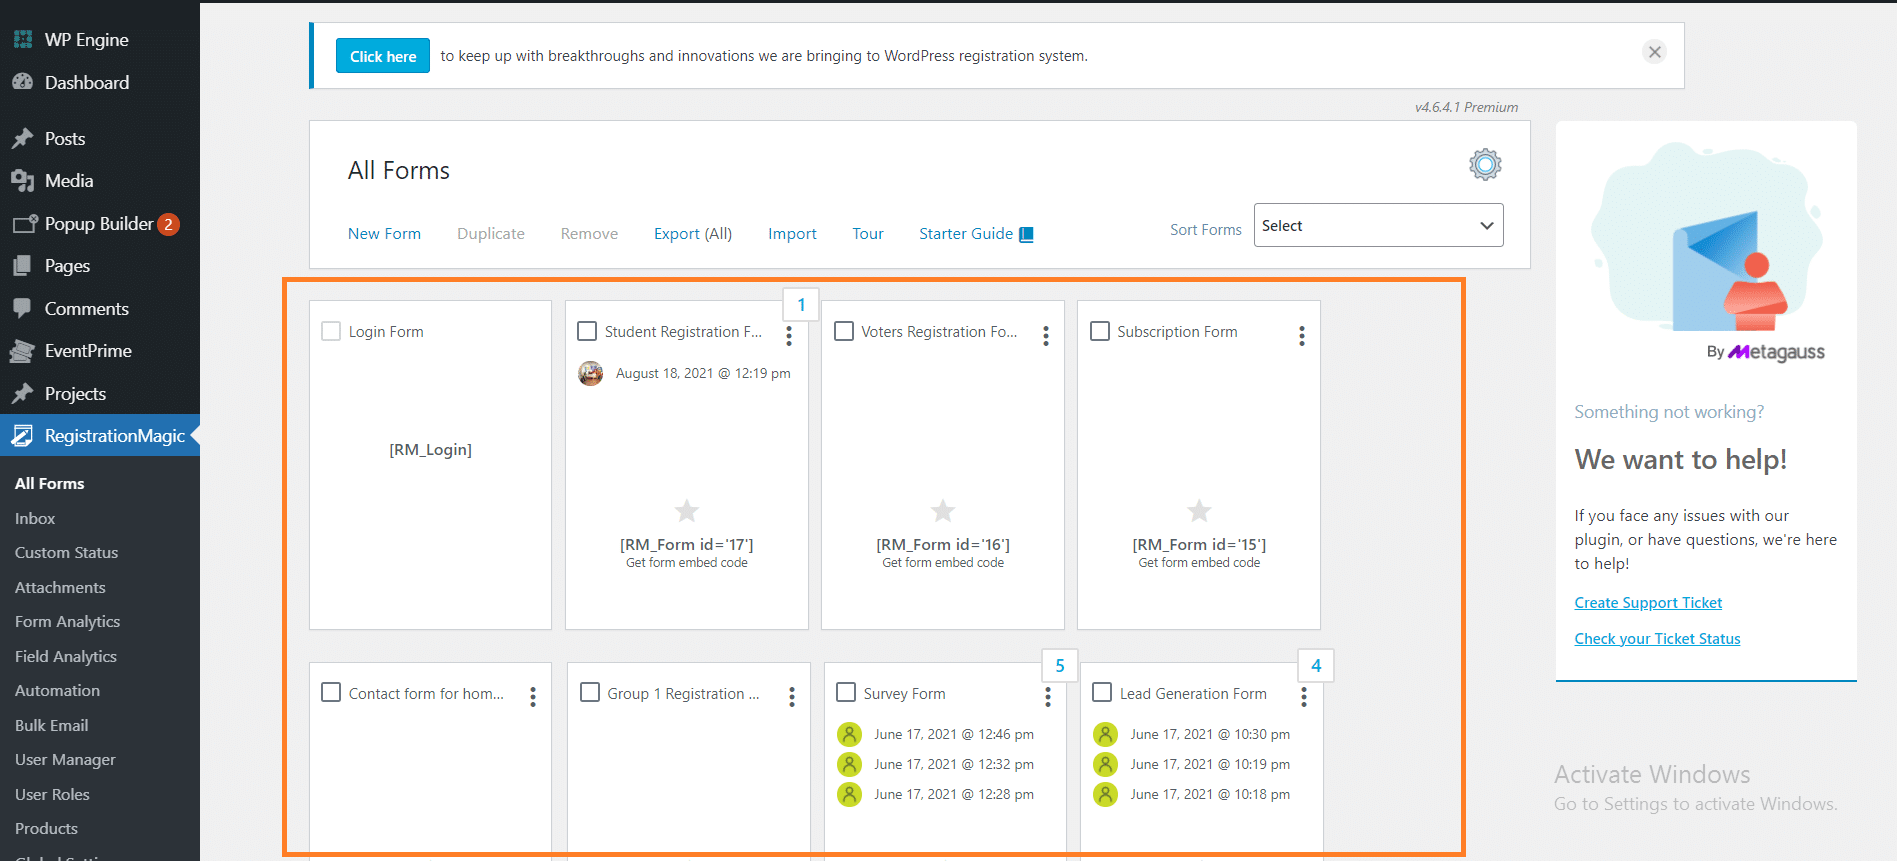
- Clicking ‘All Forms’ will open up a dashboard that will contain all the forms you have created.
Step 2: Click on “New Form” from the toolbar and add a name to your form

- A pop-up window will appear that asks you to add a name to your form.
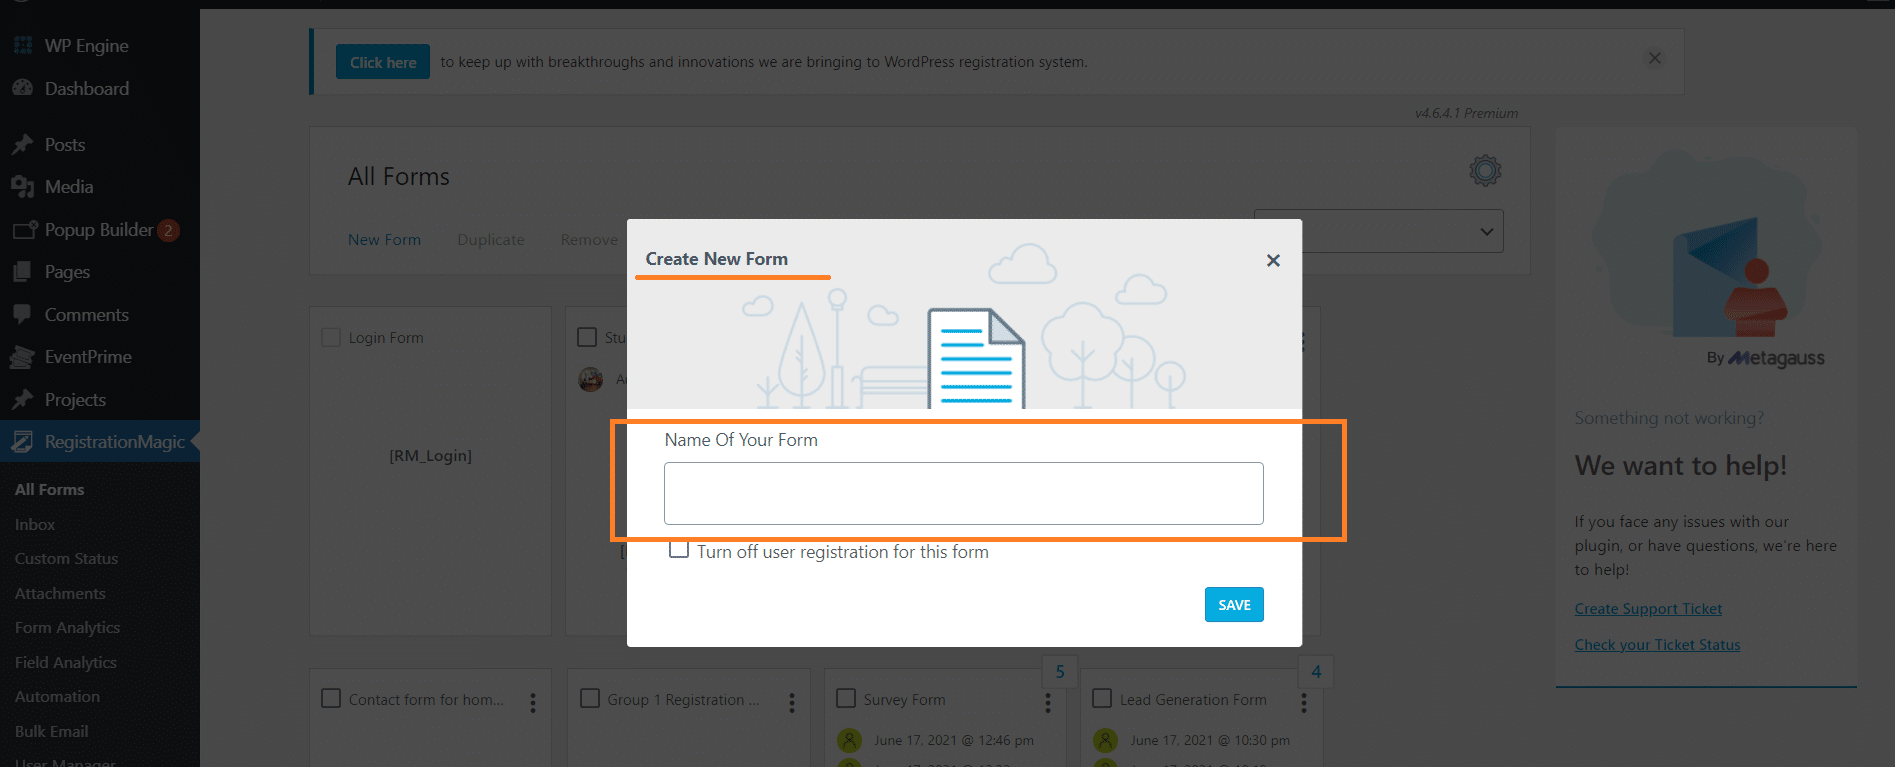
- Suppose you want to make a new registration form for any coaching institute; you can name it “Student Registration Form For Coaching Classes” and click on the “Save” button.
For example, we have named our form ‘Student Registration Form‘.

- Moving on to our next step, you can now see the student registration form that you have just created on the white window.
- The next step is to add relevant fields.
- As you hover your cursor on the blank part of the form, two options appear. A blue button saying “Dashboard” and a white button, that says “Fields.”
Step 3: Click on “Fields.”

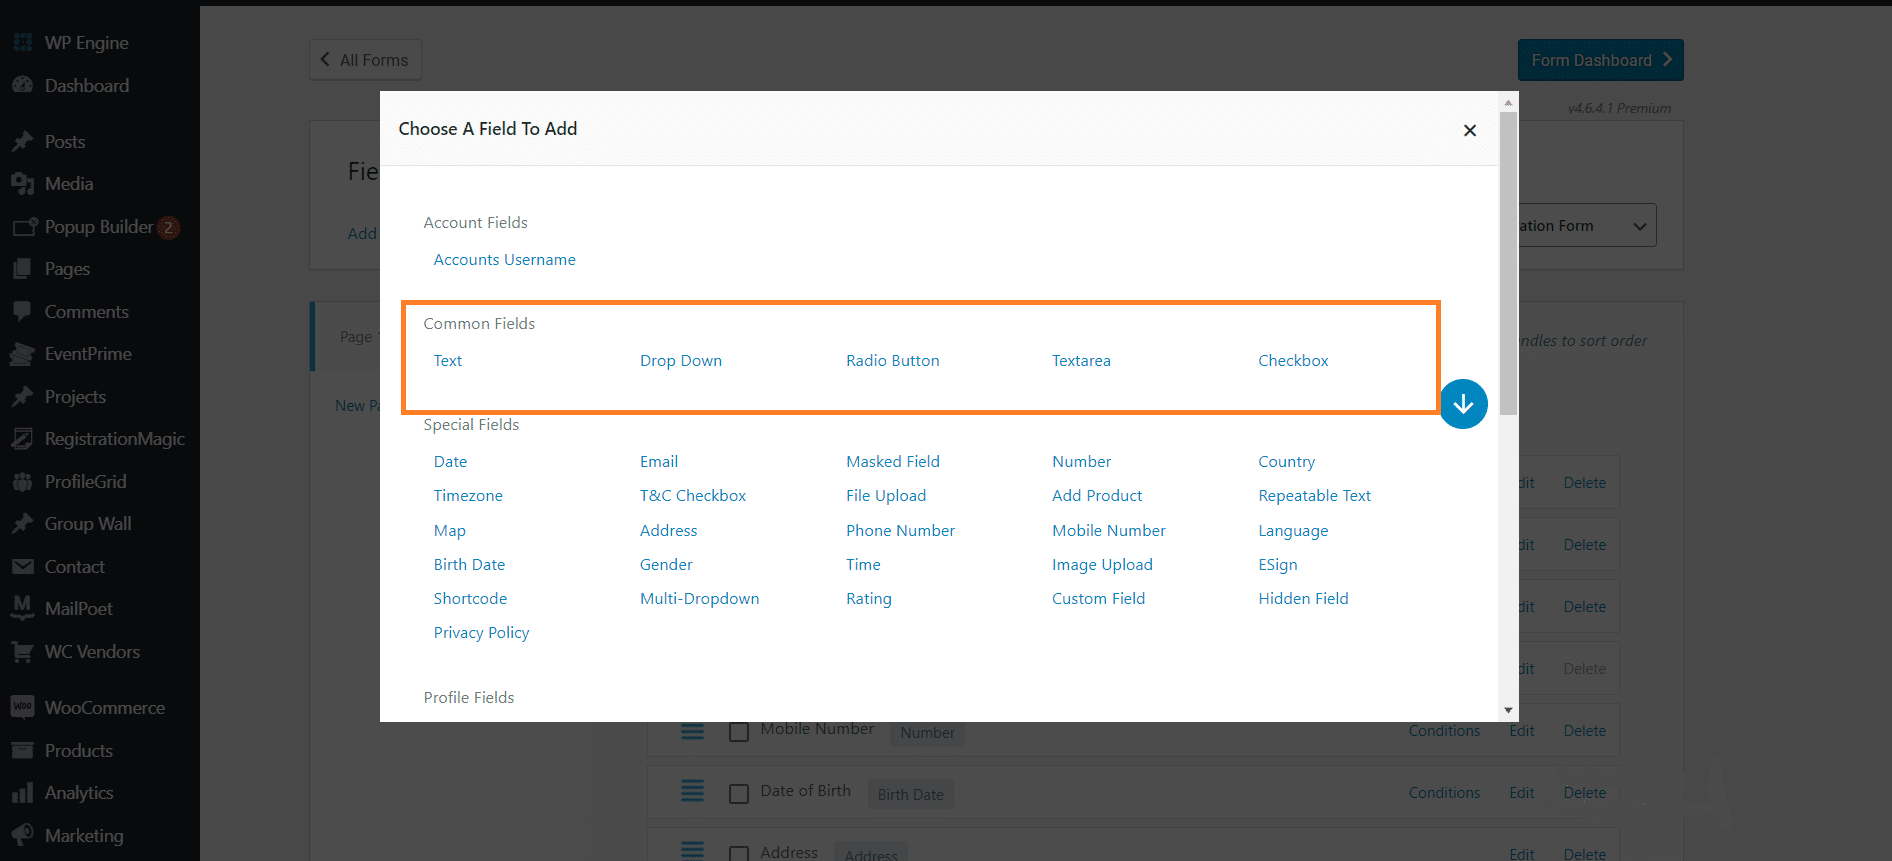
- Next, a pop-up window appears that says “Choose a field to add,” which will present various fields under different categories.
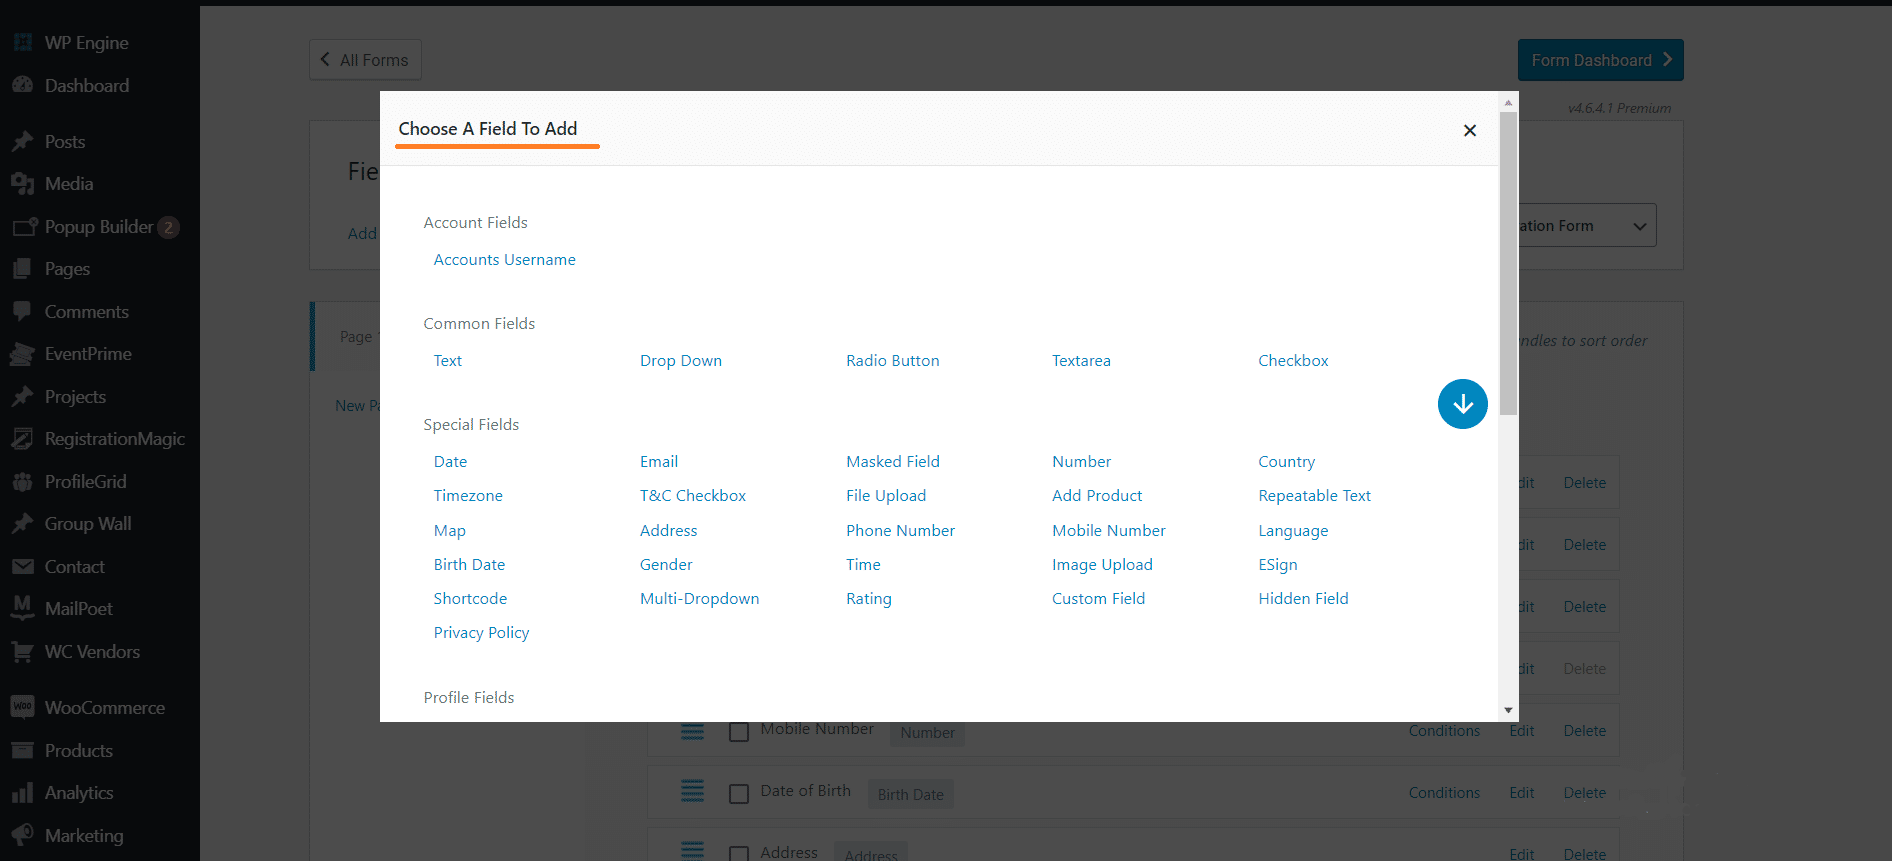
Step 4: Click on the required fields to add them to your form
After creating a registration form, the next step is to add relevant fields to it.
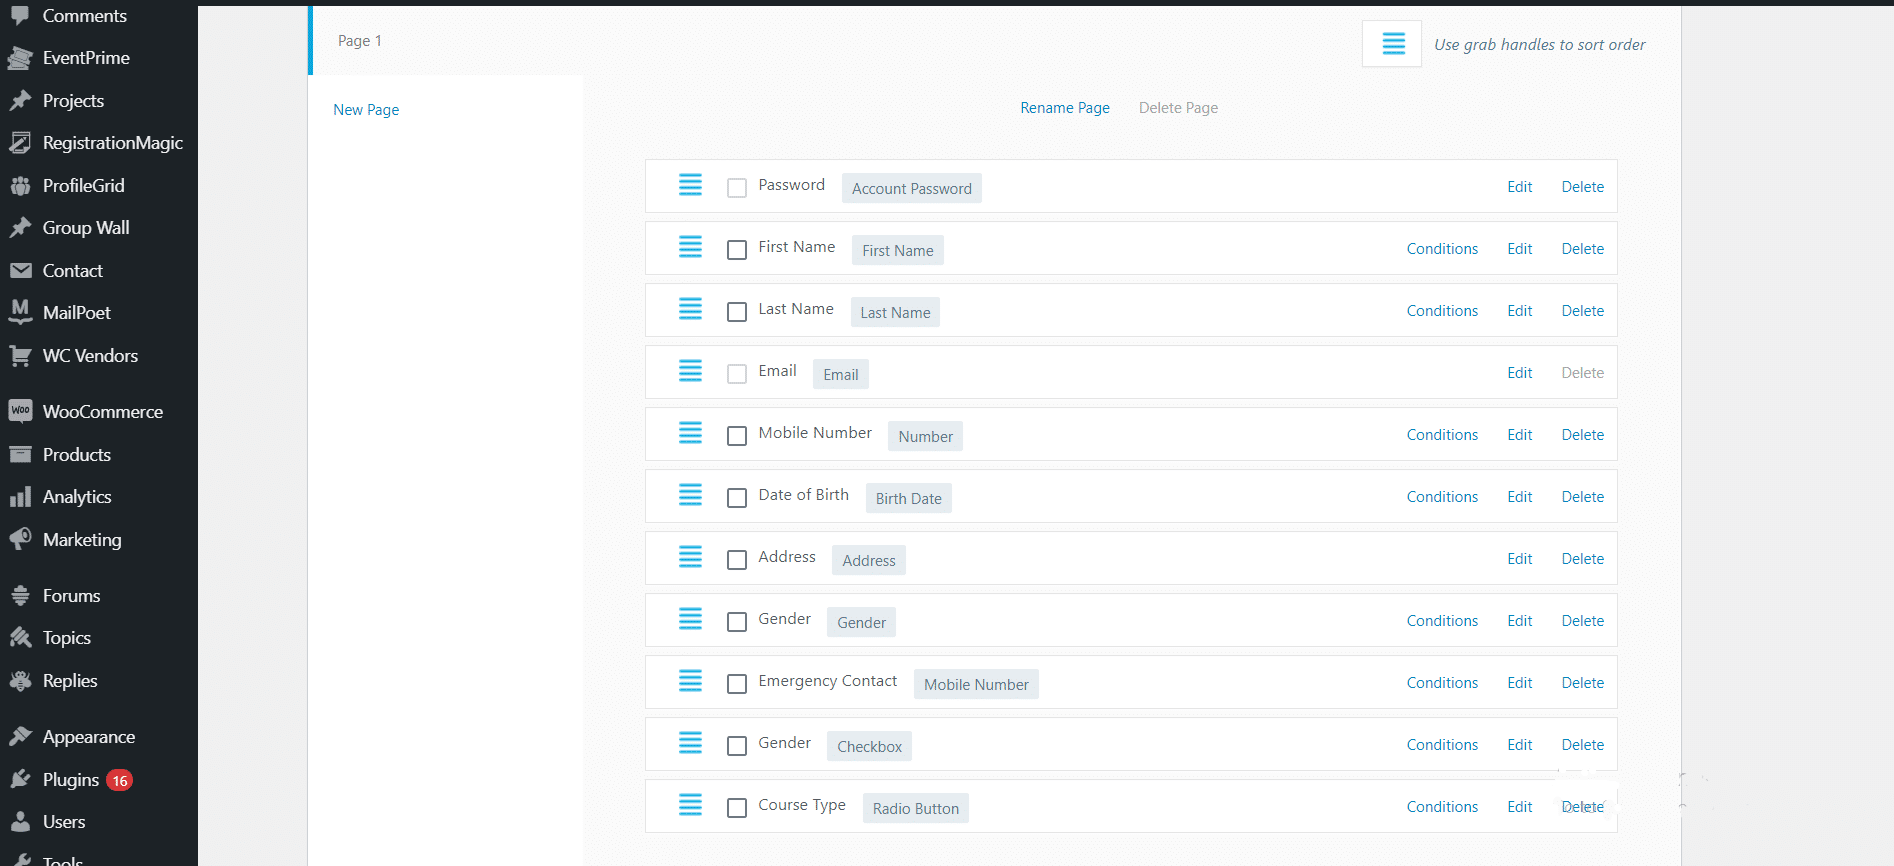
- Before we begin to add fields, there are certain fields such as “Username,” Password,” and “e-mail” that are added beforehand by default.

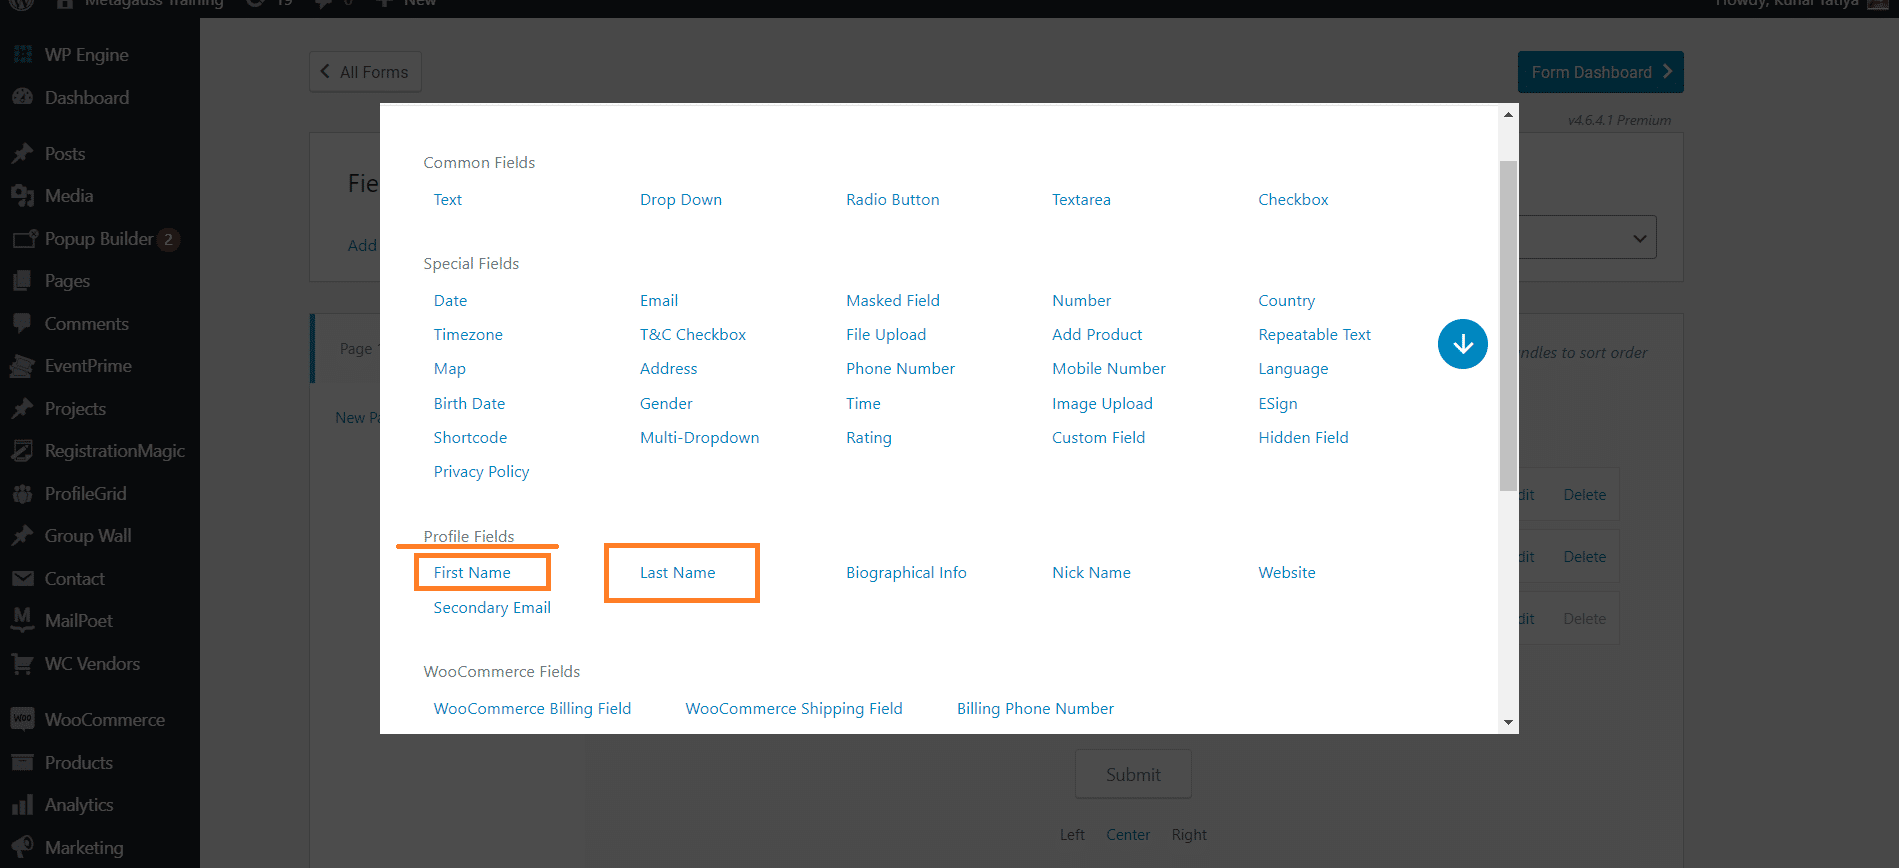
- Moving on, the next step is to select the “First name” and “last name” fields for your student application form. Right after you select one field, another window will pop up in which you must fill in the field name.
- The next pop-up window that appears will ask you to set up the field name and give you various options to customize your field.
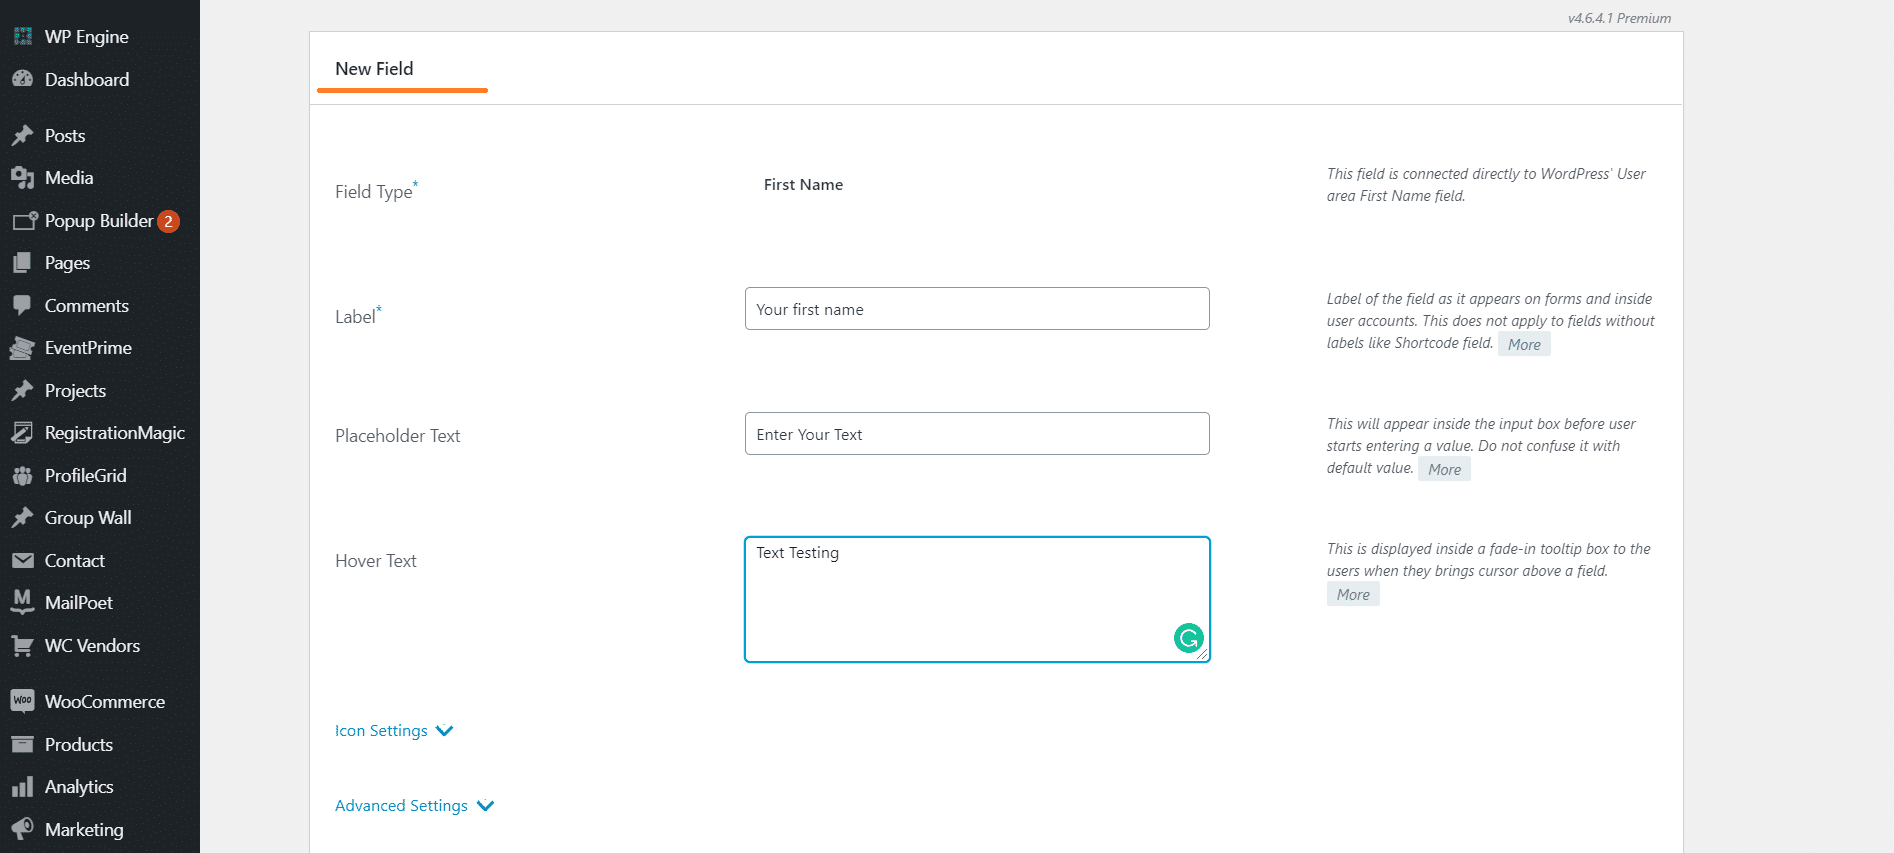
- The next step is to change the icon settings. This setting, however, is optional.
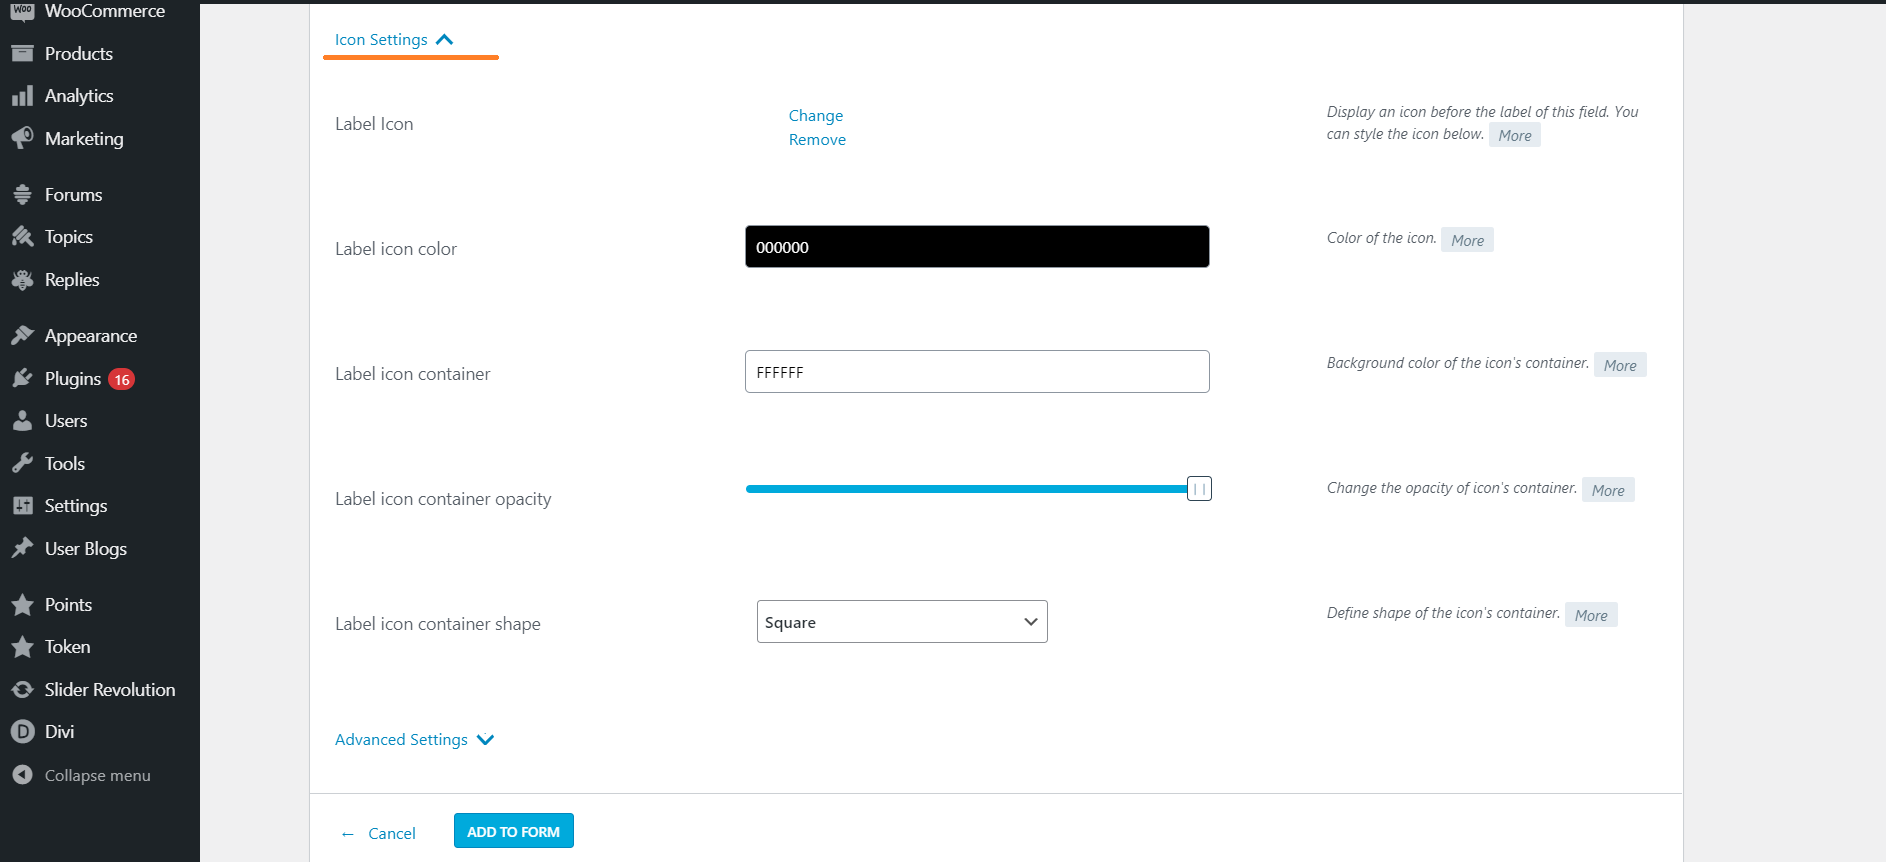
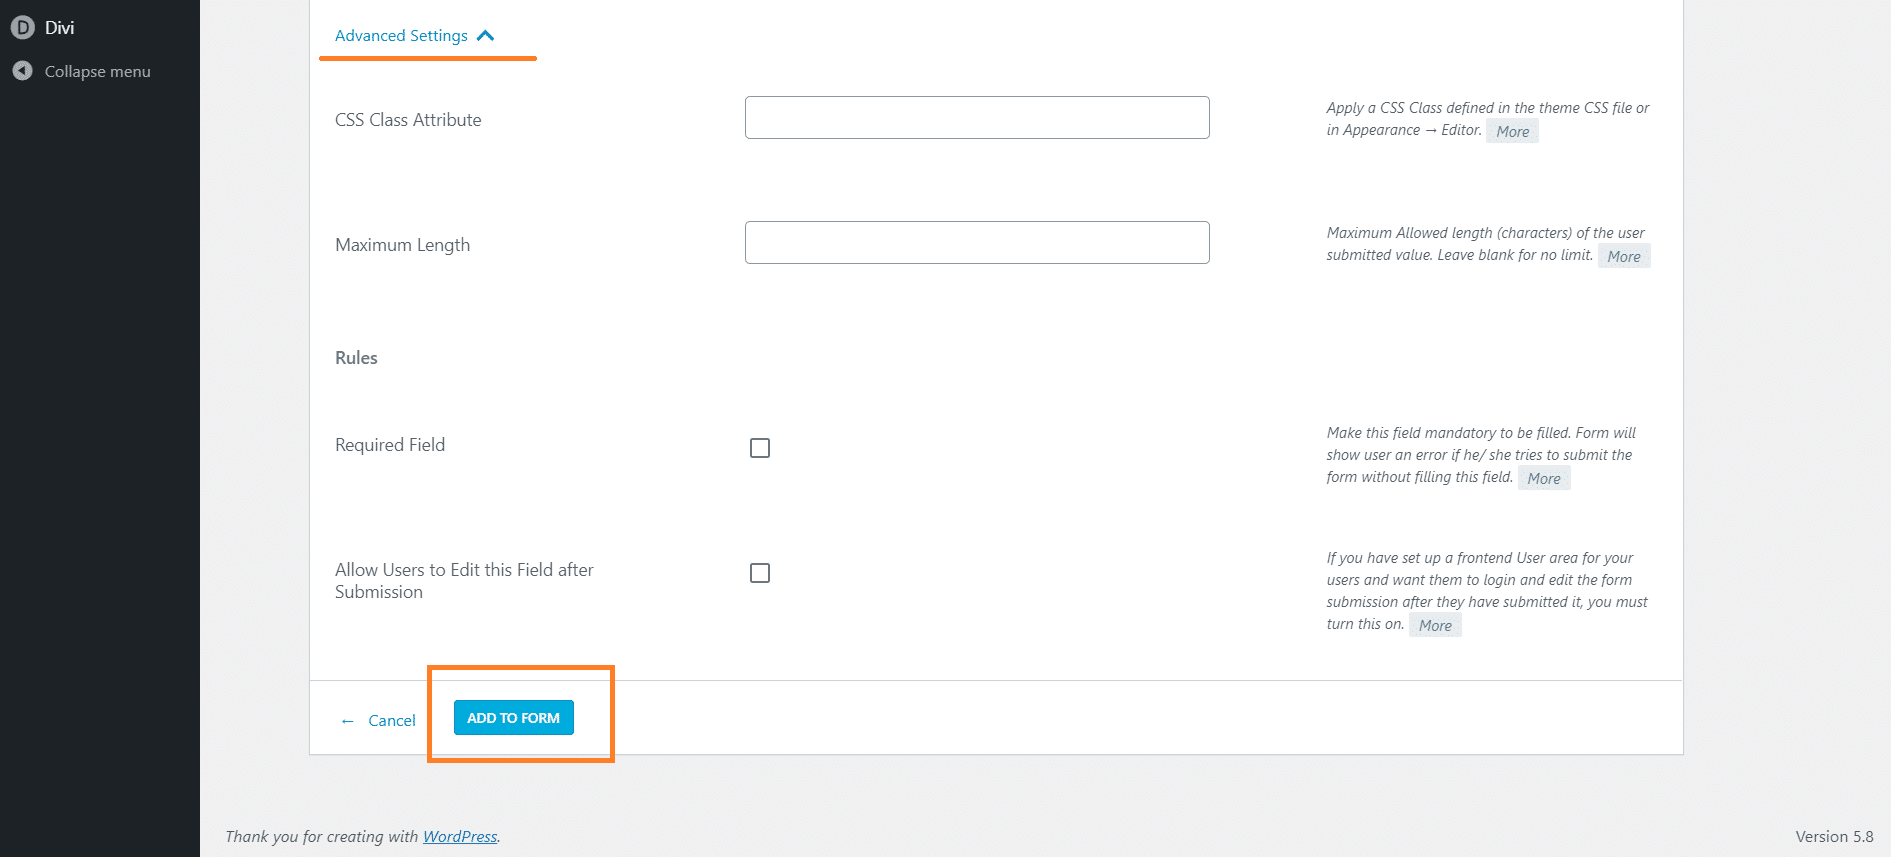
- After you customize a field your next step is to add the field to the form.
- To do this, you need to click on the “Add To Form” button present on the bottom left of the window.
- The next step is to add all the relevant fields such as an address, contact information, date of birth, Guardian’s name, etc.
Using different fields from the ‘common fields’ category
- When you create a student registration form, some fields will need options for the students to select from.
- In such cases, different buttons are needed. These buttons/text areas are present under the ‘common field’ category. This category has five ‘field’ options Text, checkbox: radio button, text area, and dropdown.
-
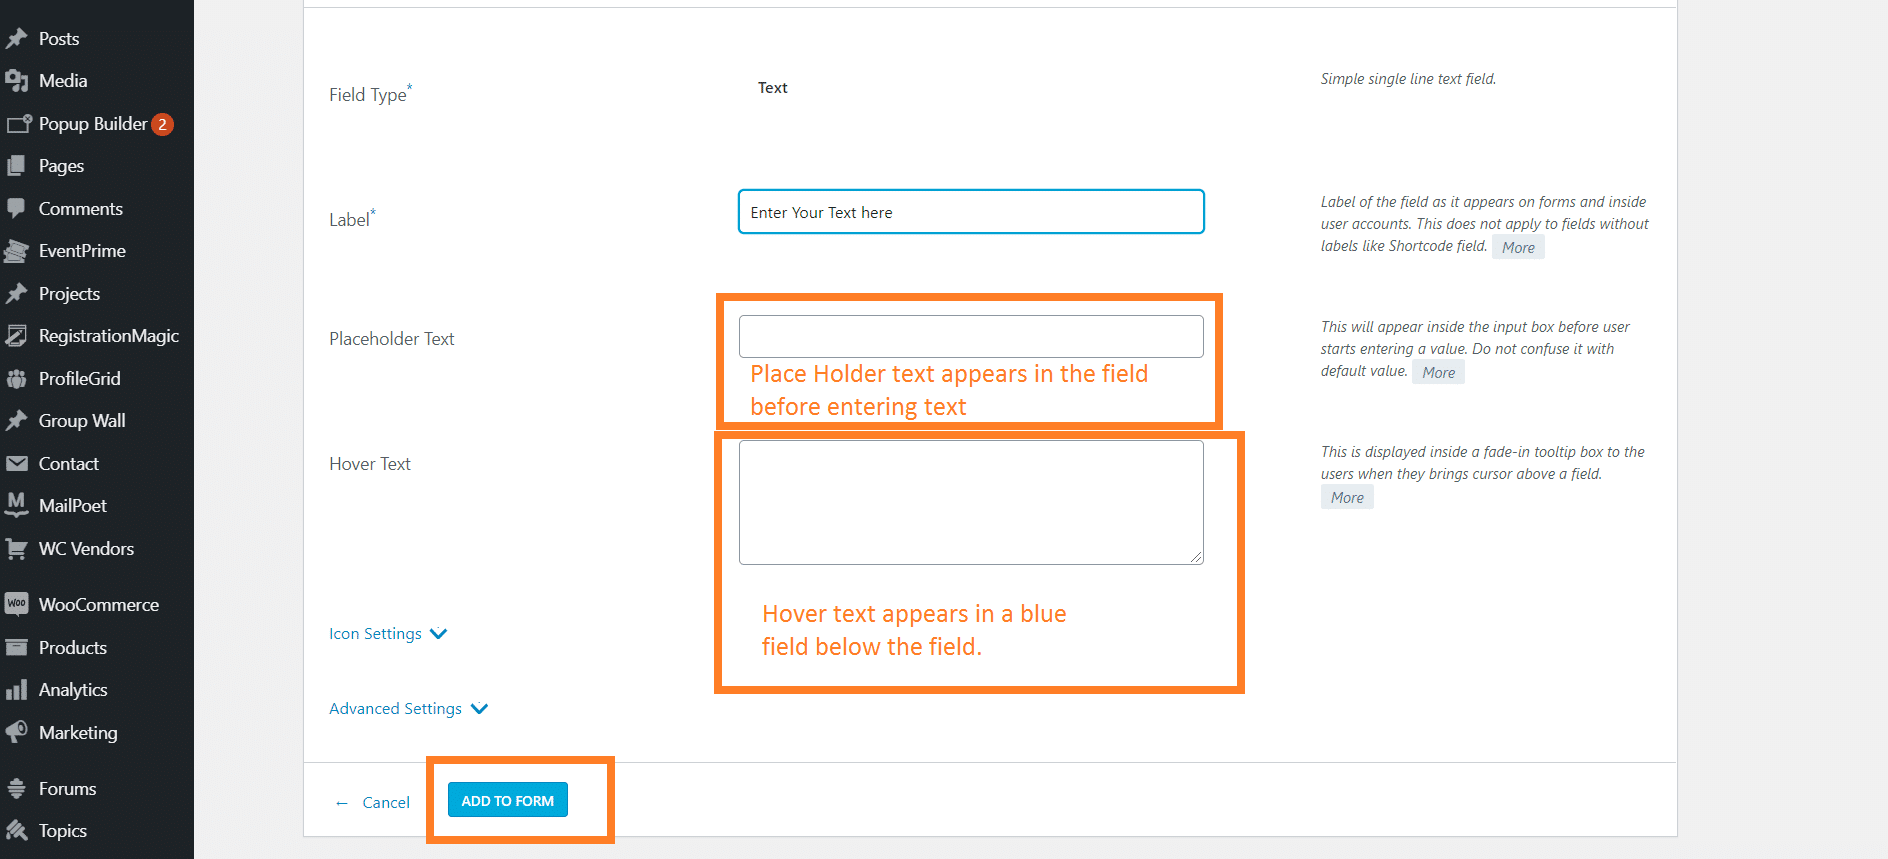
Selecting the “text” option
- Furthermore, when you select the text option, a text area is viewed in the form.
- You can limit the number of characters in that field.
- This text area can be used to write one-line texts.
-
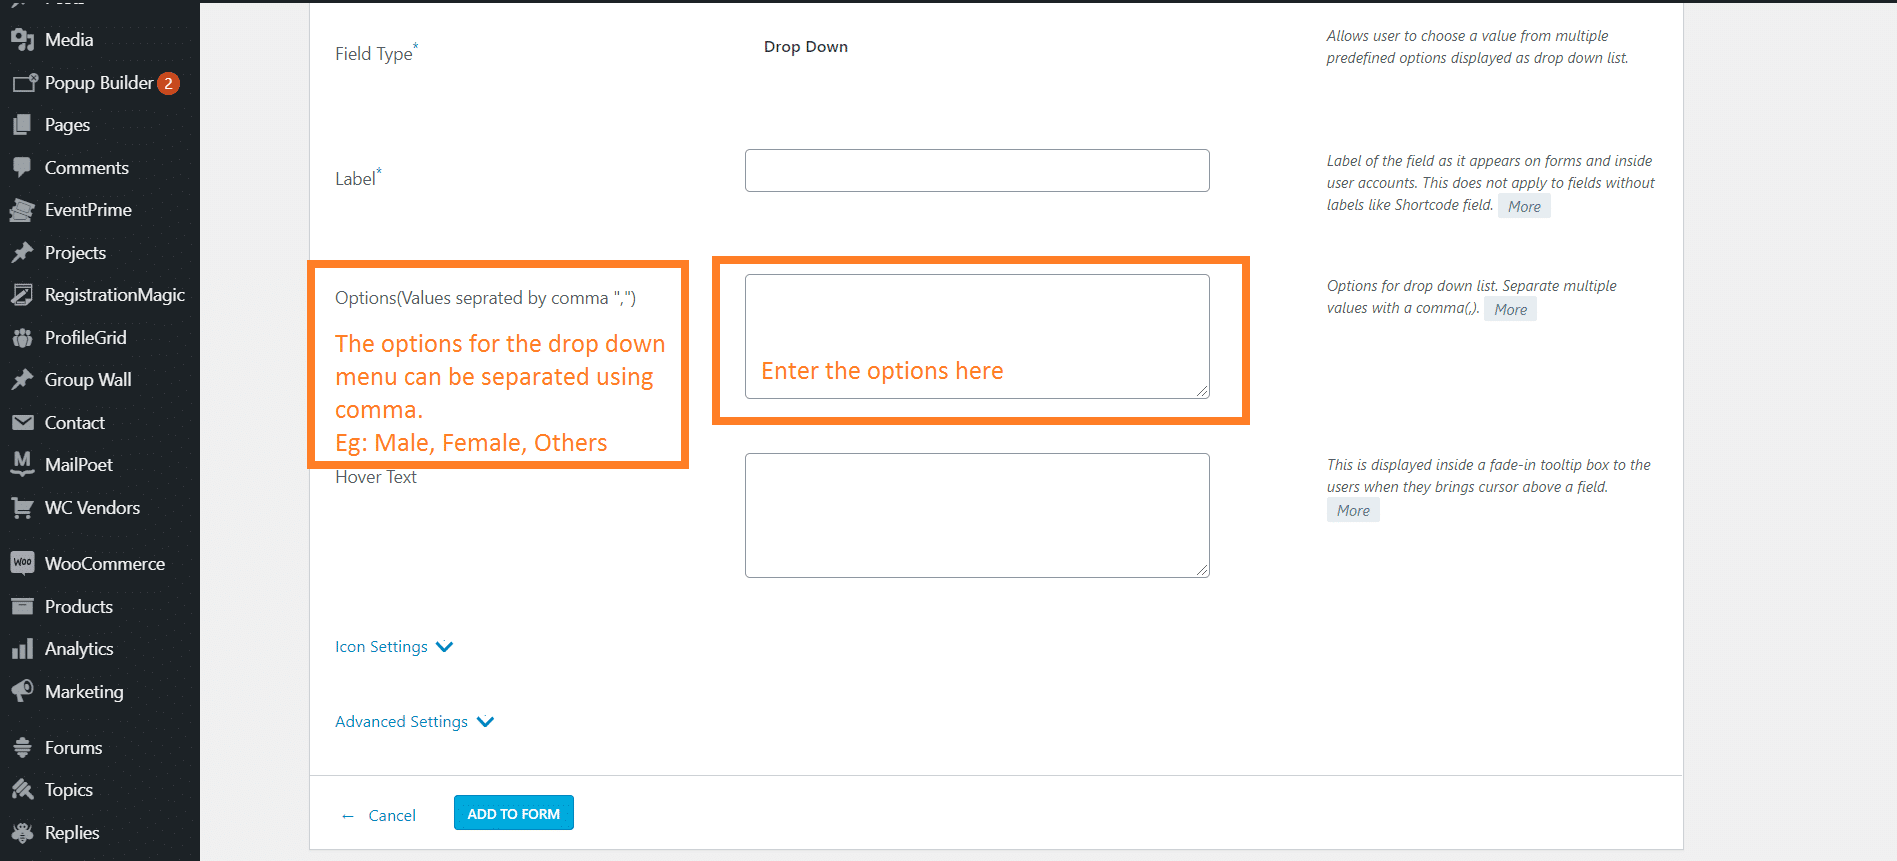
Selecting the “DropDown” option
- Selecting this option would enable a dropdown menu for a field.
- The categories for the drop-down menu for a student application form can be listed after keeping a field name.
- Below the ‘Field Name,’ keep adding the options by separating them using a comma after each option.
-
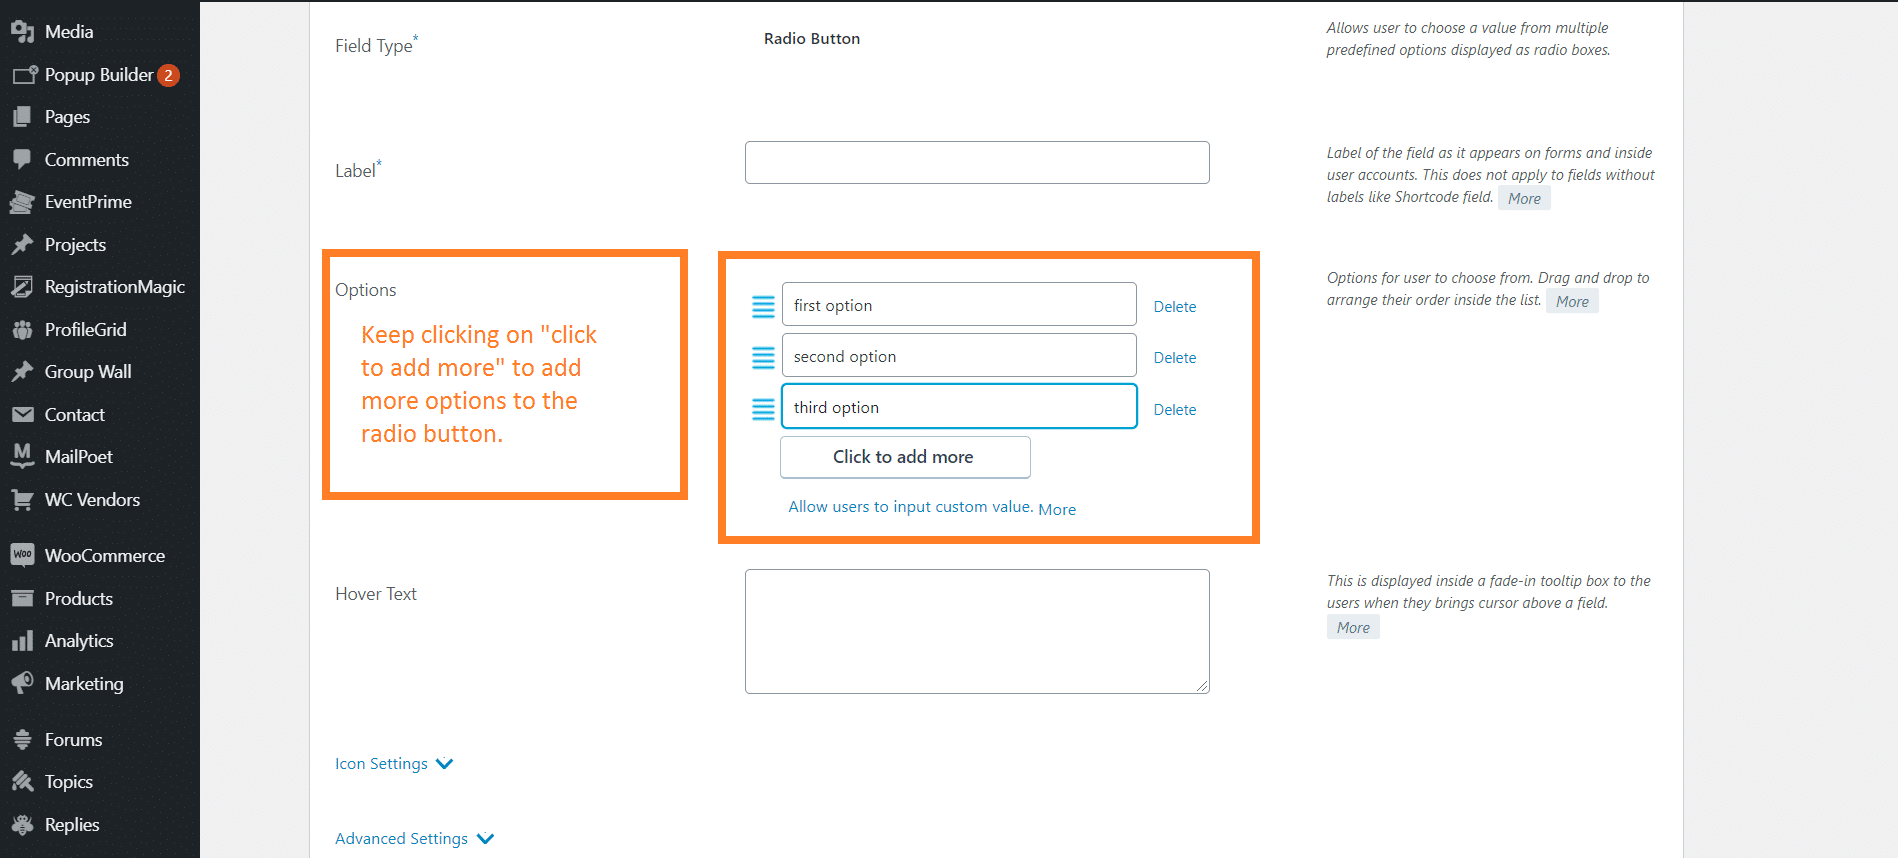
Selecting the “Radio Button” option
- The radio button option on the form is used to select one option amongst many.
- The process of setting up a radio button field for your student application form is similar to the drop-down field.
- Similarly, add categories in the radio button and then click on “Add to Form.”
-
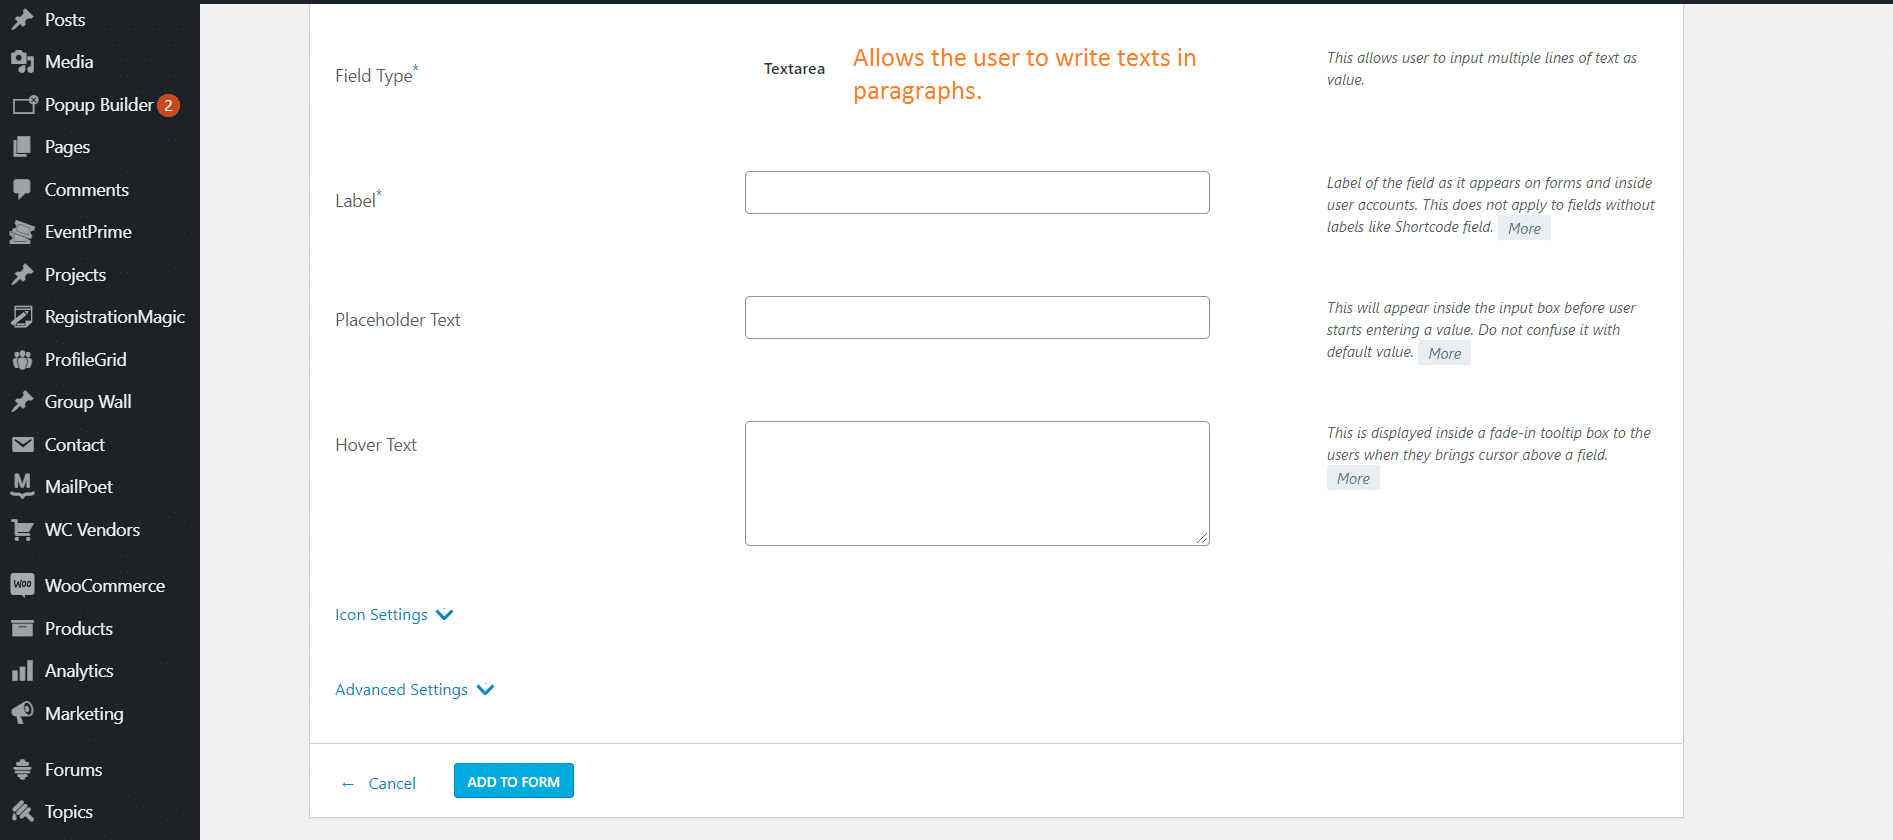
Selecting the “Text Area” option
- The only difference between “text” and “text area” is that you may fill in a whole paragraph in the text area.
- The text area can contain unlimited characters.
- The text area is customizable with a hover option that appears in the user end.
-
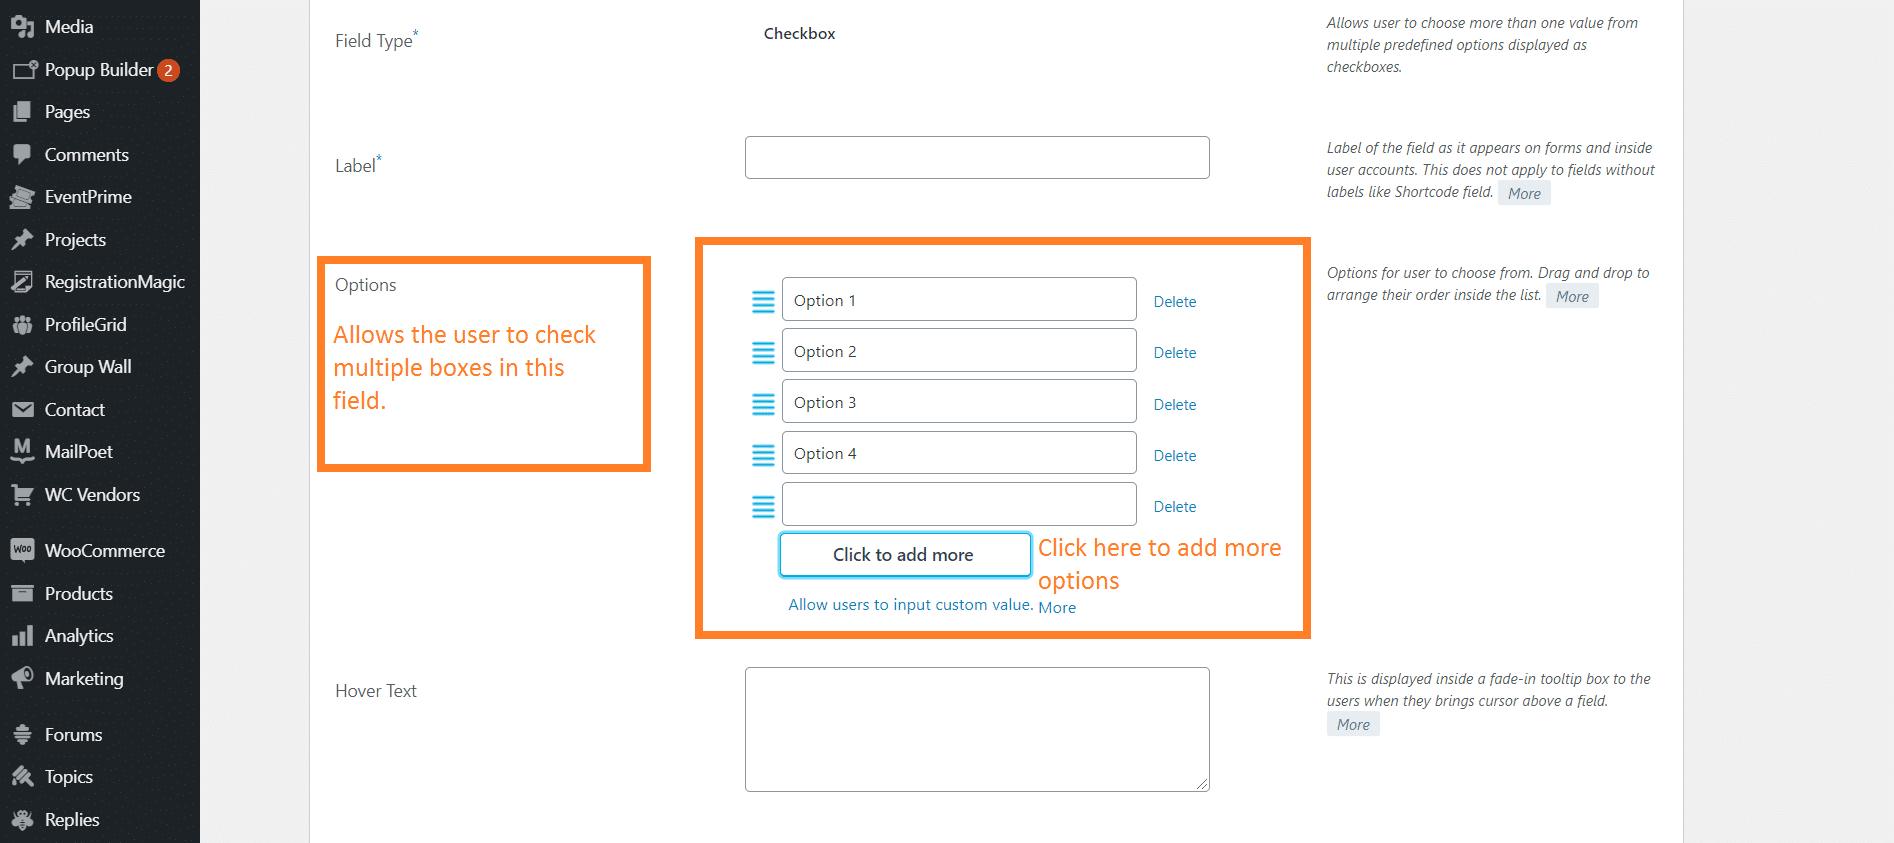
Selecting the “CheckBox” option
- Just like the drop-down and radio button option, the check box field has a similar customization procedure.
- The only difference is that you can use the checkbox to select multiple options.
Consider using this for new and returning student registration checkboxes.
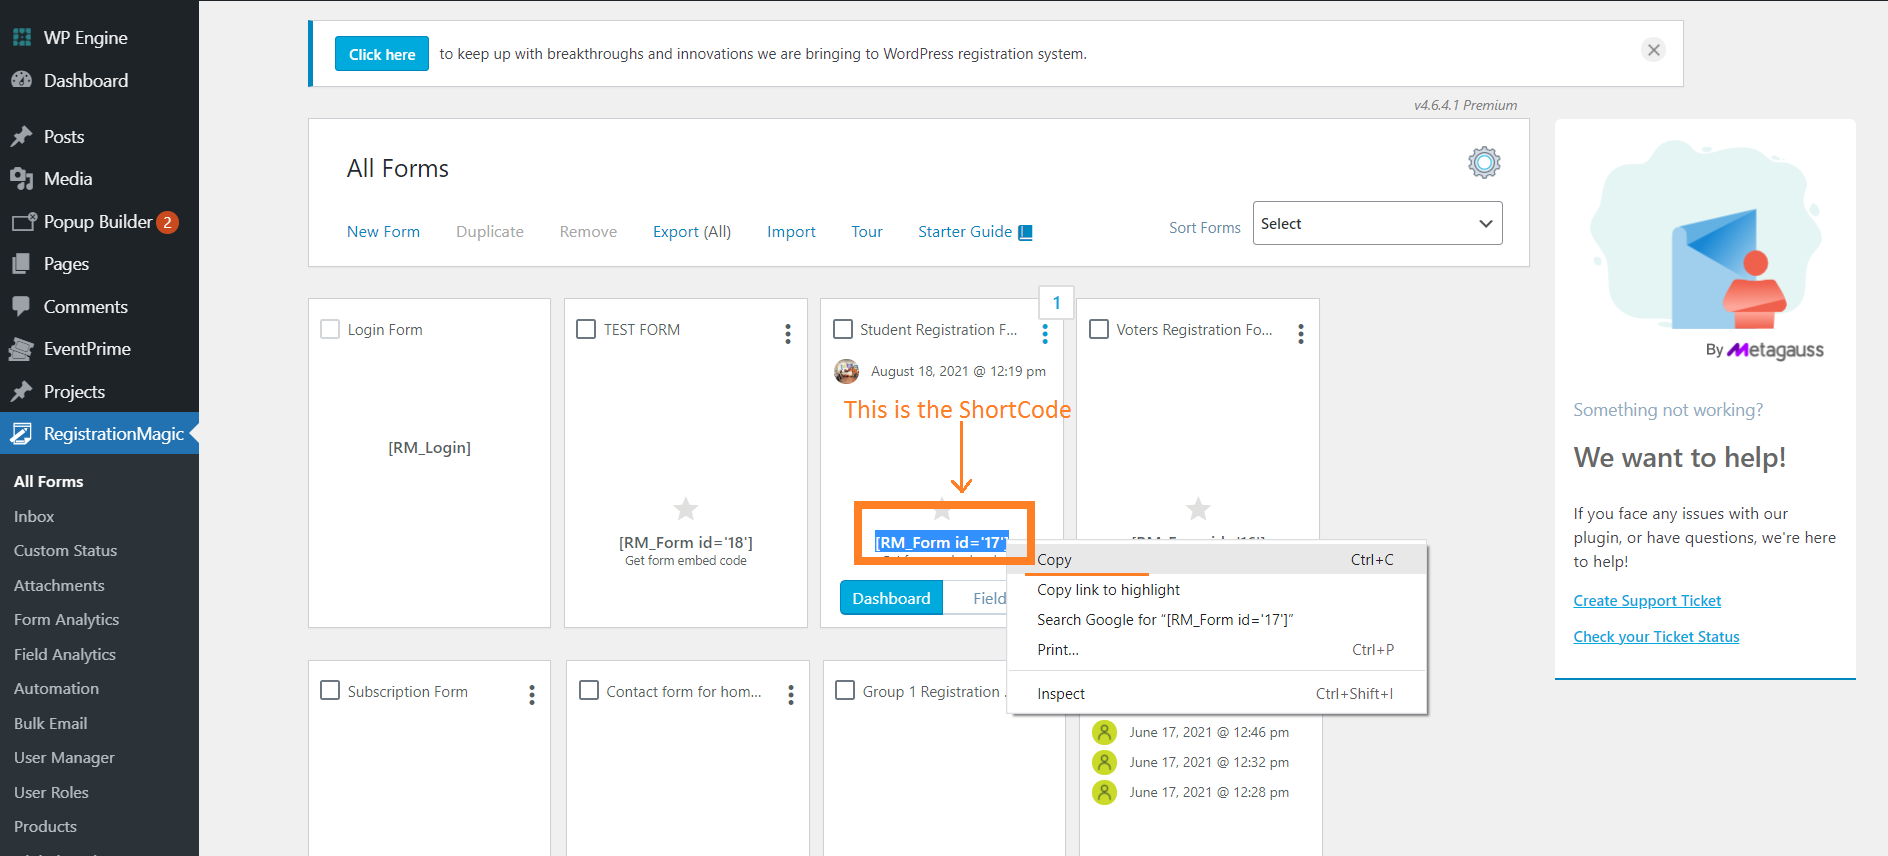
Step 6: Copy the shortcode and paste it
(You can copy the shortcode anywhere. The main motive is to make the form visible on the user end. Hence, this is one of the many ways with which you can show the form on the user end.)
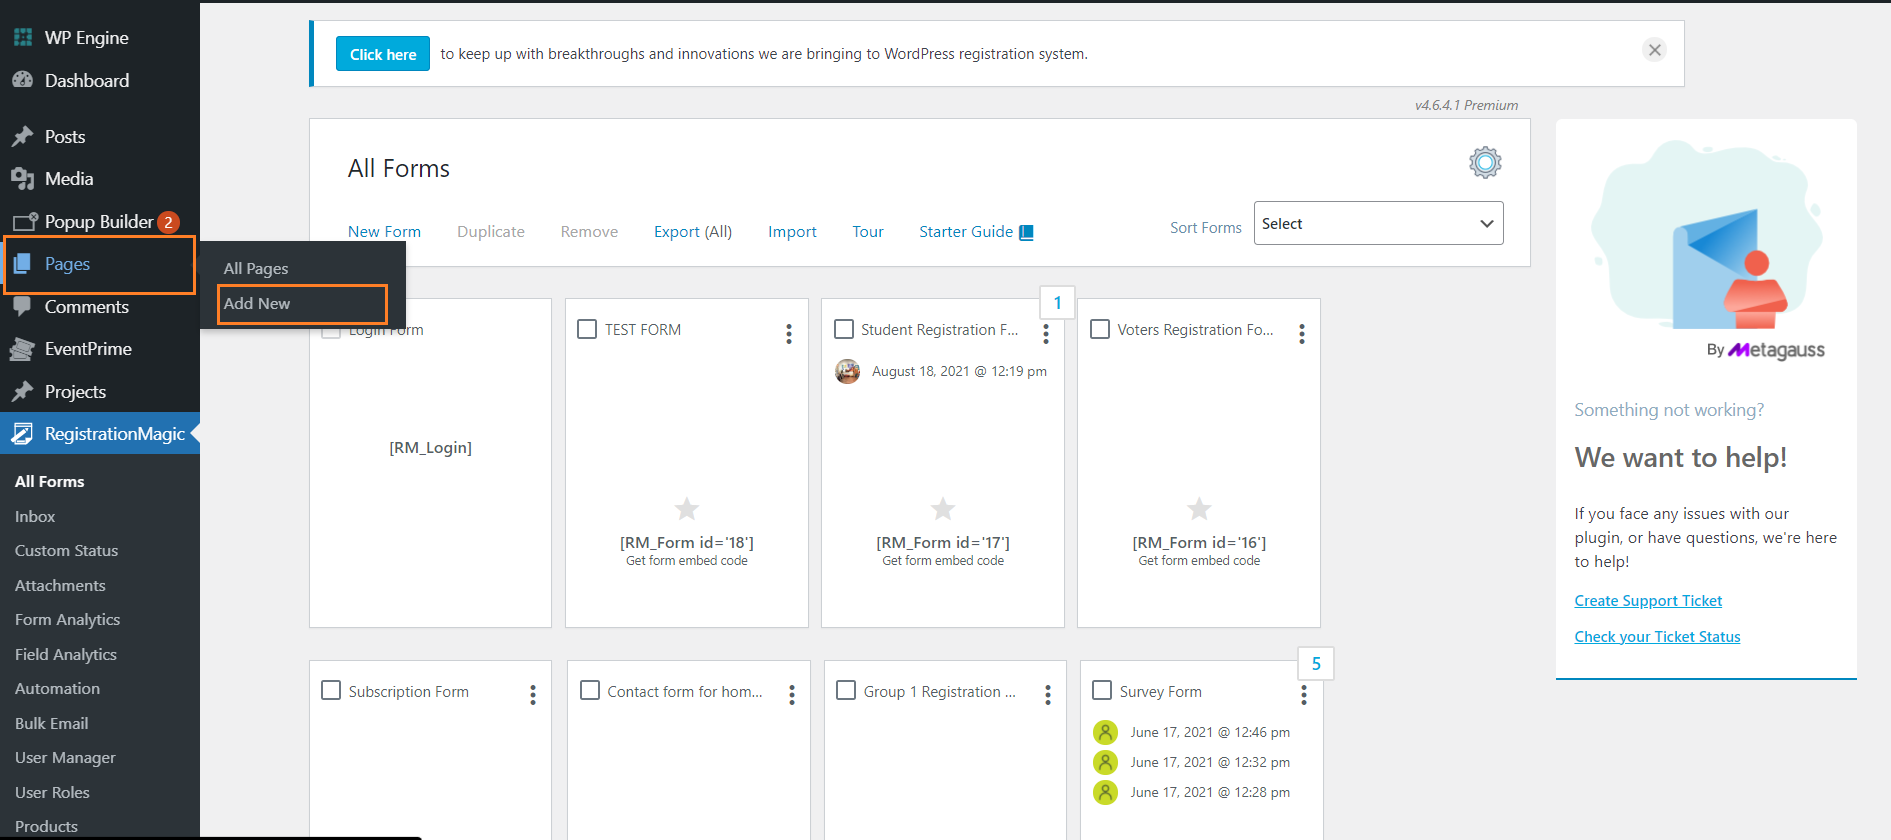
- Copy the shortcode of the form with the name “Student Registration Form”.
- Secondly, in the left-hand side dashboard menu, click on “Pages” and then click on “Add New.”
Step 7: Publish the form
- After you copy the shortcode, paste it on the blank white area.
- In the title box, write the name of the form. This name will appear on the user end.
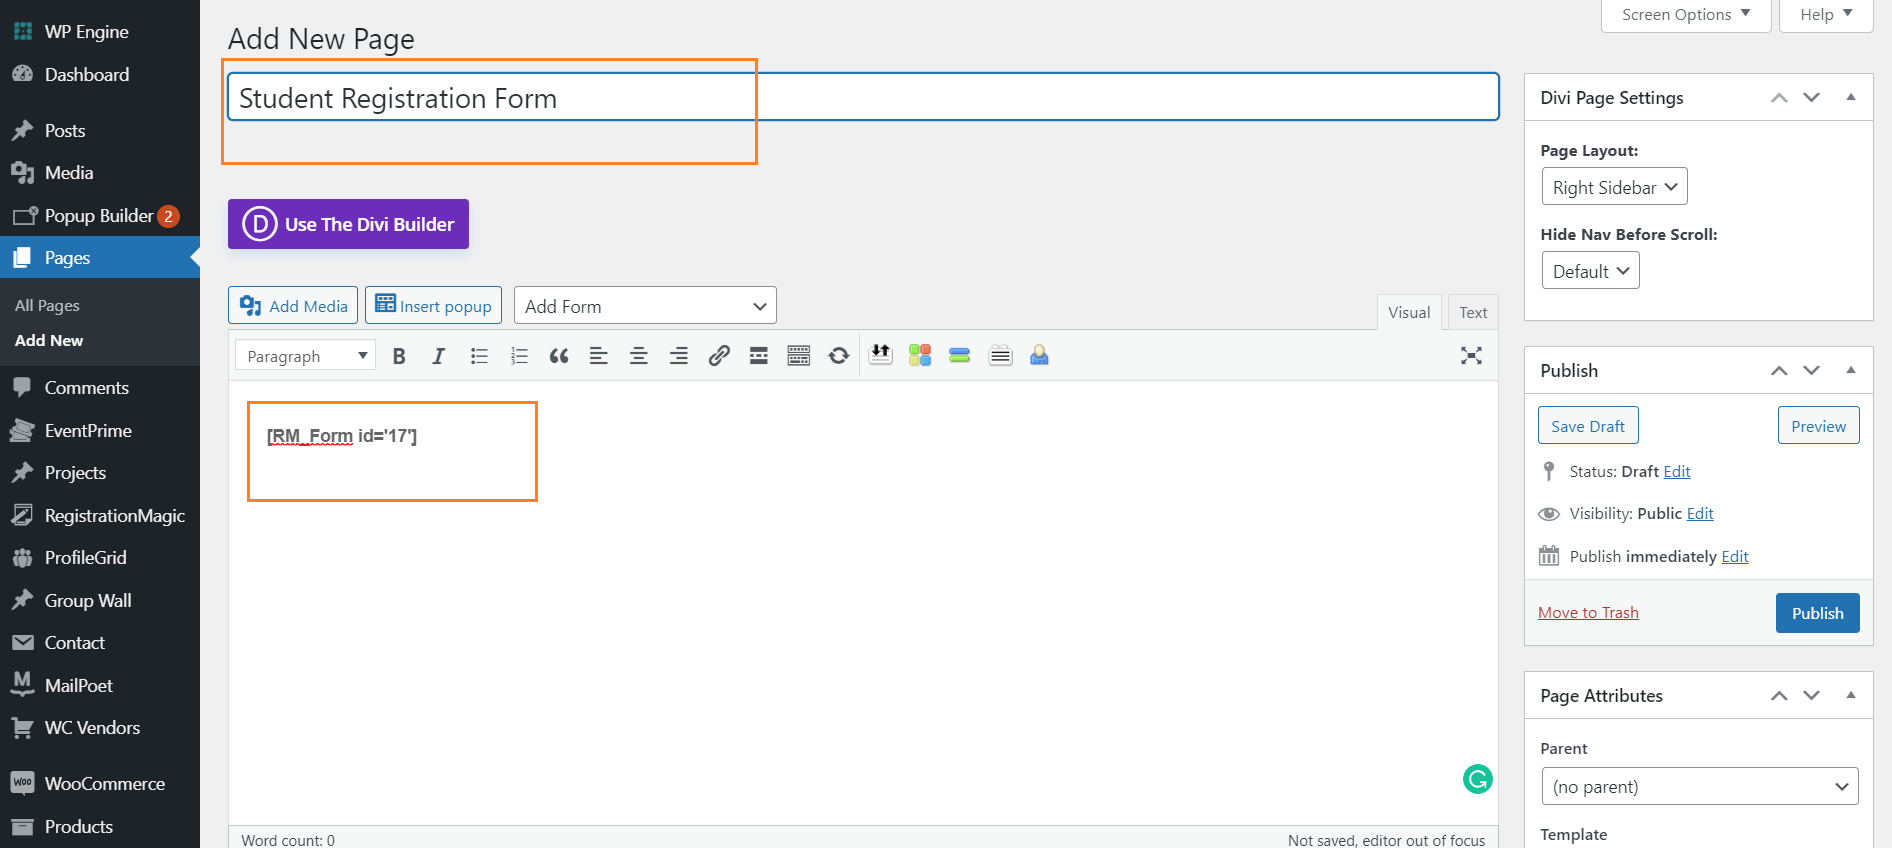
- Next, on the extreme right of the screen, find a button that says “Publish”.
- Click on that button to publish the form.

Steps to customize and design the form
You can always customize the design of your new registration form as per your choice. To add some designs and colors to your form, all you have to do is follow these simple steps.
Click on RegistrationMagic plugin > Go to “All Forms” > Click on “Design” on the menu bar
When you select the “Design” option, various options to add colours to the background of the form and fields are mentioned. A colour palette is available to you with which you can choose a various range of colours.
The colour palette also has a colour tone adjuster. You can slide the adjuster to set the colour tone from the darkest dark to the lightest light. After this part is done, click on “Save” and your form is ready to look appealing and efficient.
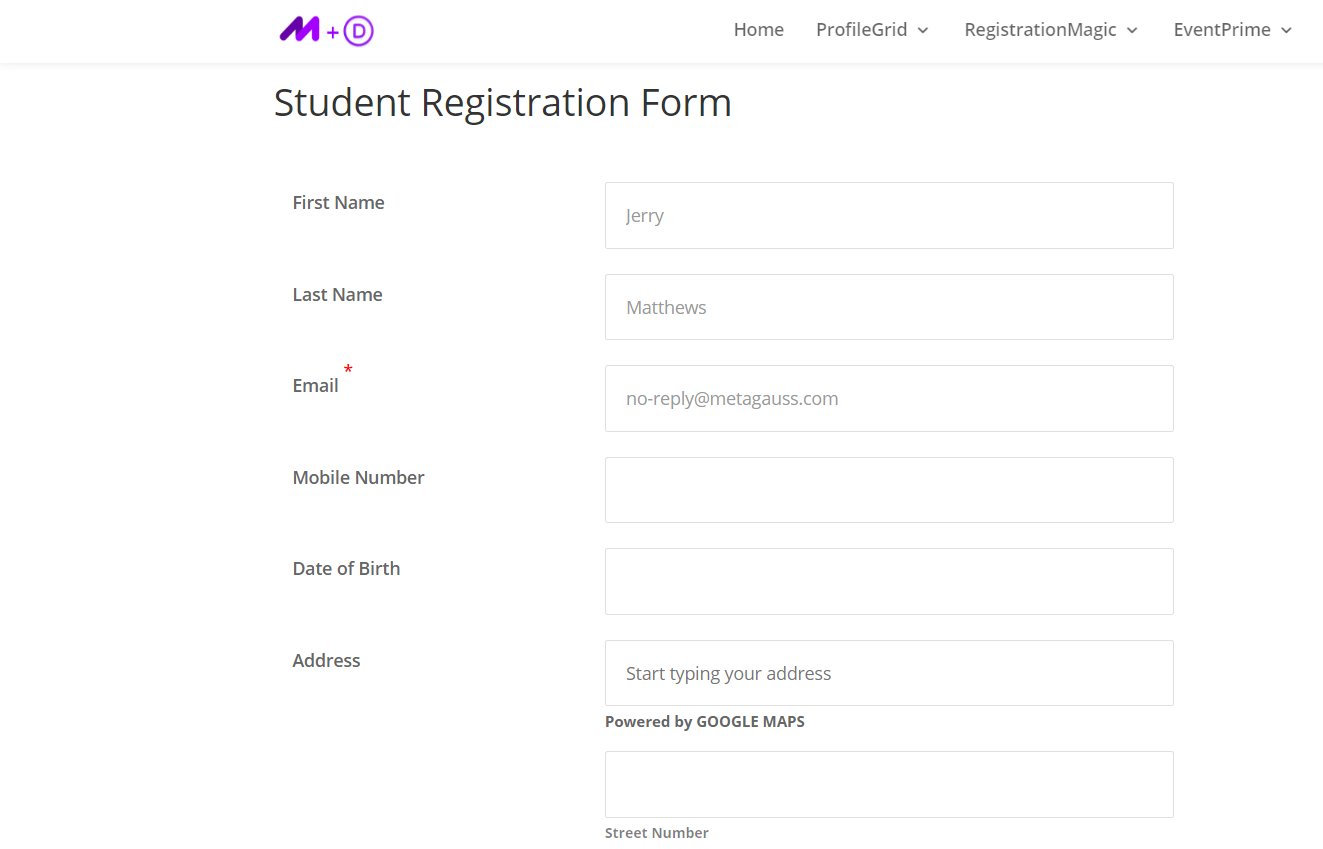
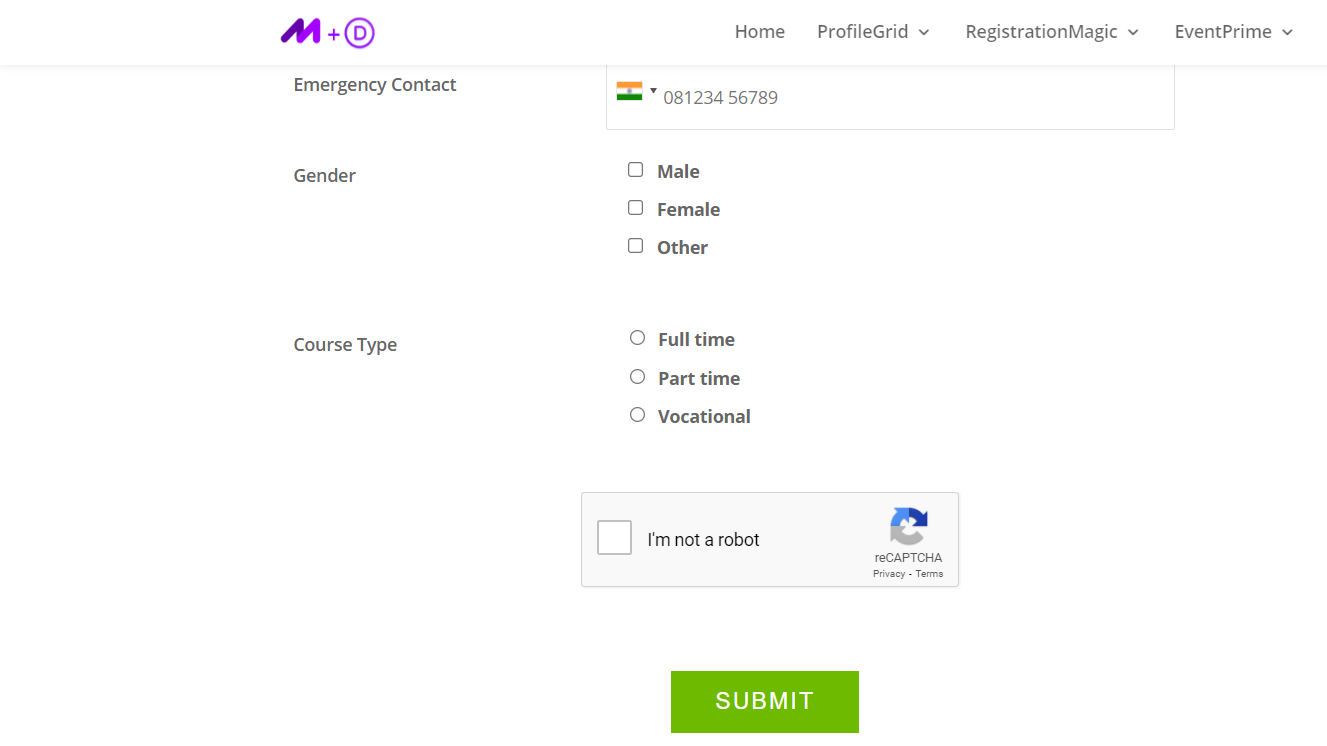
The next part is to see how the final appearance of the form looks from the user end. Here is how the front end of your website looks like after the overall customization of the form. This is how the student registration form will appear on the user end.

Creating digital forms online is a breeze, especially with RegistrationMagic’s user-friendly features that seamlessly integrate with your website’s theme. Plus, you have the flexibility to further customize forms as needed. This powerful plugin puts you in control, allowing admin oversight and the addition of social links and videos, making it a versatile tool for crafting engaging forms.
- How to Manage User Registration Status in WordPress - August 8, 2023
- Send Emails to Registered Users in WordPress with Ease - August 6, 2023
- How to Create a User Registration Form on WordPress - September 22, 2022
- Registration Based WordPress Contact Form Plugins - September 15, 2022
- Create a Job Application Form on WordPress Website- In Depth Guide - September 14, 2022
- How to create an efficient Marriage Registration Form in WordPress - November 26, 2021
- How to make a flexible vendor registration form for your business - November 24, 2021
- Creating a Smart Membership Form for Your WordPress Website - November 22, 2021
- How to create a digital Preschool Registration Form - November 18, 2021
- How to make a creative Dance Registration Form with RegistrationMagic - November 16, 2021