Introducing Bulk Email System
The Bulk Email System comprises three key components: New Bulk Email, Active Queue, and Outbox. Within the navigation bar, users can conveniently select recipient users from specific forms. This efficient system enables sending bulk emails to registered users, streamlining the communication process. Furthermore, it actively monitors the email queues, ensuring timely delivery. Altogether, this system significantly enhances user communication capabilities.
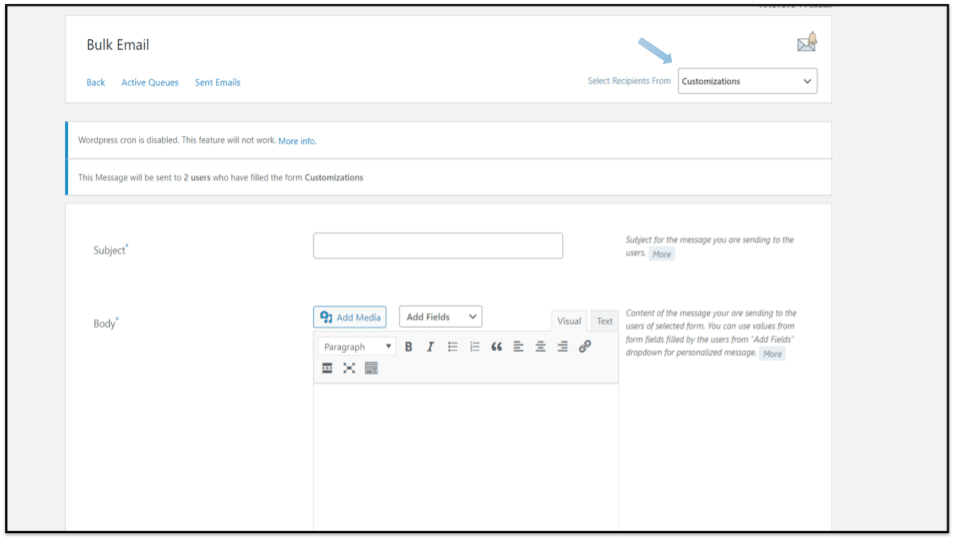
Create New Bulk Email
Email Subject
Here, administrators have the option to broadcast the subject of bulk emails to all registered users.
Email Body
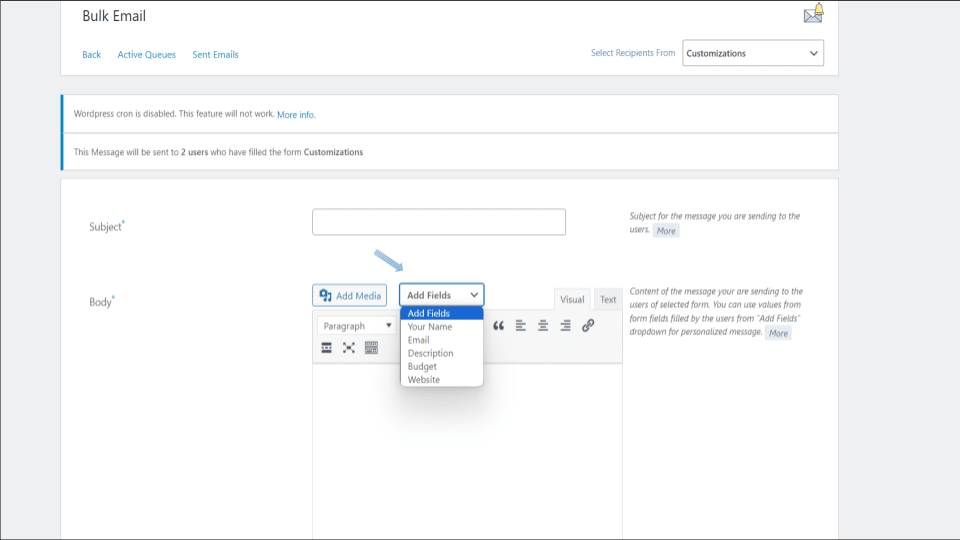
This section contains all the content intended for emails sent to registered users. The “Add Media” button facilitates the incorporation of images, audio, or video files, which will be included in the emails sent to recipients. Additionally, the “Add Fields” button allows the inclusion of specific fields like Name, Description, Email, and Website, elevating the professionalism of the emails. Users can toggle between visual and text modes. In text mode, users can input text while in visual mode, users can view the presentation format. This flexibility ensures a seamless and personalized email creation process.
Active Queues
On this page, a comprehensive list of all active email queues scheduled by administrators for the users. By selecting a specific recipient from the provided options, you can check the active queues designated for that particular recipient. If there are currently no active email streams, the page will display the message: “No active queue. Please select a form from the dropdown to send emails.”
Outbox [Sent Emails]
This section compiles all bulk emails sent to registered users, generated using RegistrationMagic. You have the option to toggle between different forms from the provided choices. Additionally, you can select the “All” option to include emails from all domains. The time checklist assists in filtering specific sent emails based on their dispatch date, allowing you to view emails sent today, this week, this month, or this year. For more precise filtering, the custom period option enables you to set date constraints by specifying the “from” and “up to” dates.
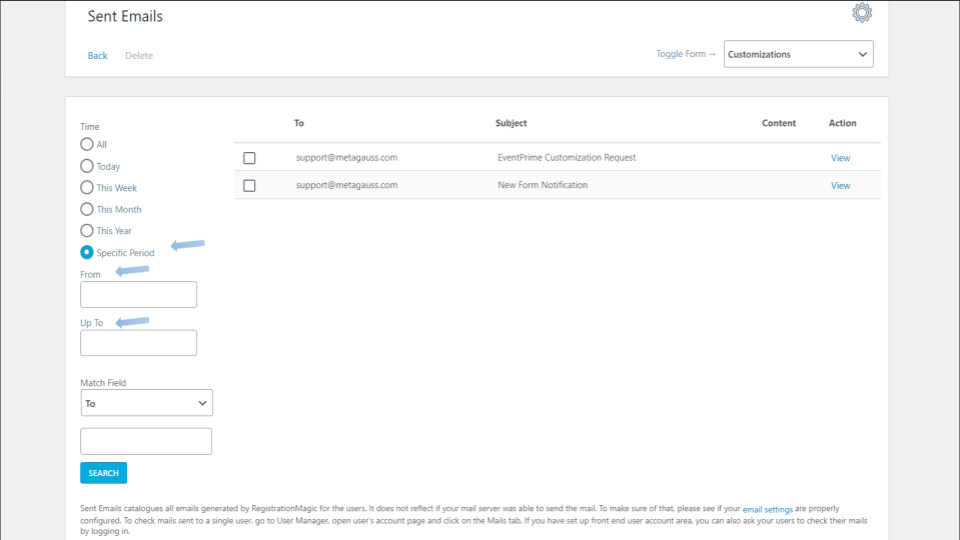
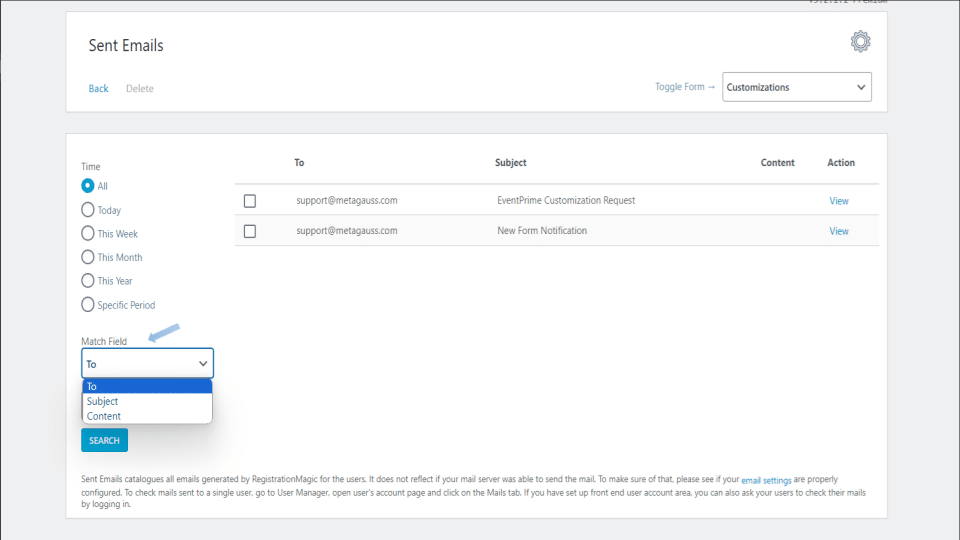
The page presents sent emails in rows, with columns for To, Subject, Content, and Action. Clicking the view button grants access to the complete content of the email, displaying detailed information such as Sent On, Subject, and Content. To facilitate specific searches, the search feature enables users to input keywords or search terms that match fields like To, Subject, or Content. This functionality ensures easy retrieval of desired emails based on customized search criteria.
Outgoing Email Handler
This section manages email configuration settings.
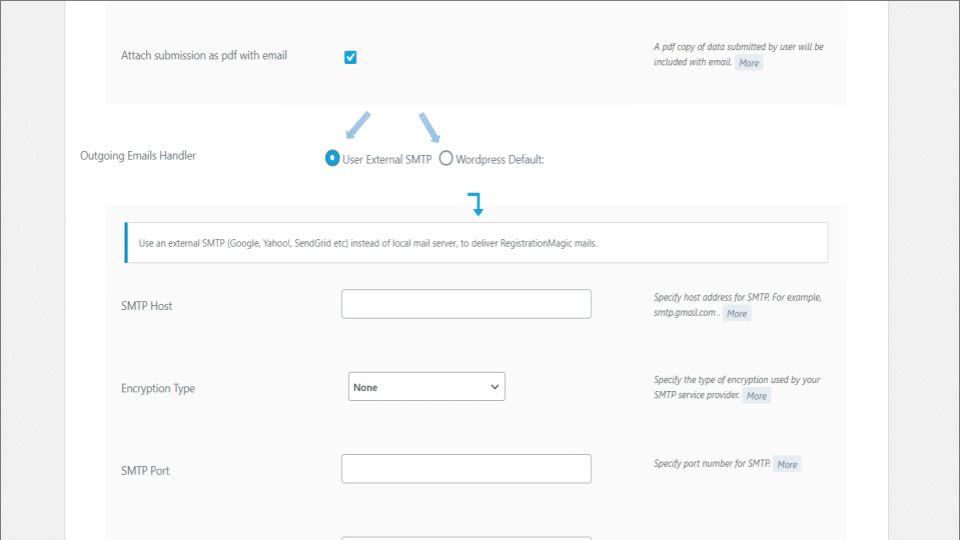
Sent Email through External SMTP
In this method, administrators can choose to use external SMTP services (e.g., Google, Yahoo, etc.) instead of a local mail server to deliver RegistrationMagic emails. Users can input the SMTP host address in the field labeled “SMTP Host.” Further, select the type of encryption provided by the SMTP service provider from the dropdown menu under “Encryption Type.” Next, users need to specify the SMTP port number in the “SMTP Port” field. Additionally, the sender’s email address can be added to complete the configuration. This setup enables seamless integration with external SMTP services for reliable email delivery.
Sent Email through WordPress Default System
This method utilizes the built-in mail program that relies on your host server to send emails. The first input is labeled “To,” where the admin can specify the email addresses to which the emails will be sent. The second input, labeled “Message,” allows users to define the content they wish to deliver to the specified email addresses.
Submission Notification for User
Within this section, you can designate the sender’s name and email address, which will appear in the message header received by the user. The sender’s name serves to identify the source of the email. This name can be dynamically selected from the form or, if the user is already registered, retrieved from their WordPress profile. This feature allows for personalization and ensures that the emails are sent with the appropriate sender information.
- How to Manage User Registration Status in WordPress - August 8, 2023
- Send Emails to Registered Users in WordPress with Ease - August 6, 2023
- How to Create a User Registration Form on WordPress - September 22, 2022
- Registration Based WordPress Contact Form Plugins - September 15, 2022
- Create a Job Application Form on WordPress Website- In Depth Guide - September 14, 2022
- How to create an efficient Marriage Registration Form in WordPress - November 26, 2021
- How to make a flexible vendor registration form for your business - November 24, 2021
- Creating a Smart Membership Form for Your WordPress Website - November 22, 2021
- How to create a digital Preschool Registration Form - November 18, 2021
- How to make a creative Dance Registration Form with RegistrationMagic - November 16, 2021
