Of all the accoutrements accompanying registration form systems, autoresponder is arguably the most important one. Take it out, and your form is patently mute. It simply cannot ‘talk back’ to the user. An autoresponder for WordPress registration forms is both a feedback and user engagement tool. Although, in times when users expect an auto-responder shooting back from every form they fill, making them personal and non-spammy is an essential art. This was at center of our focus when we built the autoresponder for WordPress registration forms in RegistrationMagic.
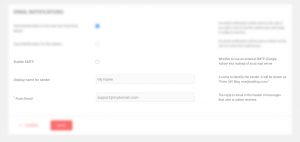
First things, first. Before putting our forms to work, we must first configure our installation of RegistrationMagic. Let’s head over to Global Settings → Email Notifications panel.
Here we shall configure outgoing mails. “Enable SMTP” is for configuring an external SMTP relay to send out emails. It is always a good idea to use a reliable and authenticated SMTP relay to make sure outgoing emails are not eaten up by overzealous spam filters. Next, “Display name for sender” defines the sender’s name inside user’s inbox. Usually this will be your business name. “From Email” is your email that user can reply to. It’s important to make sure that you have access to this email account.
Let’s create our registration form and then configure the autoresponder for WordPress registration forms. Here we’re creating a generic registration form for demonstration purpose, named “Demo Form”, keeping it real short to avoid any confusion.
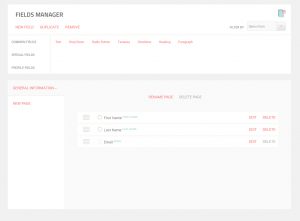
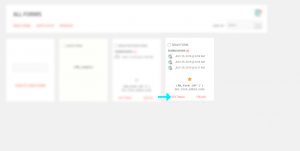
We have 3 fields inside this form here – “First Name”, “Last Name” and “Email”. Now we go back to “Forms Manager” and find the “Demo Form” card, and click on Settings link.
On the Form Configuration page, click on “Auto Responder”.
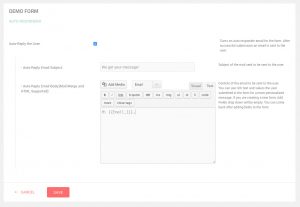
Once inside, clicking on the checkbox against Auto-Reply the User will reveal auto-responding options. Unchecking the box again will turn off the autoresponder for this particular form. Options include “Subject Line” and “Email Body”. Subject line does what it says – but it will also be the first thing user sees, so we better make it relevant.
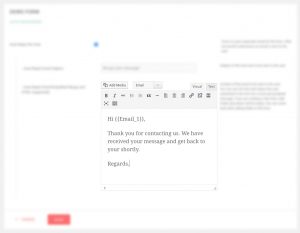
In the email body, we have option to add values which user has filled in the form to make it more personalized. For example, we want to start with something like “Hi (User’s First Name),”. To do this, we write down the text and use dropdown above the editor named Add Fields to insert the field values. So the starting will look something like this:
We see that the dropdown has 3 options: First Name, Last Name and Email. These correspond to the 3 fields we have on the form.
In short, we can fetch any field in the form and insert it inside the autoresponder text using the dropdown. Fields will get added to the dropdown as they are created in the Fields Manager of the form. Let’s go ahead and finish our message and save it.
The auto-responder is all set!
We’re going to fill out the form and test it. Please note, there are other feedback tools available in RegistrationMagic. For example, Success Message and Redirections, which are inside Post Submission panel. We can combine them with auto-responder to create powerful feedback workflow. In this tutorial we are only focusing on auto responding though.
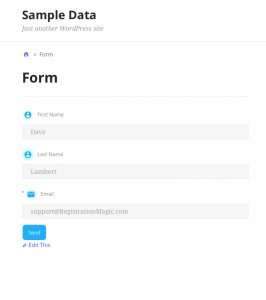
Here’s the form all filled up and ready to be sent:
Let’s submit this and check our inbox.
As expected, the auto-responder message arrives in our inbox. This is what the user will receive after filling out the form we just created.
That’s all you need to know to start building autoresponder for WordPress registration forms. Remember, each form has its own auto-responder. So don’t forget to configure it before publishing the form. Until next time…
- RegistrationMagic Starter Guide - August 4, 2024
- WordPress Registration Shortcodes List - July 10, 2024
- WordPress Payment Form Guide: Setup Payments on Registration Form - July 8, 2024
- Experience the Unfolding Magic! - August 4, 2023
- List of Guides for WordPress User Registration Process - July 28, 2023
- Frequently Asked Questions About WordPress User Registration Forms - July 28, 2023
- How to display registration forms on WordPress site? - July 26, 2022
- WordPress User Registration Custom Status Guide - April 9, 2022
- How to add or update user profile fields using WordPress forms - August 5, 2020
- Boost RegistrationMagic User Profiles With ProfileGrid Integration - February 19, 2019




After submission, i did a test and most of the submission will be at the spam folder how to put it into the inbox directly? i already send a ticket
Credibility rating of the messages is not controlled by RegsitrationMagic. Your hosting service provider support team will be able to help you out with this. Also we recommend moving your site to https as it will help generate it more secure signature.
Hello,
how do i display products that have been selected in the email sent out
The users may log in and check it in the PDF they download from the user area. Auto-responder email doesn’t allow for products to be added.
Great post!.
If i like to show the submission id of the form entry can it be done?
I saw some examples like {{SUBMISSION_DATA}}, i wonder if we can use {{SUBMISSION_ID}}?
Kindly advise.
Thanks,
RegistrationMagic allows for token IDs instead of submission IDs.
Submit button not work
As discussed on the support ticket, the issue was related to your local environment conflict and has been fixed now.