WordPress form field values automation rule
The field value rule selects submissions which match the values set in the automation rule. Using the “|” special character, multiple values can additionally be placed side by side. Form submissions are selected based on matching field values.
You can choose those submissions which are done using some selected email addresses. Take note that the automation rule only applies to those field values incorporated in the form.
For example, you want to run the automation rule on some chosen email addresses. This rule is applicable only if those accounts with the relative email address have submitted the form.
In this tutorial, we select the field and values on which this automation rule will run.
Read More.
Complete Automation Guide for WordPress Forms
Navigating to the automation feature
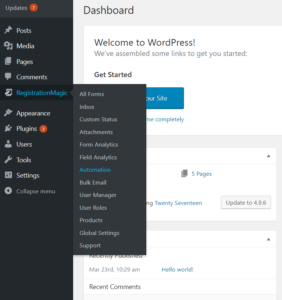
Go to “Automation” from the RegistrationMagic plugin on your dashboard.

Generate a “New Task” from the operations box of the Automation page. Consequently, select the form on whose field values you will run the automation rule.

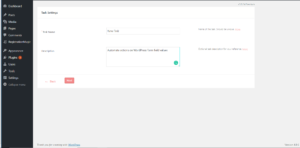
Assign a unique name to the task. In this case, we assign the task name as “New Task”. Fill the description below if required. This inclusion, however, is not mandatory. Since we are automating actions on WordPress form fields values we fill description with the same.

Go to the next page.
Configuring the “Field Value Rule”
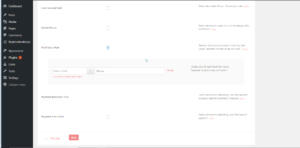
Check the checkbox for the “Field Value Rule”. This allows you to select submissions based on matching field values.

Select a field from the drop-down below. You can only select the fields which are present in your form. Fill the values for the respective fields in the adjacent input box. These field values are also the ones present in the form. Thus this section allows you to create automation rules for submitted field values.
For example, you want automation to run on all submissions where the user entered “Value A” in “Field A” form. Define it first in this section by selecting the field and entering the value. Automation also checks all submissions to see which one has that value in that particular field.
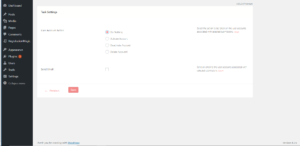
Go to the next page. Choose the action you will take on the user account.

You can activate, deactivate, delete or do nothing to the account. Furthermore, this action is influenced by the selected submissions and earlier settings.
Finally, send an email to the user mentioning his account status.
Save the automation settings.

Go back to the “Automation” page and run the automation task. In conclusion, you are able to automate actions on WordPress form field values.
- Complete Automation Guide for WordPress Forms - July 20, 2024
- WordPress User Management Plugin Guide - July 18, 2024
- Add CAPTCHA in WordPress Login and Registration Form? - July 16, 2024
- How to Send Automated Welcome Emails in WordPress - July 15, 2024
- WordPress User Roles, Permissions & Role Editor [Complete Guide] - July 14, 2024
- How to Display Custom Success Message in WordPress Forms - July 12, 2024
- Publish Registration Forms and Display Registered Users - July 11, 2024
- How to Approve WordPress User Accounts Without Logging Into Dashboard - January 25, 2021
- How to Set up Two Factor Authentication in WordPress - April 4, 2019
- How to Edit or Replace Default WordPress Registration Form - April 2, 2019
