Registration form with PayPal allows you to collect payment via PayPal when a user registers to your website.
eCommerce websites, marketplace websites, content-based websites, membership websites, and other product and services based websites use these forms the most. According to the stats 337 million users and merchants use PayPal.
The RegistrationMagic plugin is one of the best registration form plugins that can help you create a Registration form with PayPal. The plugin comes with an integration of PayPal which allows you to incorporate PayPal into your registration forms.
Moreover, no coding knowledge is needed for creating a Registration form with PayPal using this plugin. Hence it makes the process easier and quicker.
How to Configure PayPal Payment on Your Registration Form?
To configure PayPal and create a Registration form with PayPal you’ll need to download and install RegistrationMagic.
Here’s an easy guide that will help you set up RegistrationMagic.
Further, follow the steps given below to set up your registration form with PayPal:
Creating a Registration Form with PayPal
Step1: Go to Admin Panel > Under RegistrationMagic, open All Forms > Click on New Form.
Step2: After that, add a name to your form. For ease, you can just keep it Registration Form.
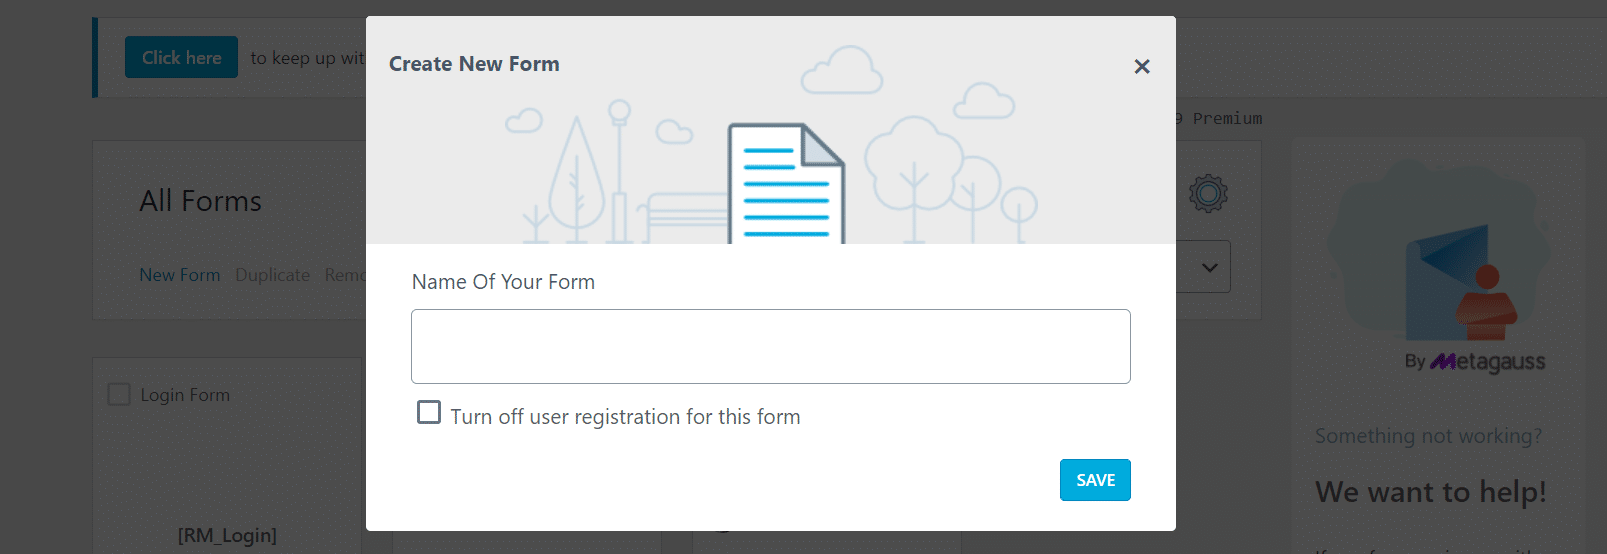
Note: If you want to configure multiple registration forms with PayPal, then choose relevant names.
Step3: Do not turn off the ‘Turn off user registration for this form’ option. This option is used for other types of forms that do not require a payment system set up.
Adding Custom Fields
You can customize the registration form according to your needs. The custom fields feature is a boon. Follow the below-given steps to add custom fields:
Step1: Once you have created the WordPress user registration form, you will find it in the All Forms list. Your newly created form will be the first one on the list.
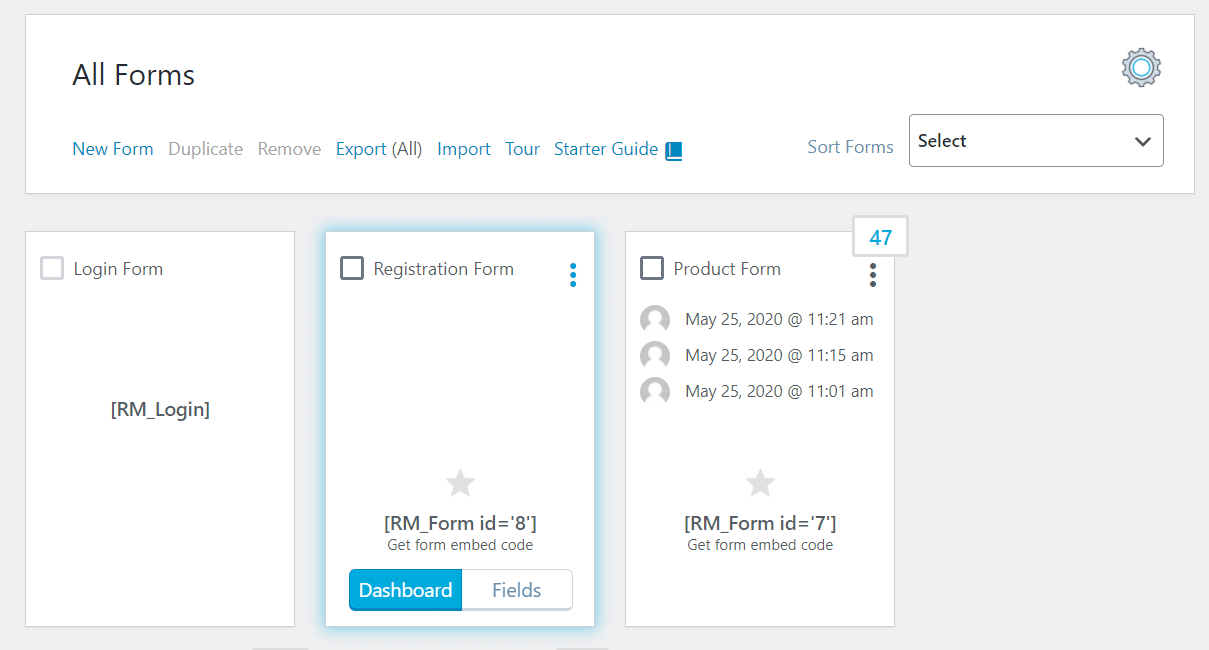
Step2: Here, hover your cursor over the form and click on Fields.
Step3: You will find a few default fields here that are automatically added to all the forms. These fields are always there in a registration form by default.
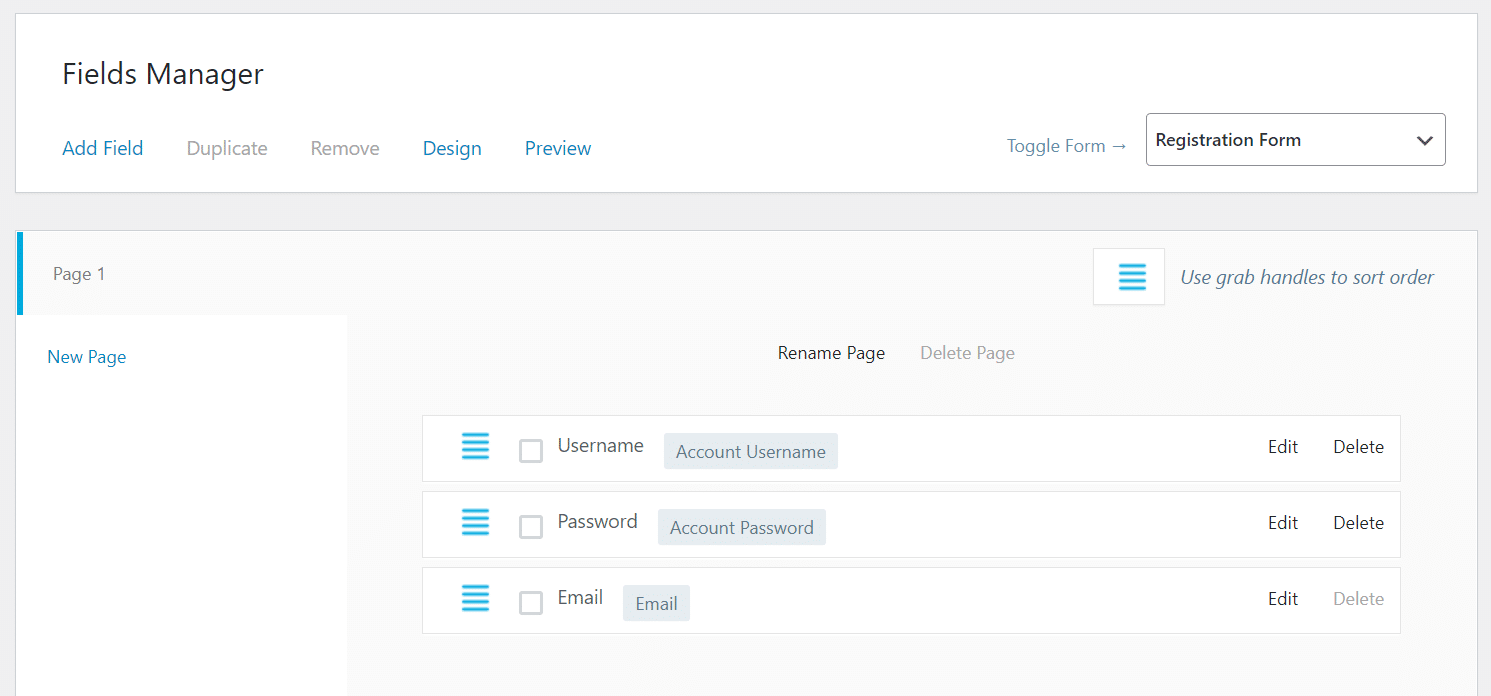
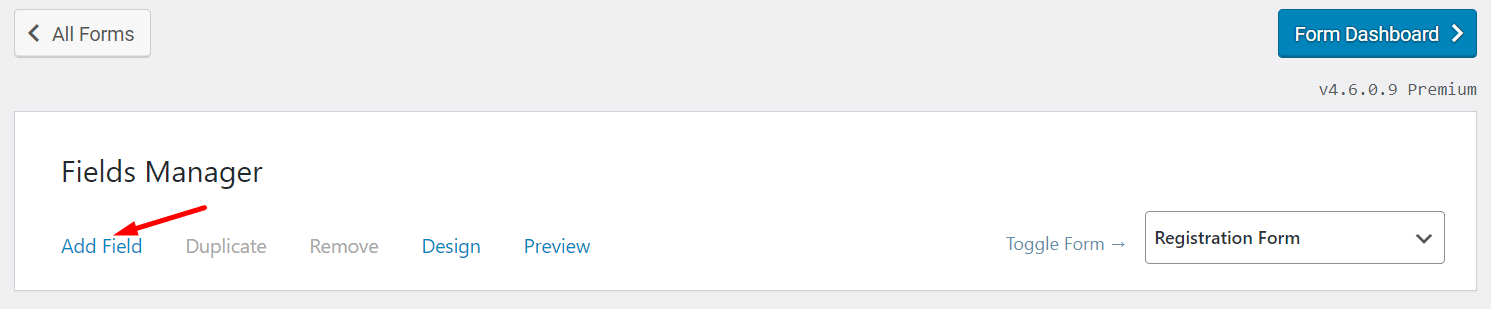
Step4: To add more fields to your registration form click on ‘Add Field’ and select the field type.
Step5: After adding the necessary fields, you can click on ‘Save’ and the fields will be added to your form.
Note: You can check out this link for a simple guide on how to add and edit fields on your forms.
PayPal Configuration
Now, you need to set up a PayPal payment on the website. To configure the PayPal payment setup follow these steps:
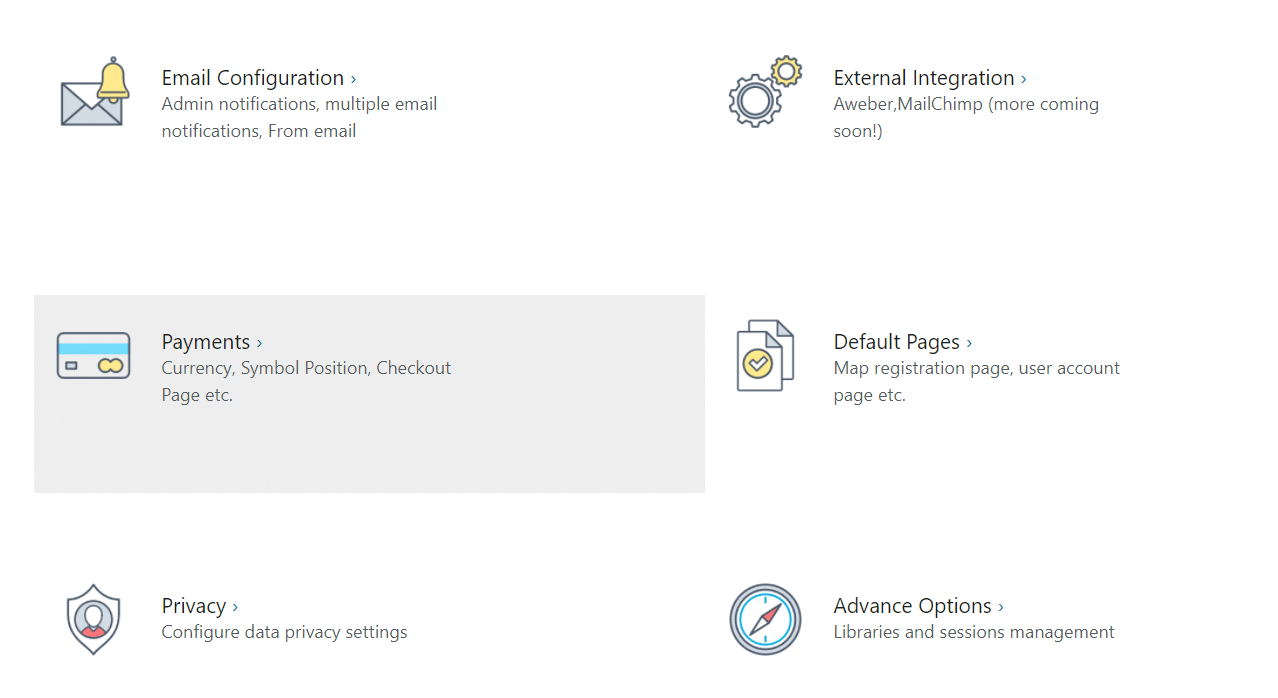
Step1: Go to Global Settings from RegistrationMagic on your Admin site.
Step2: Scroll down to ‘Payments’ and click on it.
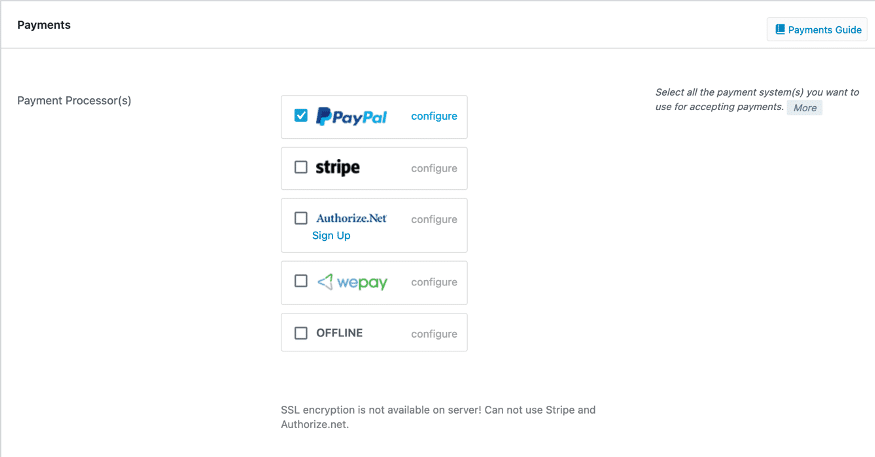
Step3: On the following page, you will find various options. Click on the Configure button given next to PayPal.
Step4: Enable Test Mode if you initially want to test your payments. You can turn it off later.
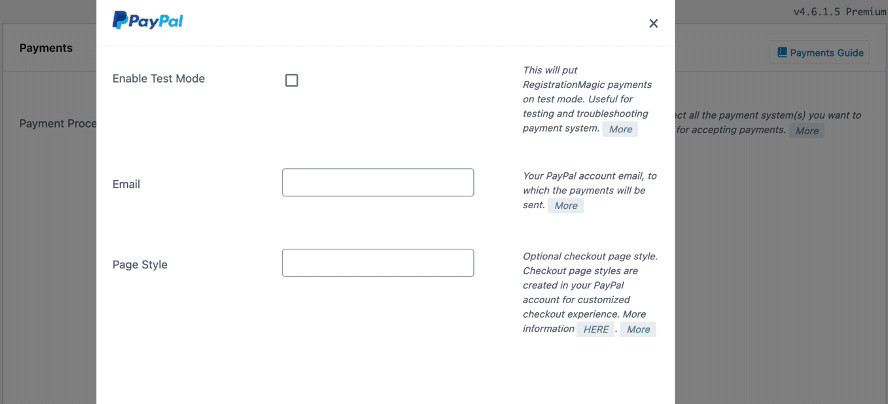
Step5: In the Email, add your PayPal account’s email. This PayPal account will receive all the payments from your website.
You have successfully configured the PayPal form on WordPress.
Note: If you don’t have a PayPal account, then you need to create an account on PayPal first to configure it on RegistrationMagic.
Creating a Product
To use this PayPal configuration and accept payments, you need to create a product, assign this product to your form, and enable it to accept payments. To do so follow these steps:
Step1: From your RegistrationMagic menu, go to -> Products.
Step2: On the Products page, click on New Product to add a product.
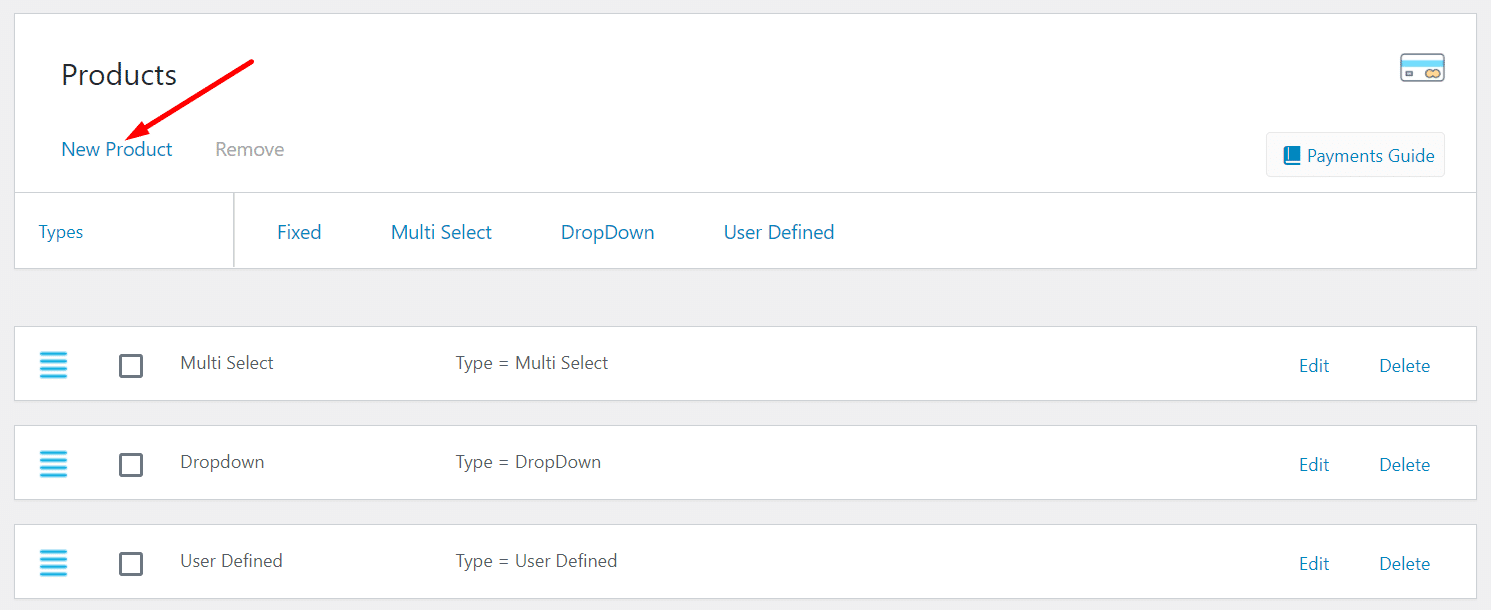
Step3: Next, you can set the product pricing types. There are four Product Pricing Types, namely Fixed, Multi-Select, Dropdown, and User-Defined. Select the one that fits your requirement the best.
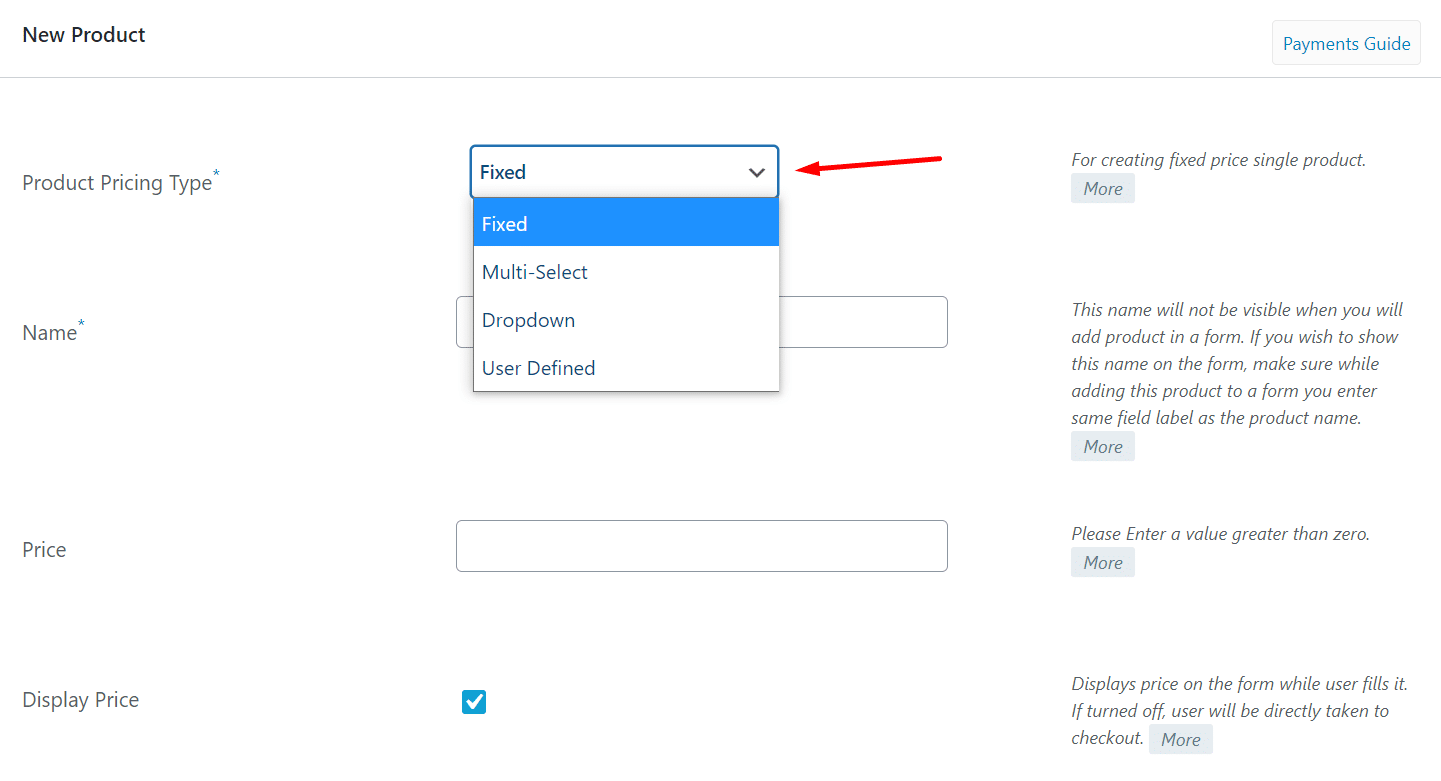
Note: Each one has a different use. For example, user-defined can be used to accept donations on an NGO website. e-Commerce websites that accept PayPal can use a fixed price type.
Step4: Fill the remaining fields and define the pricing. For example, if your registration fee is USD 50, then add 50 in the Price column.
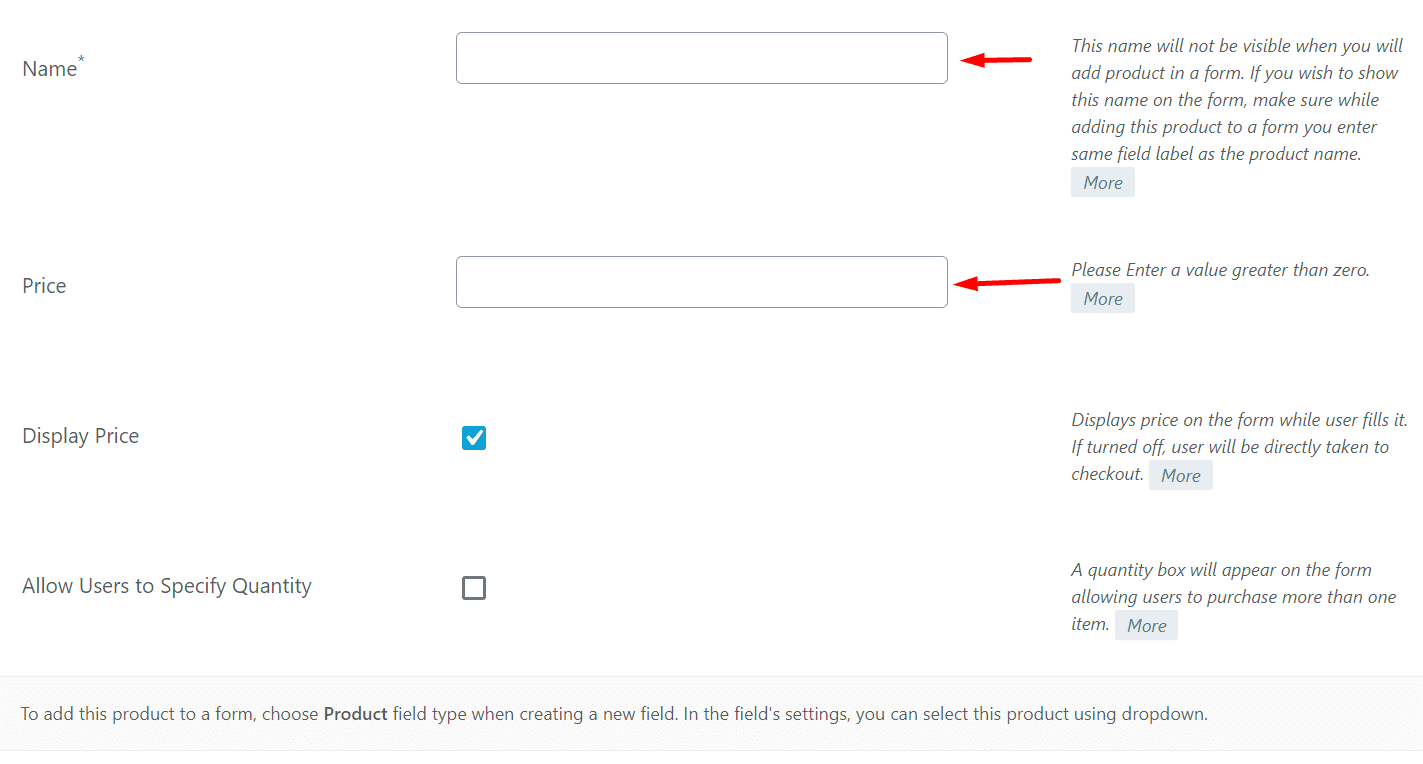
Step5: Use the ‘Display Price’ setting to Display the price on the form. Further, the ‘Allow Users to Specify Quantity’ setting will allow your users to specify the quantity of the item that they are purchasing.
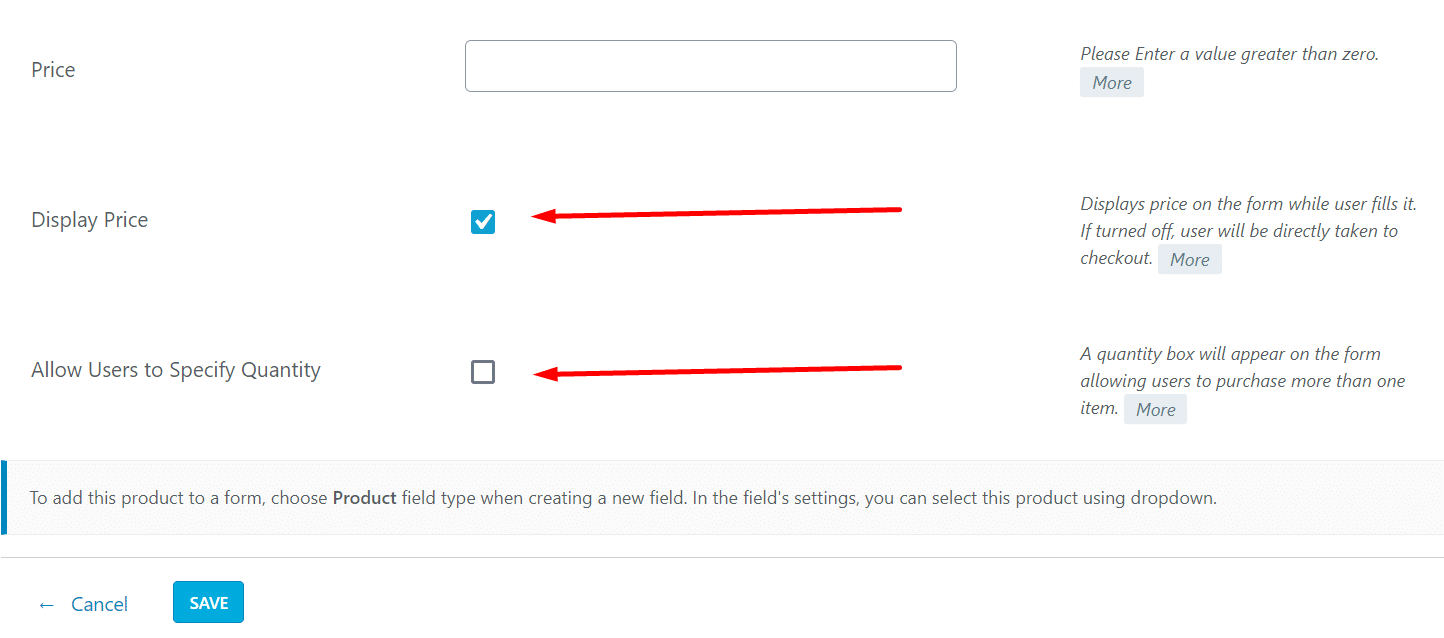
Step6: Once you click the Save button, the product will be created.
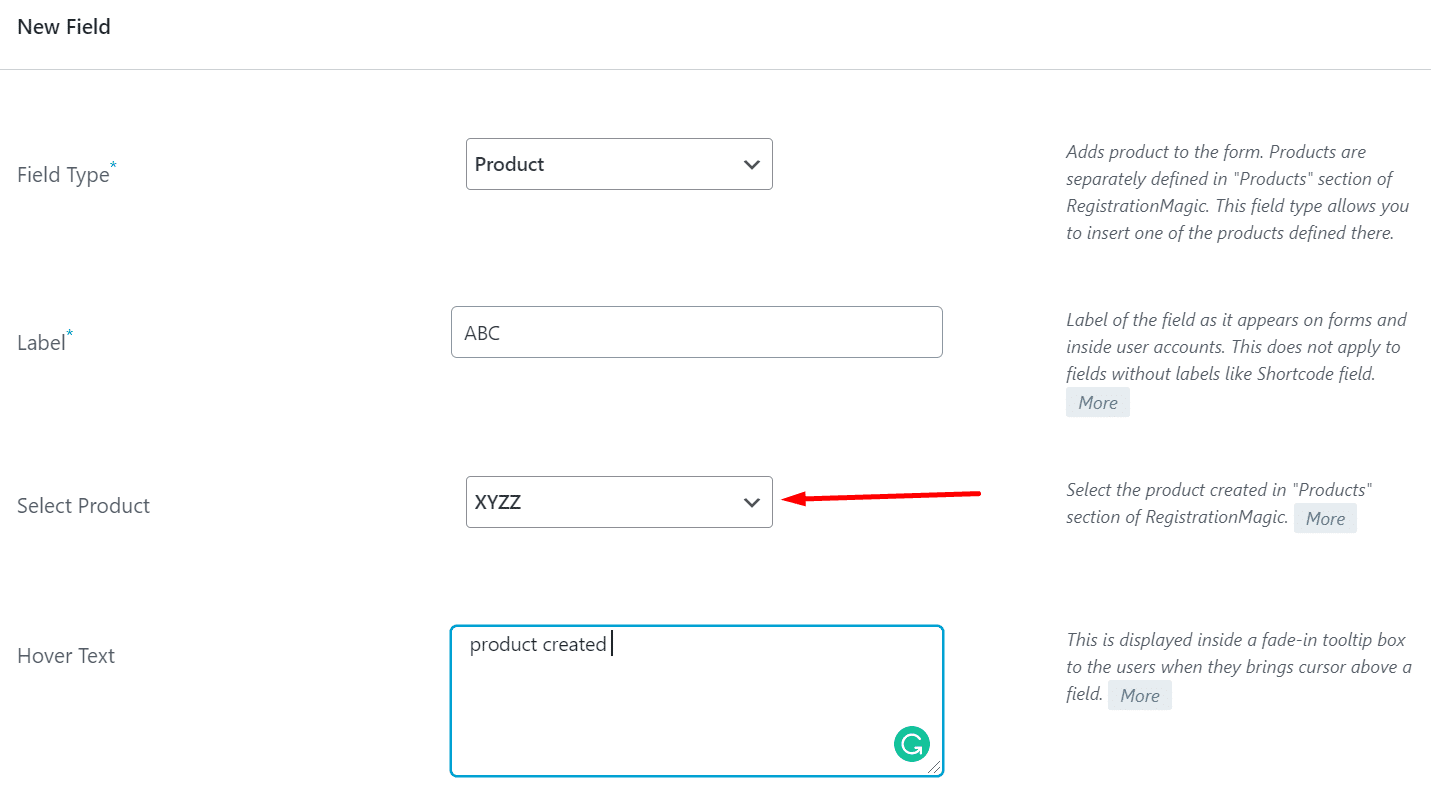
Step6: Now go back to your form, Add Field, and Add Product there.
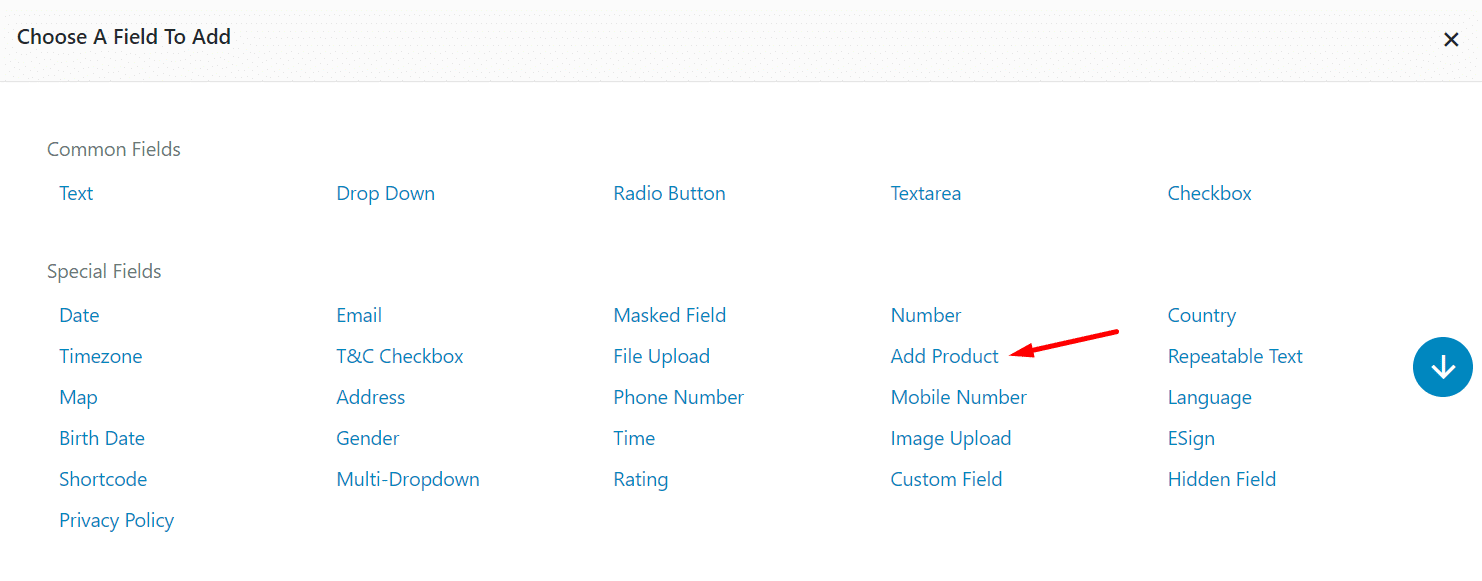
Step7: Select Product Type, Label, and Product from the list. This will assign a USD 50 fee to the registration form with PayPal.
Step8: Now to publish the Registration Form, copy the Shortcode of your Registration Form from the All Forms page.
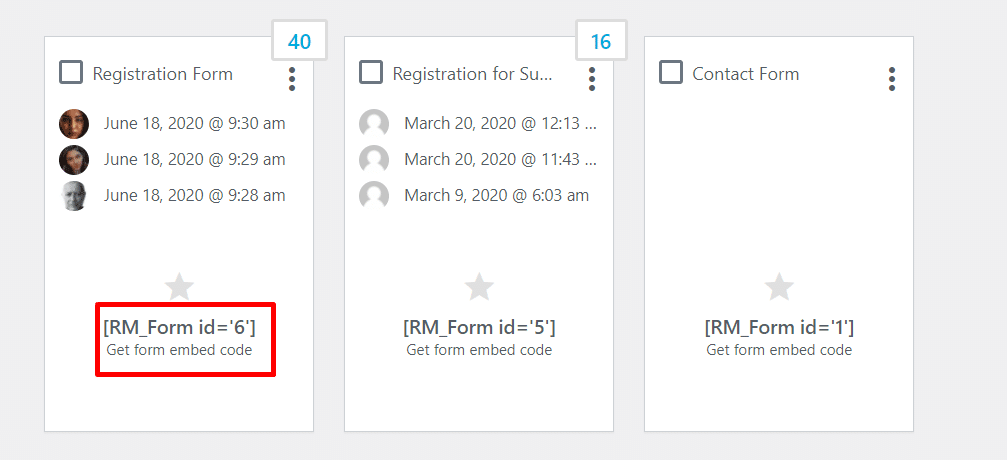
Step9: Add New Page and paste the Shortcode on this page. Save to publish Registration Form on your website that accepts PayPal.
Frontend View of the Registration Form with PayPal
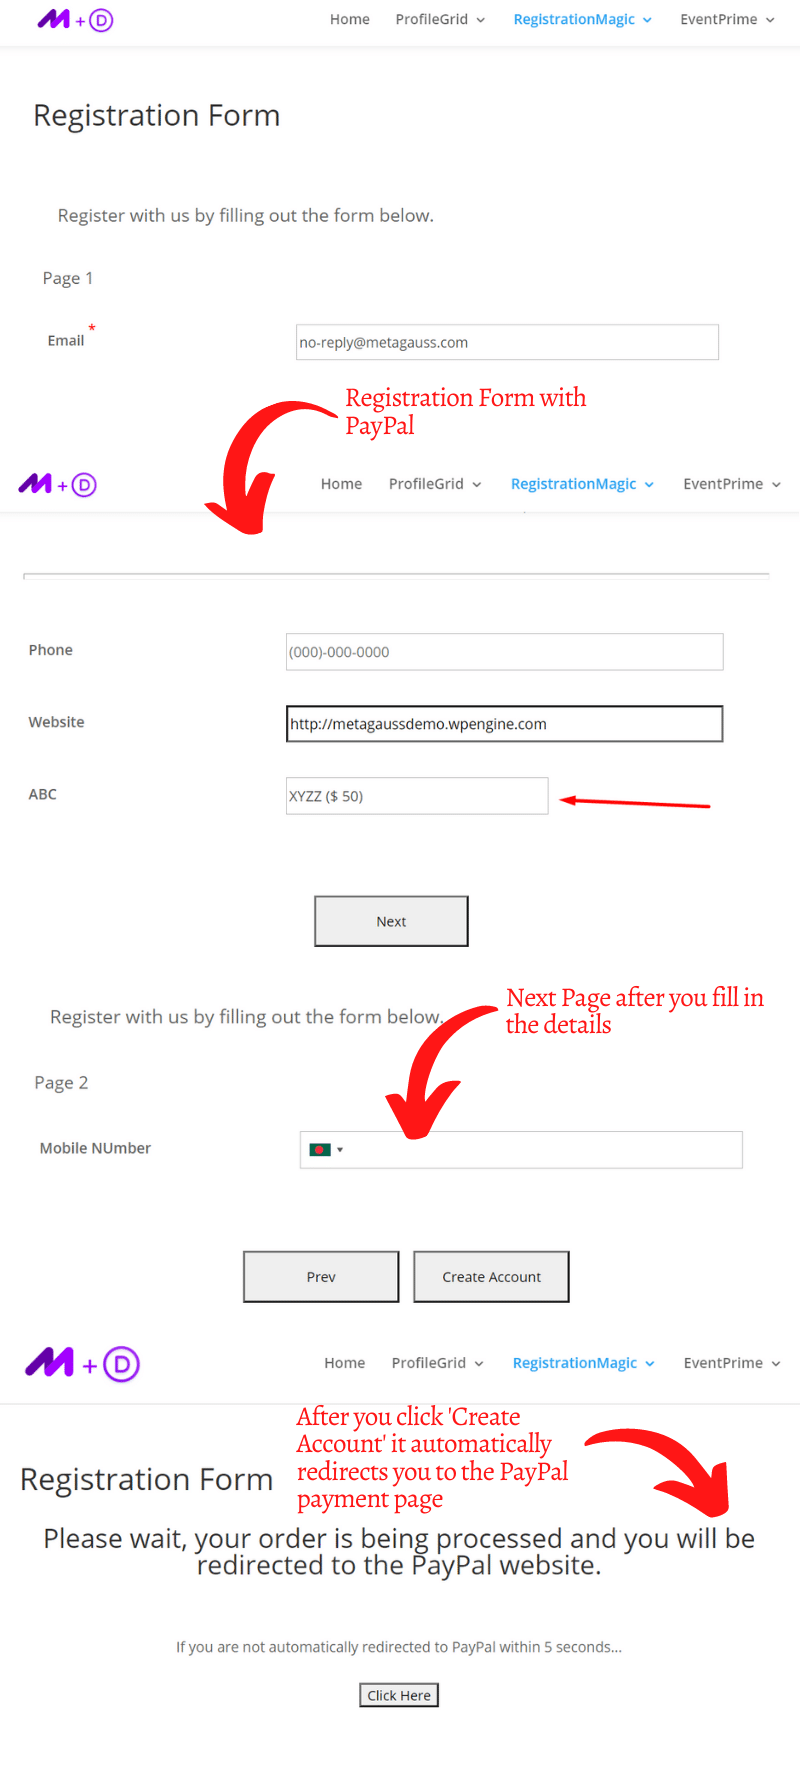
Once you complete the payment process, you will be redirected to the home page and the registration process will be completed.
Over To You
RegistrationMagic is one of the best plugins to create a Registration Form with PayPal payment system. You can add pre-created fields, create custom fields, add various payment systems, and much more.
And with the help of this plugin, you can even create your custom form with a payment setup.
Hope this guide has helped you to create and set up your Registration Form with a PayPal payment system.
For any issue or query, reach us in the below comment box. Our team will get back to you.
- How to Manage User Registration Status in WordPress - August 8, 2023
- Send Emails to Registered Users in WordPress with Ease - August 6, 2023
- How to Create a User Registration Form on WordPress - September 22, 2022
- Registration Based WordPress Contact Form Plugins - September 15, 2022
- Create a Job Application Form on WordPress Website- In Depth Guide - September 14, 2022
- How to create an efficient Marriage Registration Form in WordPress - November 26, 2021
- How to make a flexible vendor registration form for your business - November 24, 2021
- Creating a Smart Membership Form for Your WordPress Website - November 22, 2021
- How to create a digital Preschool Registration Form - November 18, 2021
- How to make a creative Dance Registration Form with RegistrationMagic - November 16, 2021