Once we are ready to sign up users, the next thing we need to do is to publish and display registration forms on WordPress site. If the site is running a ready-made theme, chances are that it came with its own built in page acting as a basic registration form. But for most admins, there’s always a purpose and clear set of goals to turn on registrations for their WordPress site. It can be setting up of a user account area for users to access secure information, run a newsletters list, connect associates with their business, collaborate for web publishing, registering users for events or classes, and the list keeps on going. For all this and more, default WordPress registration form simply won’t cut.
Now, I assume you are already familiar with RegistrationMagic and know how to build forms with it. If not, head over to our earlier blog posts. Once we have the form ready, we want it accessible on our website, linked to a menu item or a button for visibility. The shortest and simplest way to do is through shortcode. We’ll go through all the possible methods one by one.
- The ShortCode Method
Each Registration form has a unique shortcode attached to it. All we need to do is, paste the shortcode inside a page, post, or a widget, where form is to be displayed. It can be above the content, below it, or anywhere in the middle.
Let’s say we created a form named “Demo Form”. If we open the Forms Manager and look on the bottom half of the form card, we’ll see a snippet of text like this:
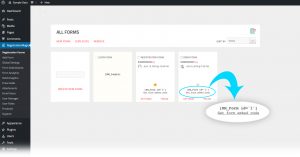
The number in the code signifies the form ID. It is different for each form. So for the “Demo Form” for our shortcode. A shortcode starts and ends with a square bracket. It needs to be copied as a whole.
Moving along, let’s create a new page on our site called “Sign Up” and paste this code inside content editor. Now it will look like this:
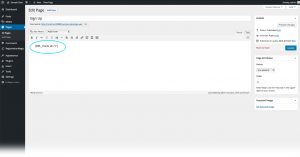
Update the page and preview the changes. The form will start appearing on the page. And that’s all there is to it. Remember, here we created a new page, but we can also paste the code in an existing page or post. Just place it where you want the form to appear. It can be after, say, a couple of paragraphs.
- The Quick ShortCode Method
Well, it’s the same method sans the first step. We can insert shortcode right from the page/ post editor (without needing to copy it first from the form card). All we have to remember is the name of the form which we want to show.
See a drop down above the content editor which says “Add Form”? Clicking on it will drop down a list of forms we have created so far.
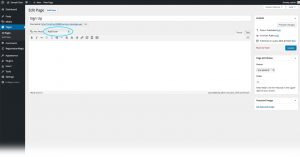
Click on the form and corresponding shortcode will be automatically get pasted inside the content editor.
- The Embed Method
This method to display registration forms on WordPress site is for advanced users and therefore only available in Gold Bundle of RegistrationMagic. It works best when we want to show a RegistrationMagic form where there’s no option to paste the shortcode. For example – a site outside our WordPress site! Yes, we can display form on any site using this method and the registration records will show as usual inside your RegistrationMagic dashboard area.
Let’s get back to form manager page, shall we?

Alright, now just below the shortcode is an underlined link named “Get form embed code”. Clicking on it pops up a translucent black box.
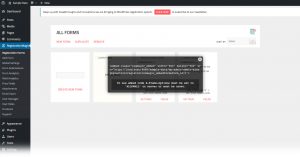
An embed code is a lot longer than the ‘short’ code since it will be carrying more information about the form to be displayed on the external page. For those familiar with HTML can easily adjust the size of the form by modifying this code. The format is <embed ….some code…. >
We need to copy all of it. For the demonstration here, I am going to paste this code inside a blank HTML page.
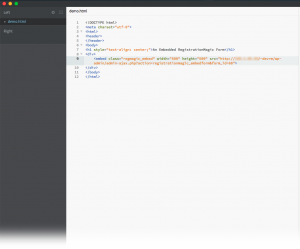
Opening the page in a browser displays this:
So, these were the best 3 ways to display registration forms on WordPress site. I am sure publishing forms will be a piece of cake for you after this. Join us for our next post on another interesting feature very soon.
(Update: Note that we recently launched a floating front end button, an innovative (4th) way to display registration forms on WordPress site)
- RegistrationMagic Starter Guide - August 4, 2024
- WordPress Registration Shortcodes List - July 10, 2024
- WordPress Payment Form Guide: Setup Payments on Registration Form - July 8, 2024
- Experience the Unfolding Magic! - August 4, 2023
- List of Guides for WordPress User Registration Process - July 28, 2023
- Frequently Asked Questions About WordPress User Registration Forms - July 28, 2023
- How to display registration forms on WordPress site? - July 26, 2022
- WordPress User Registration Custom Status Guide - April 9, 2022
- How to add or update user profile fields using WordPress forms - August 5, 2020
- Boost RegistrationMagic User Profiles With ProfileGrid Integration - February 19, 2019

How to add a link in auto-reply mail?
You may edit the autoresponder email and add link to it. You may edit it from Dashboard -> Autoresponder settings.
I deleted a default form of “registration” how can i get that back to my display ?
Delete action cannot be reverted once done. However, if you want to create a new registration form you may click on “New Form” in “All Forms” page. Name the form and select “CREATES WORDPRESS USER ACCOUNT ON SUBMISSION.”.
I want to add link in auto reply mail, this link expires in 3 day it is possible
Autoresponder email can be edited from form Dashboard -> Autoresponder settings.
Can we have multiple registration form on same page?
Yes, this is possible. You can simply add the shortcodes of the forms you want on the page.
Submit button not work how doing now
As discussed on the support ticket, the issue was related to your local environment conflict and has been fixed now.