Introduction
In this article, we will discuss how to use the two-column layout in the WordPress registration form through Fields Manager.
Setting up a Two-Column Layout
Once logged in, navigate to the All Forms section from the plugin menu.
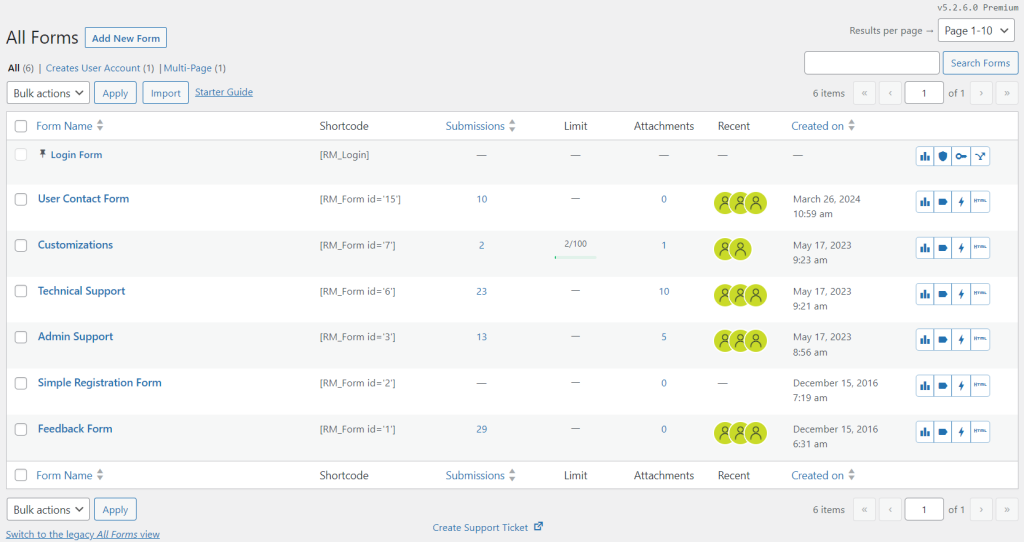
Hover the cursor on the Form Name that you wish to edit, and tap on the Fields button from the contextual pop-up.
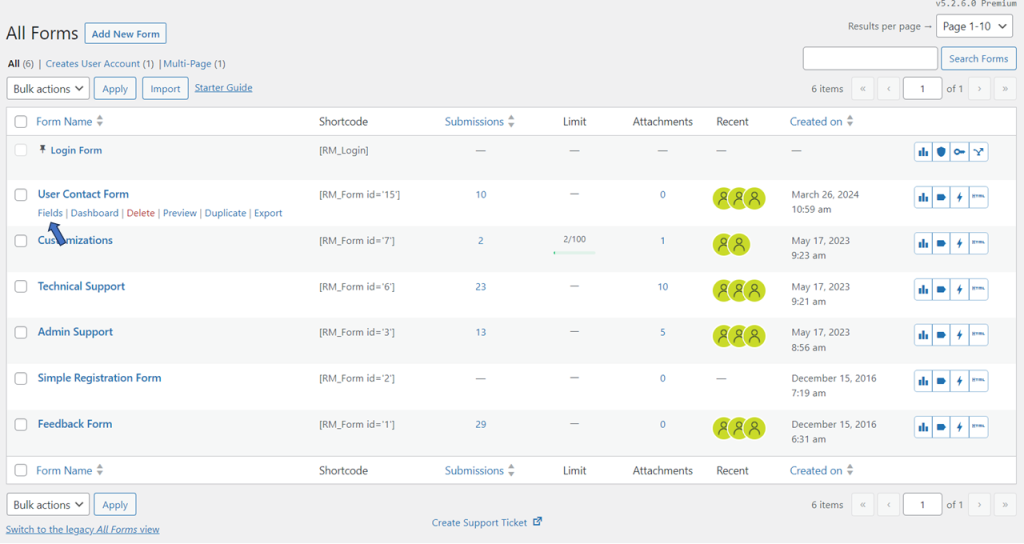
You will land on the Fields Manager page.
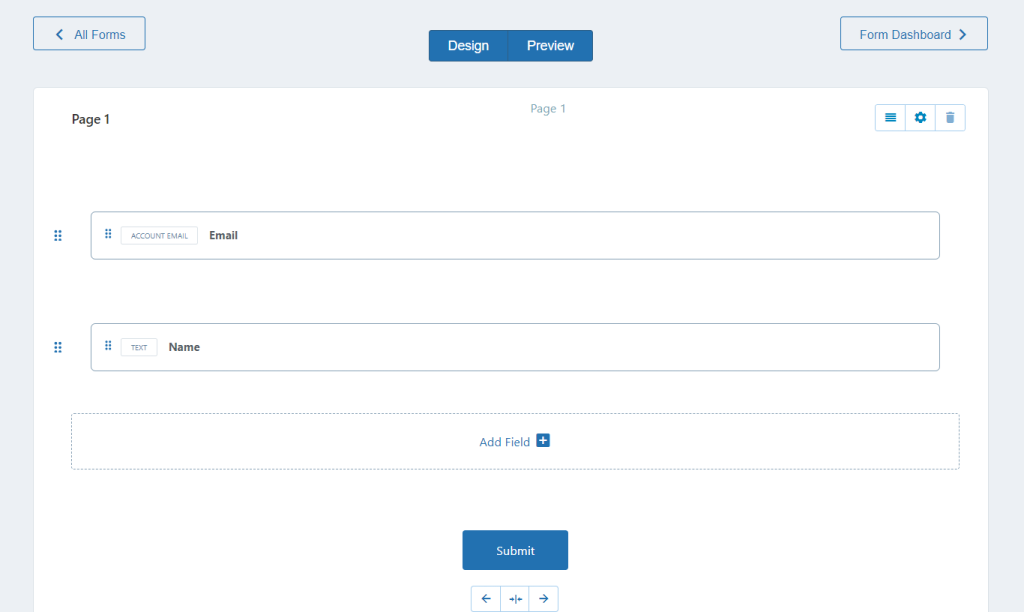
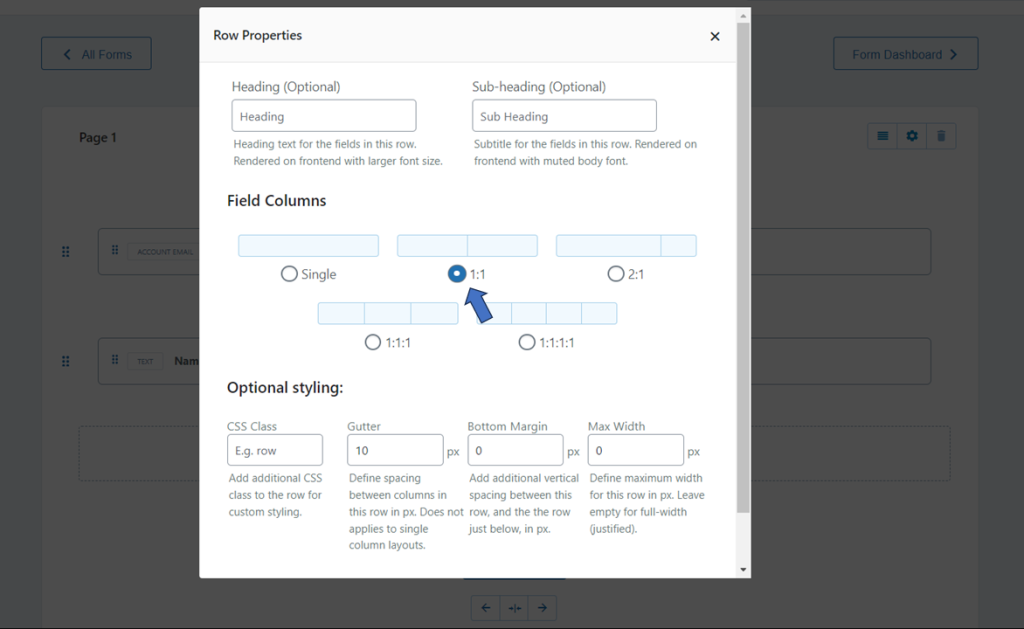
Next, select the row settings for the layout adjustment to two columns.
From the Row Properties page, you can adjust the structure to a two-column layout. There are other column layouts available that may be used for other setup requirements. Select 1:1 from Field Columns and then Save it.
The layout of the selected row will be changed to a two-column layout.
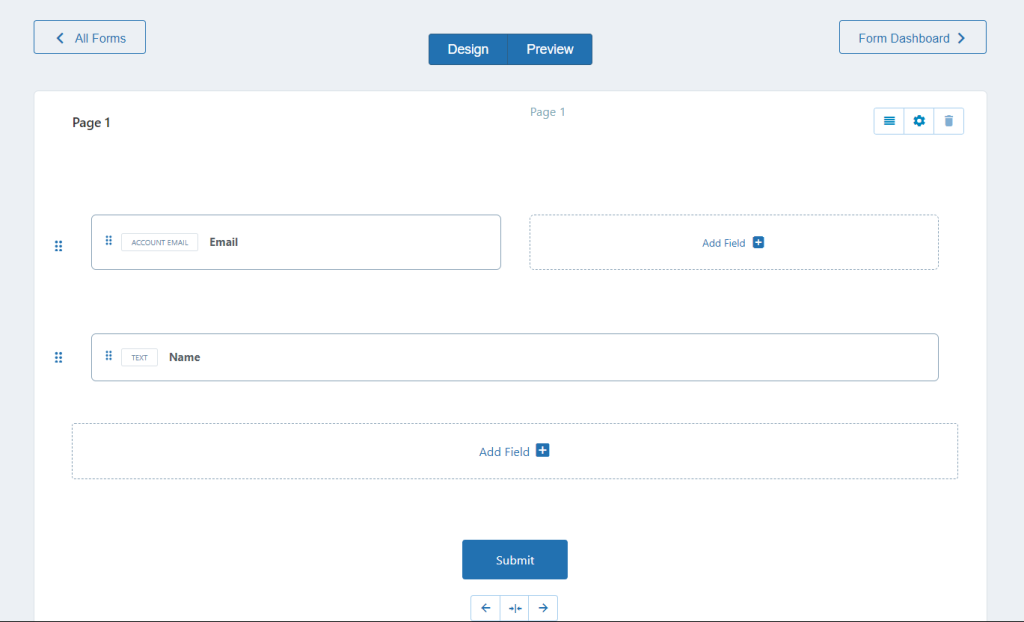
Utilizing a two-column layout for rows is straightforward with the RegistrationMagic plugin. The Row Properties page offers various layouts to choose from, enabling adjustments to the structure of the WordPress registration form according to customization needs.
- How to Delete a Field from the WordPress Registration Form? - April 24, 2024
- How to Add a New Field to a WordPress Registration Form - April 15, 2024
- How to Use Two-Column Layout in a WordPress Registration Form? - April 7, 2024
- How to Add a New Row to a WordPress Registration Form? - April 3, 2024
- How to Find and Copy WordPress Registration Form Shortcode? - March 28, 2024
- How to Access Login Form Options in WordPress? - March 21, 2024
- How to Quickly Filter Registration Forms that Create WordPress User Accounts? - March 13, 2024
- How to Access Registration Form Options from Form’s List? - March 12, 2024
- How to Quickly Preview Registration Form in WordPress? - March 11, 2024
- How to Sort Registration Forms in a WordPress Dashboard? - March 4, 2024
