Introduction
Within RegistrationMagic, the User Manager section enables administrators to effortlessly curate user profiles. This versatile tool allows admins to easily create, delete, view, and update user accounts. Moreover, the ability to assign specific user roles adds a layer of difference among users, enhancing the overall user management experience. The User Manager section is a cornerstone for administrators seeking seamless control and organization of user information within the RegistrationMagic plugin. In this article, we will look deeper into the user managers section. You can access it from the left menu in the RegistrationMagic plugin.
User Manager Dashboard
Within the User Manager dashboard, administrators find a comprehensive set of tools to facilitate various actions. The dashboard structure encompasses key components:
- Adding a New User
- Filtering Actions Based on Date and Roles
- Comprehensive User Columns: Name, Email, Role, Submissions, Mails, Revenue, Registered On, and Last Login.
This well-organized dashboard equips admins with the necessary features to efficiently manage user-related tasks and access crucial information at a glance.
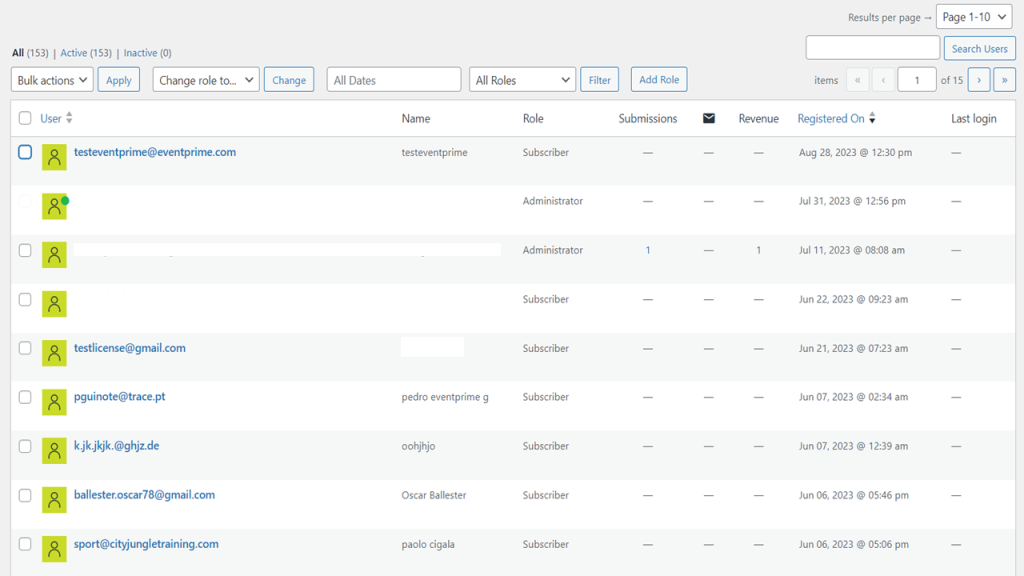
In the User Manager dashboard, individual users are presented with distinct rows. The initial column displays the user’s registered email. Following that, the subsequent columns showcase the user’s name and assigned role. The succeeding three columns have the counts of submissions, mails, and revenue attributed to that specific user. Concluding the display, the dashboard provides details on the user’s registration date and their most recent login time.
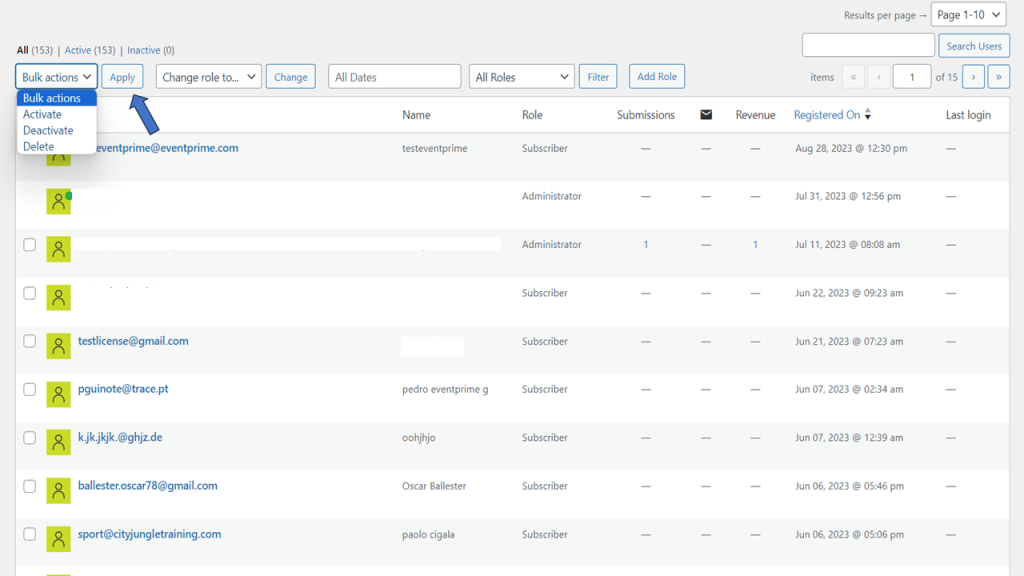
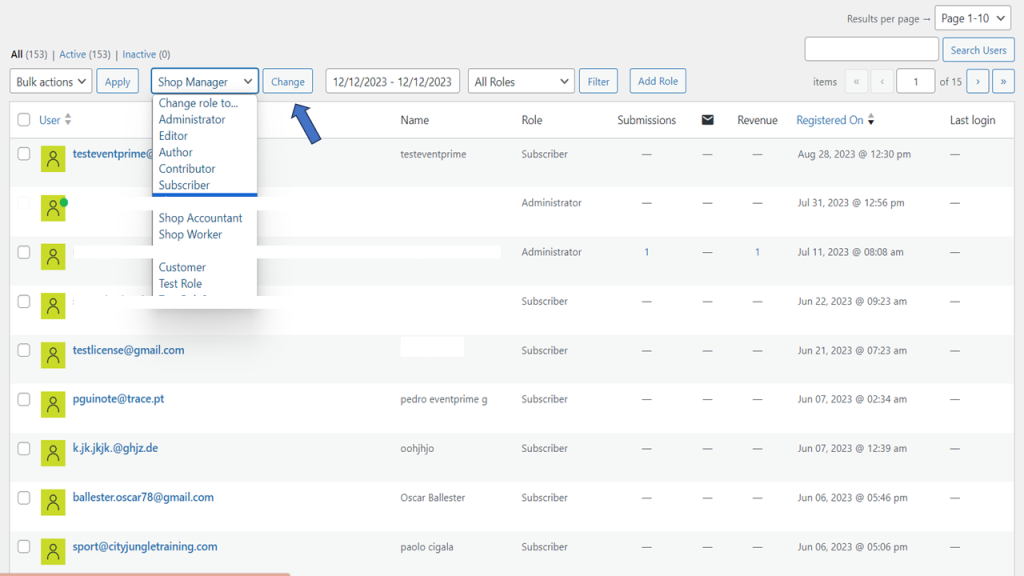
The User Manager dashboard facilitates streamlined user management by offering bulk actions. Admins can conveniently activate, deactivate, or delete a set of users collectively, simplifying overall processes. This feature proves particularly handy for efficiently handling large user datasets and ensures that user management tasks are executed with ease and efficiency. Further, change a user role to any of the following from the list given, options available are – Administrator, Editor, Author, Shop Vendor, etc. Further, more roles can be created in the settings.
The User Manager dashboard provides versatile filtering options based on both dates and roles. Users can conveniently filter data for today, yesterday, the last 7 days, the last 30 days, this month, or last month, or set a custom date range using the date filter. The role filter lists all available roles. Additionally, admins can customize the number of results displayed per page from the top right corner under “Results per page.” The search bar further aids in efficiently locating specific users within the dashboard.
Adding a new User
The admin can add a new user with the help of “Add New.” It opens the page for adding a new user by filling in all the relevant information.
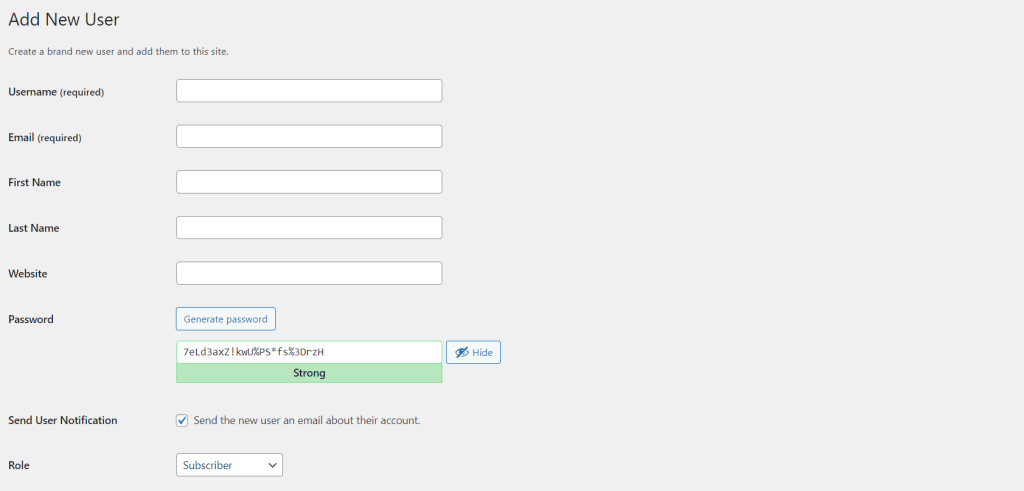
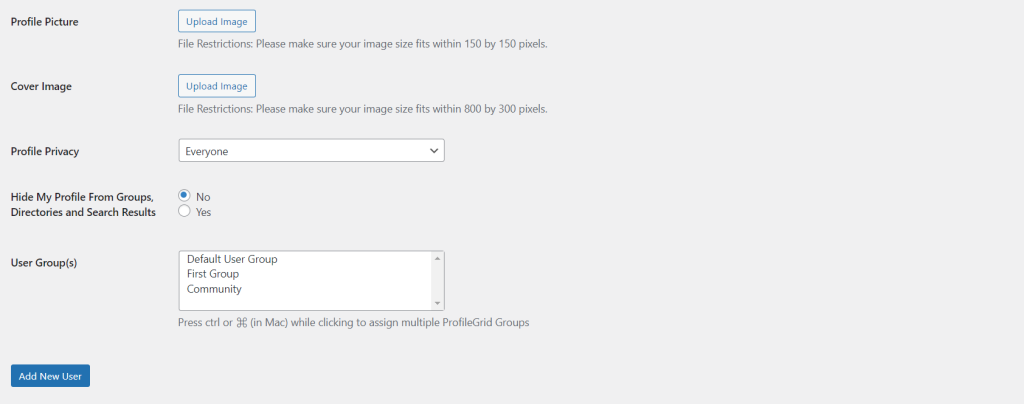
The Add User mandates the inclusion of a username and email while offering additional optional fields such as first name, last name, website, password, profile image, and cover image. The admin has the flexibility to directly assign a role to the new user. Enabling “Send User Notification” triggers an email notification to inform the user about their newly created account.
View
Under every user, there are options like – View, Deactivate, Block Email, Delete, Login Details, and Send Email. This helps to know more details about the user.
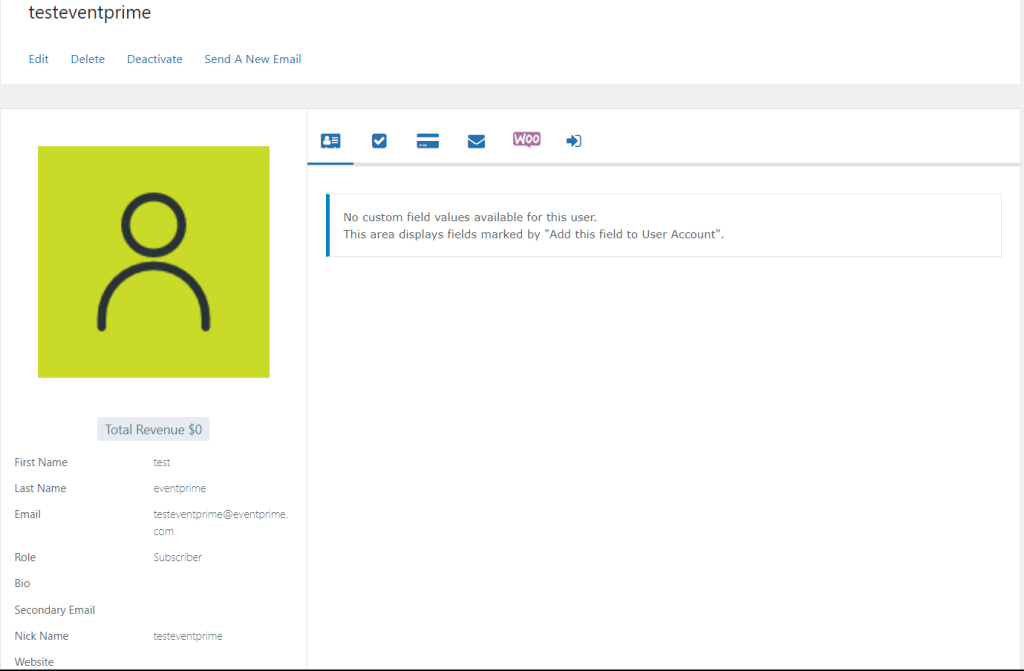
This user view encompasses essential user details, including revenue (from WooCommerce sales), profile picture, first name, last name, email ID, role, bio, secondary email, nickname, and website. Admins can perform actions like editing, deleting, or deactivating users, with an additional option to send a new email. Further exploration is facilitated through options revealing custom field values, user form submissions, payment records, and WooCommerce details encompassing orders, addresses, and downloads.
The deactivate option deactivates a user, signaling their inactive status. This efficient feature is complemented by additional options like blocking email and deleting, providing a comprehensive set of tools for user management. This ensures streamlined control and management of user accounts, enhancing the overall administrative experience.
Login Details
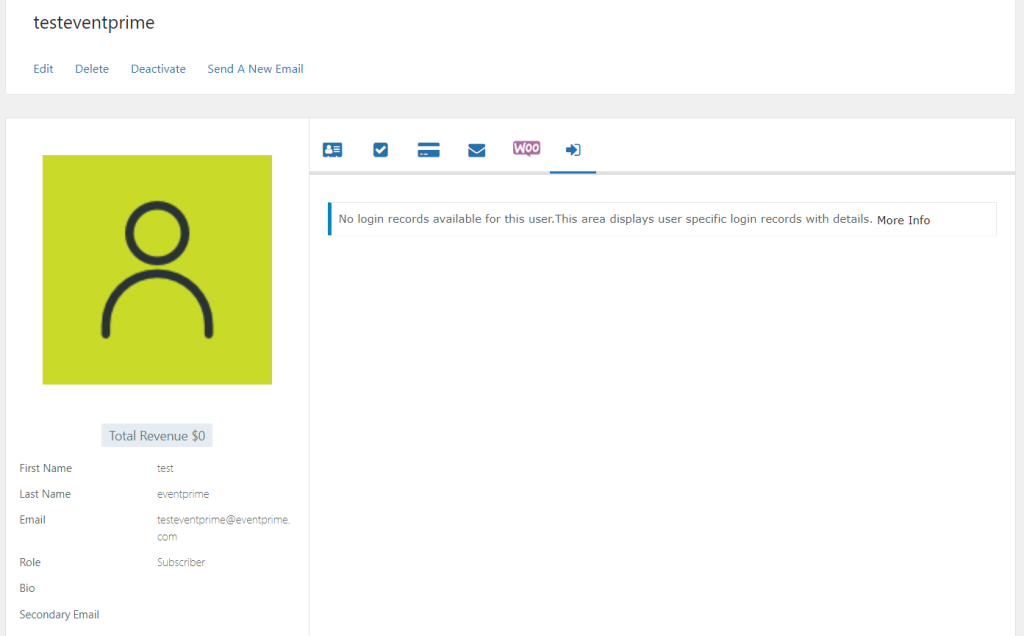
The View section not only showcases user information but also offers direct access to login details through the “Login Details” option in the tab. This section meticulously records every login action executed by the user, providing a comprehensive overview of the user’s login history. This feature enhances transparency and accountability in user activity tracking, contributing to effective user management.
In conclusion, the User Manager section within the RegistrationMagic plugin empowers administrators with efficient user curation tools. From creating and deleting users to managing roles and conducting bulk actions, the dashboard streamlines administrative tasks. The detailed user view, coupled with filters and search options, ensures a comprehensive understanding of user data. The ability to customize user roles, and privacy settings, and initiate new email communications adds a layer of flexibility. With a focus on user transparency, the Login Details section offers a clear timeline of user login activities. In essence, RegistrationMagic’s User Manager optimizes user management, promoting seamless and organized administrative workflows.
- How to Delete a Field from the WordPress Registration Form? - April 24, 2024
- How to Add a New Field to a WordPress Registration Form - April 15, 2024
- How to Use Two-Column Layout in a WordPress Registration Form? - April 7, 2024
- How to Add a New Row to a WordPress Registration Form? - April 3, 2024
- How to Find and Copy WordPress Registration Form Shortcode? - March 28, 2024
- How to Access Login Form Options in WordPress? - March 21, 2024
- How to Quickly Filter Registration Forms that Create WordPress User Accounts? - March 13, 2024
- How to Access Registration Form Options from Form’s List? - March 12, 2024
- How to Quickly Preview Registration Form in WordPress? - March 11, 2024
- How to Sort Registration Forms in a WordPress Dashboard? - March 4, 2024

Is it possible to add more columns to the main admin view of the list of users? I’d specifically like to see the ‘status’ of the users registration. Then we can alter the status when certain criteria are met,
And see a snapshot of all users’ status.
Thanks.
Hi Steve,
There is no method to add more columns to the user manager view. However, you can filter the view for active or inactive users by clicking on the links “Active” and “Inactive” above the bulk actions dropdown.