WordPress form payment status rule
The “Payment Status Rule” selects submissions depending upon the payment status. The payment status can be of 3 types:
- Completed
- Pending
- Canceled
The automation task runs on those submissions whose payment is complete, pending or canceled. In summary, selection rules filter a submission if all enabled rules are true for that submission. For instance, enabling both “Field Value Rule” and “Payment Processor Rule” only filters submissions fulfilling both the rules. Submissions unfulfilling one of these rules are discarded.
This rule applies to those using paid forms. Free forms are not affected by this rule.
Read More.
Complete Automation Guide for WordPress Forms
Navigating to automate form payment status
Navigate to the “Automation” feature from the RegistrationMagic plugin on your WordPress dashboard.
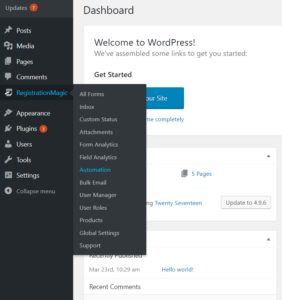
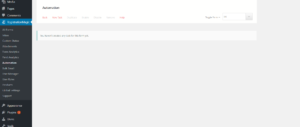
Create a new task from the operations column of the automation page. From the drop-down, select a form on which this task will run on.
Assign a unique task name. In this example, we have assigned task name as “New Task”.
Filling the description section is still optional. Nevertheless, for your personal need, you can fill the input box with a relative description. To illustrate, “Automate actions on WordPress form payment status” is the description here.
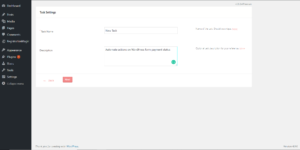
Go to the next page.
Configuring the form payment status rule
Check the “Payment Status Rule” checkbox. A popup appears allowing to select one or multiple payment statuses. The automation rule will run on those submissions with the selected payment status.
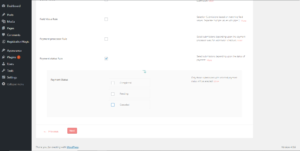
For example, if the payment status is “completed”, then submissions with complete payment status are automated. With a “pending” payment status the automation rule acts upon submissions with incomplete payment. Similarly, choosing the canceled payment status automates aborted form submissions.
As a matter of fact, you can select multiple payment statuses. Selecting completed and pending will automate submissions with both the statuses.
Go to the next page.
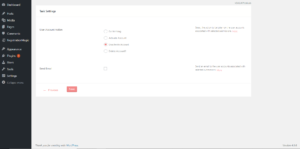
The user account action defines the action taken on the user account according to previous entries. Choosing to deactivate an account would disable the account with selected payment status on the last page.
Moreover, you can send an email to the user mentioning their account status. Embed necessary information in the mail and save your settings.
Activating the automation task
Go back to the “Automation” page and run the automation task. Click “Run Now” to do so.
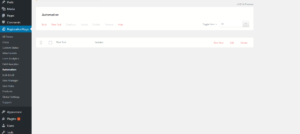
In conclusion, this completes automating actions on WordPress form Payment status.
- Complete Automation Guide for WordPress Forms - July 20, 2024
- WordPress User Management Plugin Guide - July 18, 2024
- Add CAPTCHA in WordPress Login and Registration Form? - July 16, 2024
- How to Send Automated Welcome Emails in WordPress - July 15, 2024
- WordPress User Roles, Permissions & Role Editor [Complete Guide] - July 14, 2024
- How to Display Custom Success Message in WordPress Forms - July 12, 2024
- Publish Registration Forms and Display Registered Users - July 11, 2024
- How to Approve WordPress User Accounts Without Logging Into Dashboard - January 25, 2021
- How to Set up Two Factor Authentication in WordPress - April 4, 2019
- How to Edit or Replace Default WordPress Registration Form - April 2, 2019

This seems to only email the person registering. I need to have my registrar / admin notified when a payment is successful.
I can turn off automatic emails to admin after form submission. Then create an automated email for just successful payments. But that seems to only go to the person registering.
The registered admin is notified as soon as a RegistrationMagic form is submitted. It doesn’t depend on the payment status. Automatic email or automation task’s email are sent to the users/registrants only, not the admin.
These tasks are executed on the users/registrants that fulfill the implemented settings under Payment status Rule, Payment processor Rule, etc.
The email is sent to the registered users and only to the users that fulfill the criteria at the time the task is run.
How i can send an automatic email after a payment ?
You can use the automation feature of RegistrationMagic to send email to the users when the payment is complete.
1- Go to RegistrationMagic > Dashboard for the form > Automation Tasks
2- Create a new task and name it
3- Enable Payment Status rule
4- Choose Payment Status as Completed > click on Next
5- In user account activation, choose Do Nothing > Enable: Send Email > type in the email and Save it.
What about if I wanted to change a “pending” status to “completed” because we established payment after a submission was created? I just want to simply update it to status “completed”.
To change the status of payments, please refer to the following steps:
1. Go to RegistrationMagic > inbox
2. Click on view for the submission that you wish to change the status of
3. Click on “Update” for “Payment Status” and select the desired status from the available options.
You can also set a custom status on the submissions to distinguish those with relevant identifiers in case the online payment processors are used.