WordPress form Payment Gateway Types
Payments processors are gateways for executing monetary transactions. Consequently, online payments are possible through these secure gateways. Your credit or debit card details are integrated with these payment processors. At the same time, it helps in faster and flawless transactions.
Multiple payment gateways included in this rule make transactions simple specifically for diverse crowds. The automation rule, therefore, runs on those submissions made through the selected payment processor.
Read More.
Complete Automation Guide for WordPress Forms
Navigating to Automate Payment Processor rule
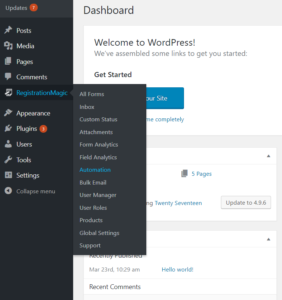
Navigate to “Automation” under the RegistrationMagic plugin on your WordPress dashboard.

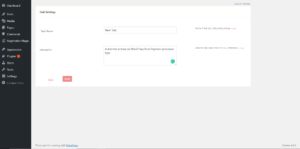
Drill in to run an automation task. From the drop-down select the form where the automation rule is applied. This form can be anyone of your choice.

Assign a unique name to the task. The task name assigned in this case is “New Task“.

The description section is optional. In fact, you can go ahead and fill it for your convenience. In this example, the focus is to automate actions on WordPress form payment processor type.
Configuring WordPress form Payment Processor Type
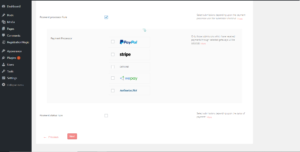
Go to the next page and check the “Payment Processor Rule” checkbox. This rule is applied to those form submissions made using the selected payment gateway at checkout.

The different payment processors present here are:
- PayPal
- Stripe
- Offline
- WePay
- Authorize.net
You can relish the liberty of selecting multiple payment processors. All these payment processors eventually are the most conventional ones. Monetary transactions made through these gateways are swift and safe.
The automation task runs specifically on those submissions whose payment is processed through one of these gateways. For example, selecting PayPal automates only those submissions with payments made through PayPal. The same rule applies to the rest of the payment processors as well.
To summarize. it cuts down lengthy manual steps of segregating forms according to their payment type.
Setting Automation Output
Click “Save” to go to the next page.

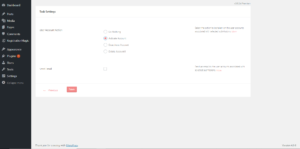
According to earlier settings select the action to be taken on the user account. In fact, you can delete, activate or deactivate any user account.
Users paying through selected gateways might be active or inactive. This completely depends upon the admin. In addition, you can also send emails notifying users of the account status.
Save the automation task settings. Go back to the Automation page. Run the task you created simultaneously.

Finally, this completes automating actions on WordPress form Payment Processor Type.
- Complete Automation Guide for WordPress Forms - July 20, 2024
- WordPress User Management Plugin Guide - July 18, 2024
- Add CAPTCHA in WordPress Login and Registration Form? - July 16, 2024
- How to Send Automated Welcome Emails in WordPress - July 15, 2024
- WordPress User Roles, Permissions & Role Editor [Complete Guide] - July 14, 2024
- How to Display Custom Success Message in WordPress Forms - July 12, 2024
- Publish Registration Forms and Display Registered Users - July 11, 2024
- How to Approve WordPress User Accounts Without Logging Into Dashboard - January 25, 2021
- How to Set up Two Factor Authentication in WordPress - April 4, 2019
- How to Edit or Replace Default WordPress Registration Form - April 2, 2019

Hi, so just to be clear. I am able to create a form and at the end accept a payment specified to what the user selected throughout the form?
Hi jhemar,
With Automation, you can execute some actions on user accounts based on a selection criteria. For accepting payments, just add product fields to your form and user will be asked to pay when submitting the form.