Learn How to Approve WordPress User Accounts Without Logging Into Dashboard With RegistrationMagic
The prerequisite to get WordPress user accounts registered on your site is to approve them. But too many user registrations in one go can become a problem for the admin to approve one by one. Hence the need for approving WordPress user accounts without logging into the dashboard.
In a busy membership site, where users register every minute, the admin has no time to approve each account manually. An Admin can get WordPress accounts that need to be approved almost every minute. Also, manual approval of WordPress user accounts will slow down the workflow of the site as well. Thus RegistrationMagic offers the feature of Account Activation via Mail.
Here the admin can be sure of approving each WordPress user account manually, minus the hassle of logging into the dashboard every time. The admin will not have to activate or approve each user one by one. Instead, the plugin will automate this task and make it a matter of one click for the admin. This will also ensure that the user has a verified mail id since the account approval will be done through a verification mail.
This WordPress user registration plugin not just helps you create dynamic registration forms or smart contact forms in WordPress. It also takes care of the fact that you get verified users on your site. And the admin stays tension-free regarding the approval of new WordPress user accounts.
So, let’s start today’s tutorial by first creating a form that will create WordPress accounts on your site. Then we will go ahead and get into the process of approving these WordPress free accounts without logging into the dashboard.
Build Account Creation Forms
Step1: Install the RegistrationMagic plugin on your site. The WordPress user approval plugin will help you approve new users of WordPress. Next, you will find the plugin menu on your menu panel. From there, click on the All Forms link.
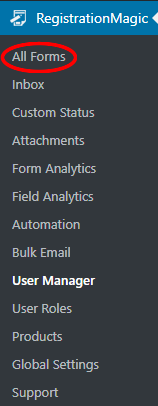
Step2: Now, you will land on the All Forms page. This page will show you all the forms that you create through this plugin. Besides, you can create new registration forms and contact forms from here.
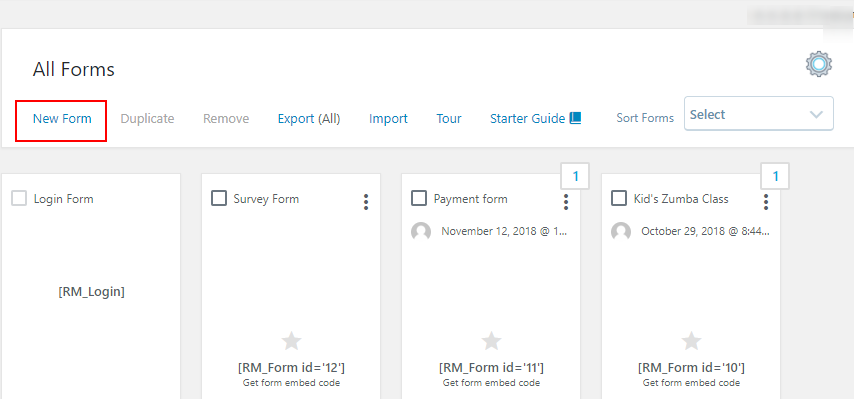
Step3: In the left corner, you will find the New Form link. When you click on it, a pop-up will appear with two form options. One will let you create a WordPress user account on form submission and one that does not create a user account on your site. This means if you want to create a WordPress registration form or a WordPress contact form.
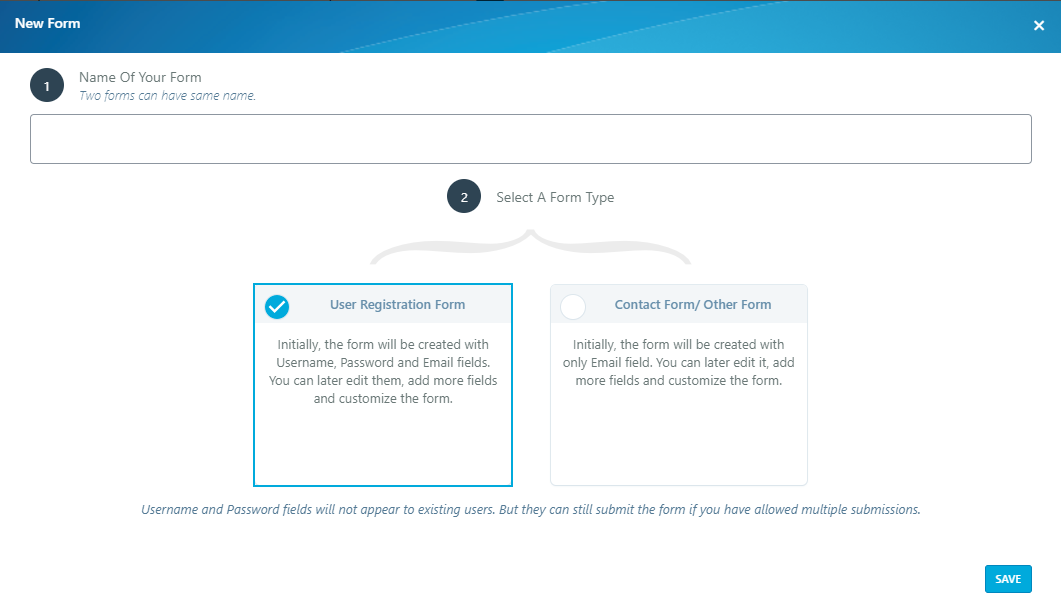
Step4: From here, select your type of form and name it. Next, you will find your registration form appears on the All Forms page. Now, if you hover on the form cover, you will find two links appearing at the bottom – Fields and Dashboard.
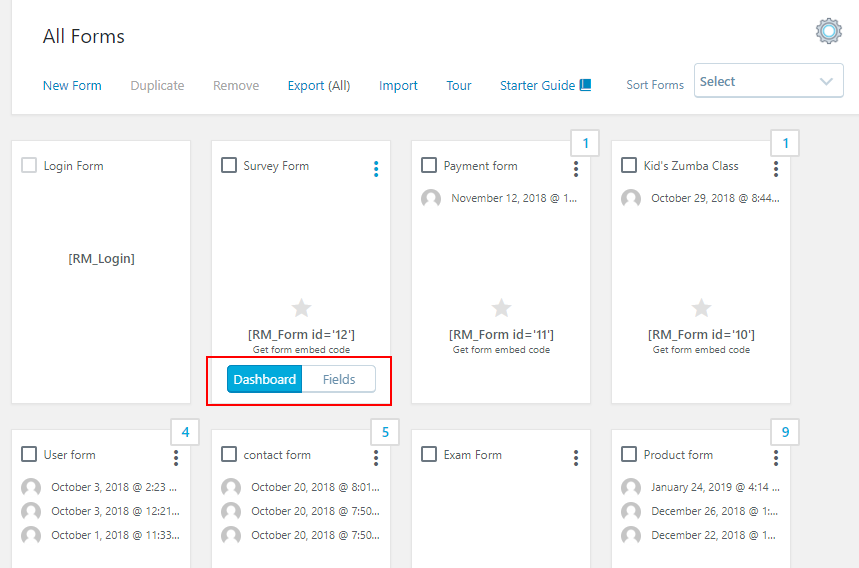
Step5: Then, from the Dashboard link, we can take care of the WordPress forms payment, design, analytics, security, etc.
Publish the Form
After adding user data fields to the form, it is now time to publish the form for your users on the front end. RegistrationMagic makes form publishing also a really simple job with its preset shortcodes.
Step1: As you hover your cursor on form covers on the All Forms page, you will also find a unique shortcode there. This shortcode remains unique to every form, and it will help you publish this form on the front end.

Step2: Now, copy the shortcode from the form card. Paste it on a new WordPress page and click on Publish.
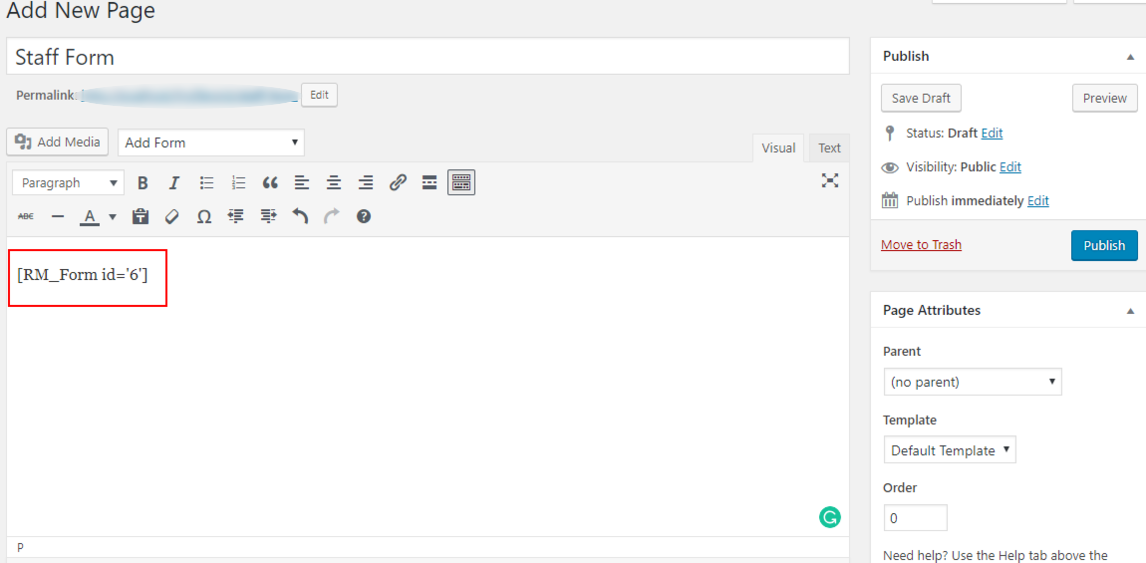
Step3: You will then find your form on the front end of your site. This form is now ready to create WordPress user accounts on your site. Now, in order to approve WordPress user accounts without logging into the dashboard, we need to know a little about Global Settings.
Global Settings
The Global Settings menu of this plugin is the most important area that can lessen many jobs of the site admin. From here, you can enable or disable features on all the WordPress Forms on your site. Thus there is no need to work on each form when you enable any settings from this menu.
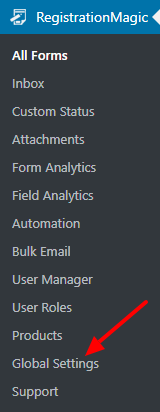
Step1: As we install the RegistrationMagic plugin on our sites. We find the plugin menu on the site’s menu panel. From there, click on the Global Settings link.
Step2: As you land on the Global Settings page, you will find an array of menus to add up to extend the functionalities of default WordPress forms. From here, we will click on the User Accounts menu to start our job.
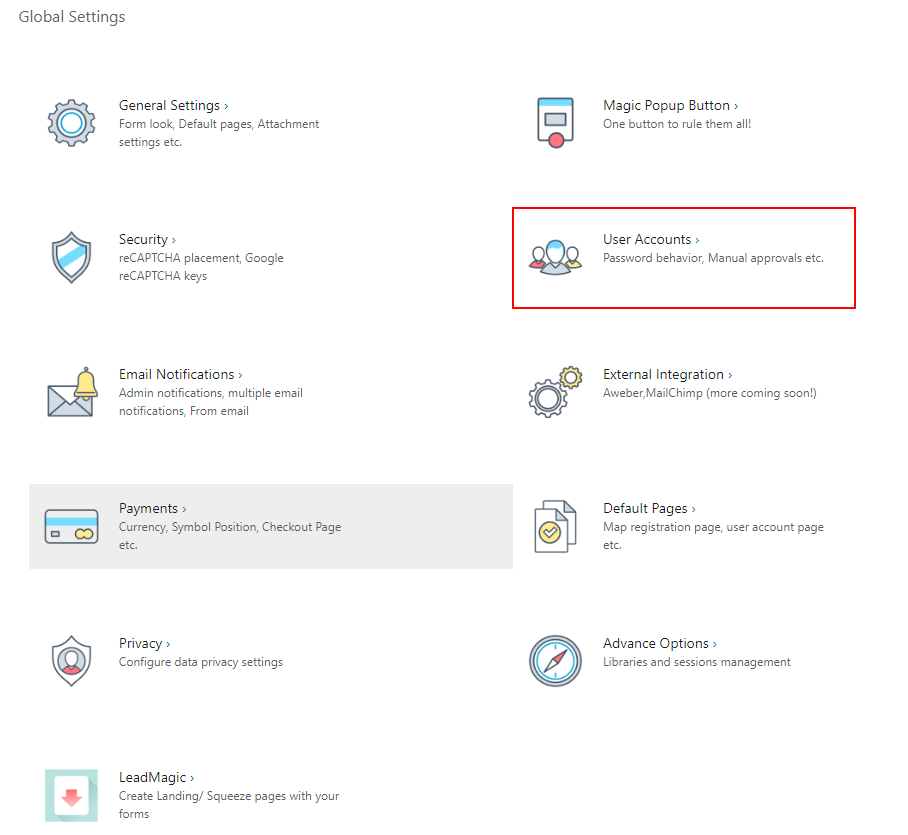
Step3: This menu takes care of the actions that an admin needs to do with respect to activating, allowing, approving WordPress user accounts on a site.
Activation Methods of User Accounts
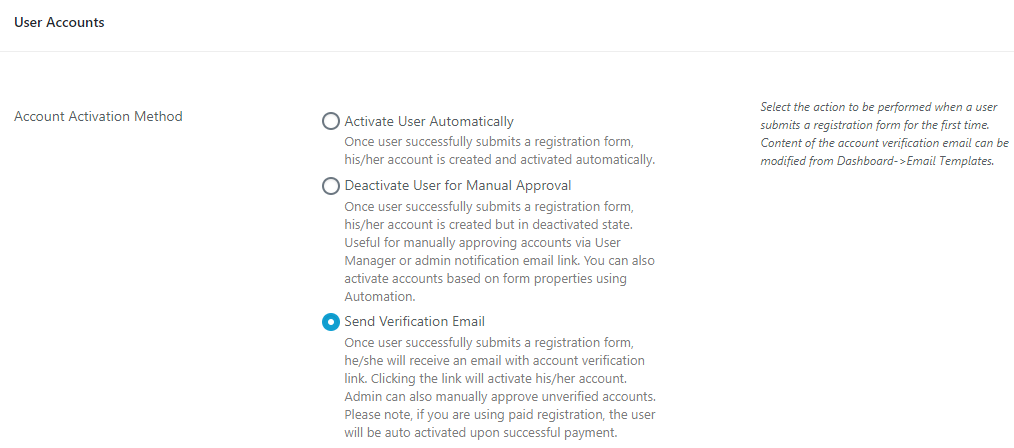
Step1: As we land on the Users’ WordPress account page settings, we will find a series of options on account activation, namely:
Activate User Automatically – Here, there is no scope for the admin to approve WordPress user accounts. Right after a user submits a form, he/she gets an account on your site automatically.
Deactivate User for Manual Approval – Here, the user account stays deactivated after he/she submits a form. The admin has to manually activate the account from the User Manager page of the site dashboard. Till this manual approval from the admin, the user account stays deactivated.
Send Verification Mail – Here, once a user successfully submits a registration form, he/she will receive a WordPress account activation email with an account verification link. Clicking the link on this WordPress account activation email will activate his/her account. The admin can also manually approve unverified accounts.
Note that if you are using paid registrations, the user will be auto-activated upon successful payment.
Approving WordPress Accounts Via Mail
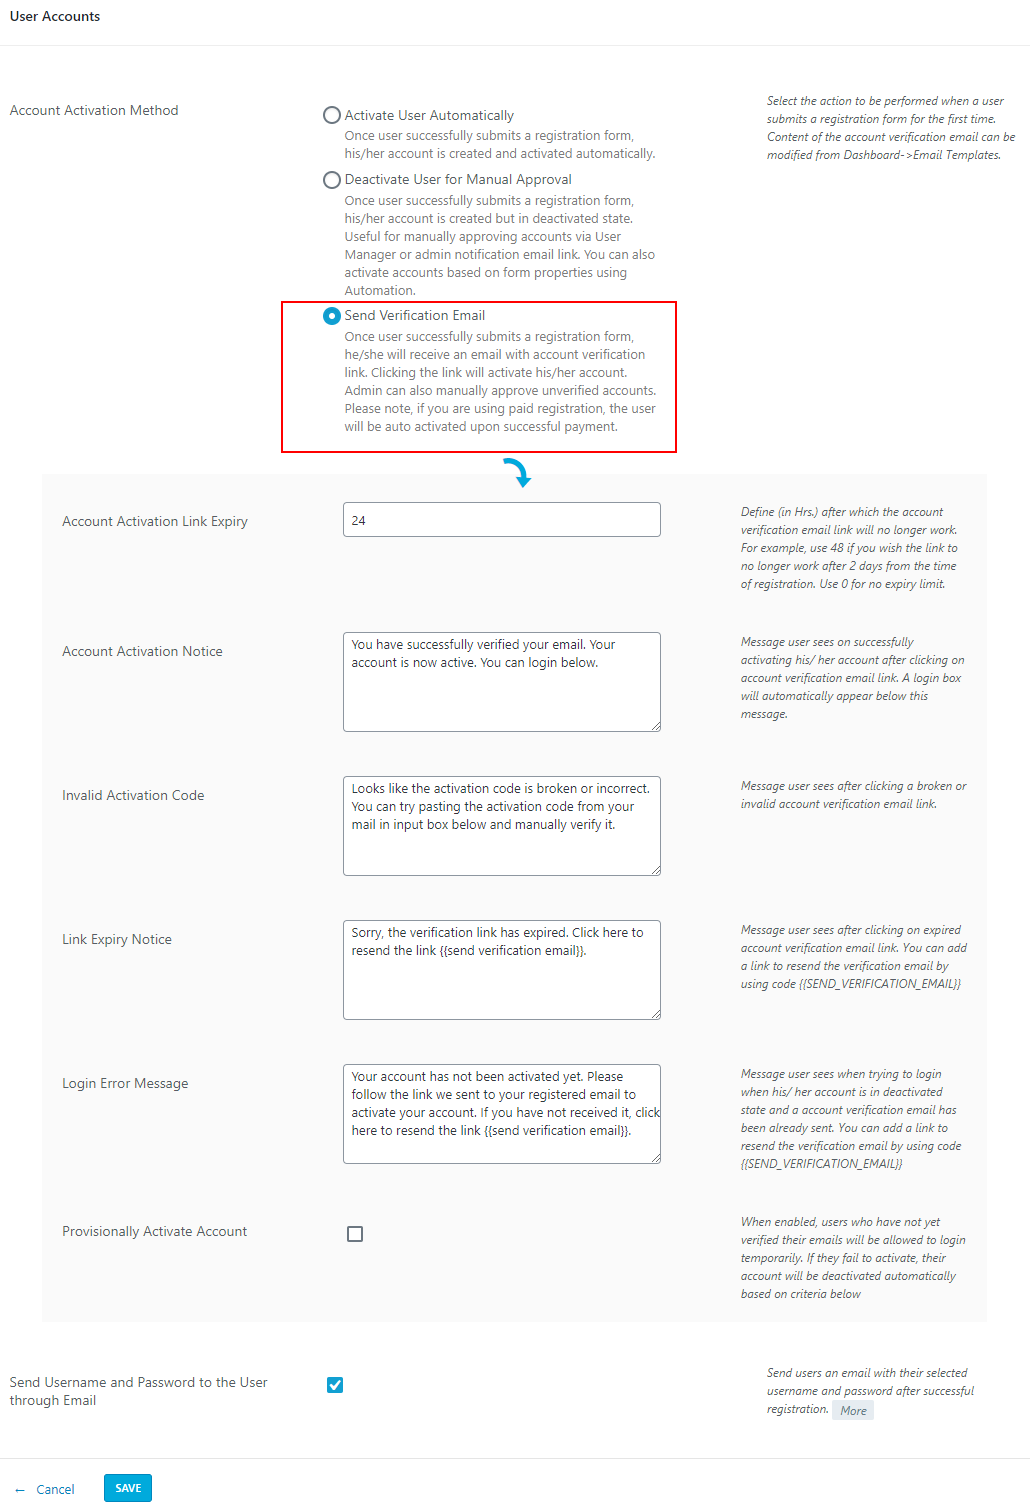
Step2: We selected the Send Verification Mail account approval method because it will allow the admin the approve WordPress user accounts without logging into the dashboard.
Step3: As we select the option, a series of settings open up. The first option being, the expiry time of the Account Activation Link. You can specify hours here. As an example, I have entered 24 to make the link last for a day.
Step4: The next field is the Account Activation Notice. Here you can type the message that you want to send in the verification mail.
Step5: Then comes Invalid Activation Code. This will let you send an error message in case your user finds the activation link broken.
Step6: Next is, Link Expiry Notice. As the name suggests, your users will get this message as the activation link expires from your mentioned time.
Step7: Lastly comes, Login Error Message. If your user faces any issue trying to log in to your site from the activation link, then they will receive this mail. This message will also hold a link that will allow them to request you to send another verification mail.
Step8: The next field, Provisionally Activate Account, will temporarily activate a user account even if they are not verified. They can log in to your site till that time. But if they fail to activate their account from the verification link, their accounts will get deactivated.
The final field ones enabled, lets you send a user’s username and password in the verification mail. In the end, click on the Save button to finish the job.
Approving User Accounts from Dashboard
Now since you have seen the fast and easy process of approving WordPress user accounts via mail, it is time you also see the process of activating user accounts from your site dashboard.
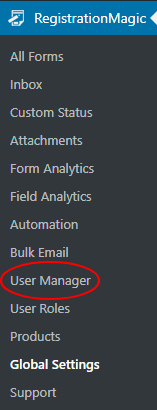
Step1: From the RegistrationMagic menu panel, click on the User Manager link.
Step2: As you land on the User Manager page, you will find a list of all your users. The new ones which are not activated yet will give the option to the admin to activate them manually.
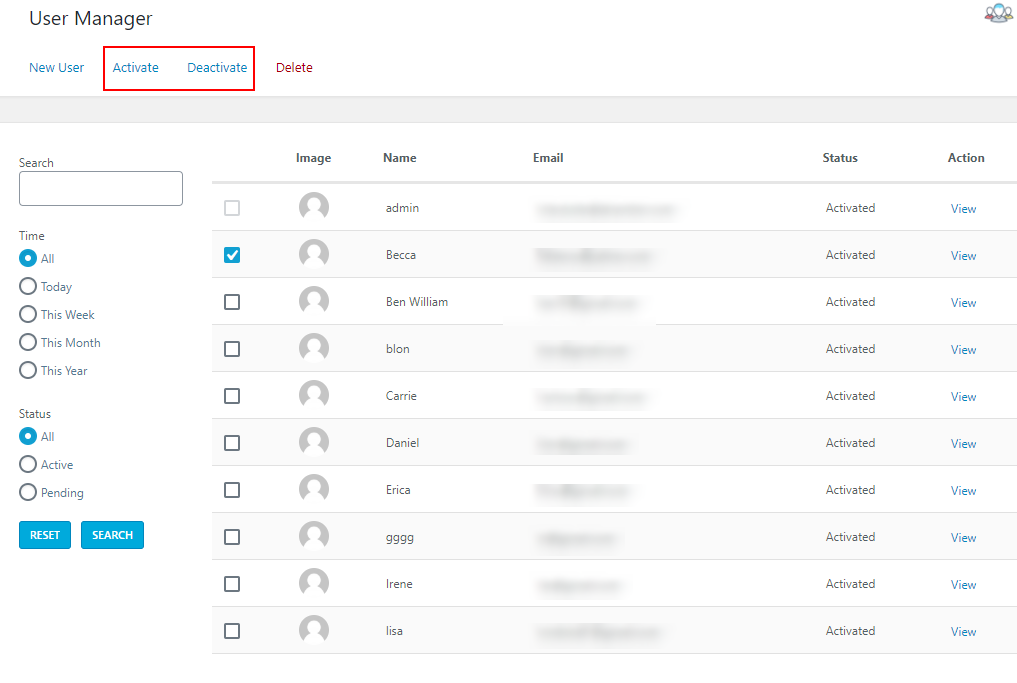
Step3: When you select a user from the checkbox beside them, you get options at the top panel to Activate, Deactivate or Delete any user.
Ending Note
So, you see how difficult it can be for the admin to activate users one by one when loads of users register to your site every minute.
The user registration process will slow down, and that might make a few users shift to another site offering similar services.
Added to that, the account activation process via mail verifies a user’s mail id and confirms his/her authenticity.
So, switch to the smarter way of operating your membership site. Just install the RegistrationMagic plugin on your site and handle WordPress user accounts like a pro. Hopefully, this article has helped you understand how to approve users in WordPress.
- Complete Automation Guide for WordPress Forms - July 20, 2024
- WordPress User Management Plugin Guide - July 18, 2024
- Add CAPTCHA in WordPress Login and Registration Form? - July 16, 2024
- How to Send Automated Welcome Emails in WordPress - July 15, 2024
- WordPress User Roles, Permissions & Role Editor [Complete Guide] - July 14, 2024
- How to Display Custom Success Message in WordPress Forms - July 12, 2024
- Publish Registration Forms and Display Registered Users - July 11, 2024
- How to Approve WordPress User Accounts Without Logging Into Dashboard - January 25, 2021
- How to Set up Two Factor Authentication in WordPress - April 4, 2019
- How to Edit or Replace Default WordPress Registration Form - April 2, 2019

I have deactivated a test user. When I try to login frontend, the following error comes up – “Your account has not been activated.”
How do I change the error message?
Hi Caetlyn,
This text isn’t editable from the plugin settings. However, you can change it using a translation editor plugin.
Sounds good! a really important feature for the admins of busy membership sites. How much user-approval I can make with this plugin? any limitation for that?
You may approve any number of users. There is no limitation set on this.