Send Automated Emails for WordPress Forms with RegistrationMagic
When there are multiple users on your membership site, automated emails for WordPress forms save a lot of manual work. The admin won’t have to worry about sending email notifications for every user registration or deactivation.
An automated email is a message sent to the user without manual intervention. Moreover, automated emails for WordPress forms strengthen the admin-user relationship. Users feel connected to your brand. Yet, the admin can manage communication with his/her users without having to compose emails for every user.
Enabling automated emails for WordPress forms with the RegistrationMagic plugin will send emails as per specified criteria to each user on your site. This WordPress registration plugin also offers filters based on user metadata to send automated emails.
With automated emails for WordPress forms, you can now convert your manual workflow post form submission to a completely automated process.
However, these days automated emails are the most preferred marketing tool for customer engagement and user retention.
According to a study by Campaign Monitor, in 2008, 40% of brands sent a welcome message to their new subscribers. Today 80% of brands send these types of automated messages.
Read More.
Complete Automation Guide for WordPress Forms
Having said so, let’s show you how you can set up automated emails for WordPress forms for your membership site with RegistrationMagic.
Navigating to the Automation page
First, install the RegistrationMagic plugin on your site. After activation, you will find the plugin menu on your dashboard. Now, go to Automation from the RegistrationMagic plugin menu.
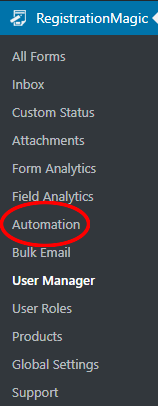
You will land on the Automation page. Here, you can see there is an option to create a New Task. This is where you can set up an Automation Task for your users. From sending email notifications to automated account activation you can do various tasks from here.
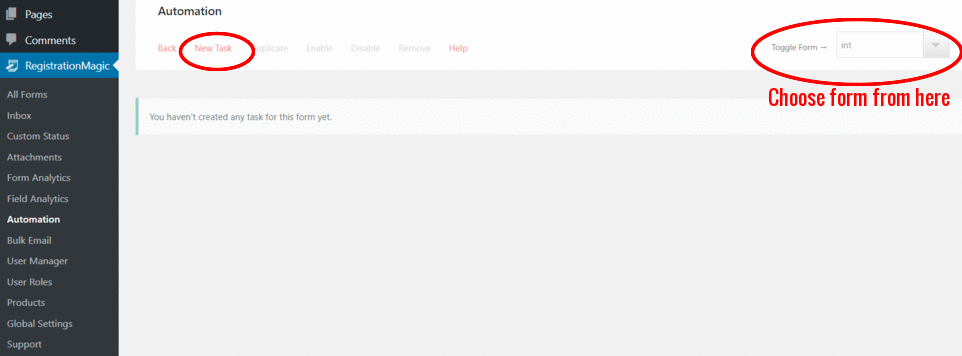
On the right corner of the page, you will also find a drop down from where you can choose a form. On this form, you can set up your automated emails for WordPress forms.
Setting up the Automation Task
Clicking on the New Task link opens up a Task Settings page. Assign a Task Name in the text area. This name will appear on your backend helping you to differentiate one task from the other.

Fill up the task description, it will help you to list down your automated tasks on the backend. Here, in our example, I wrote, “Setting up Automated Emails” as the task description.
Now, click Next to go to the next page. Here you can select one rule or multiple rules to set up the automated emails for your users.
The User Account Rule lets you select users according to the state of the account. There are two fields to choose from – Activated and Deactivated users.
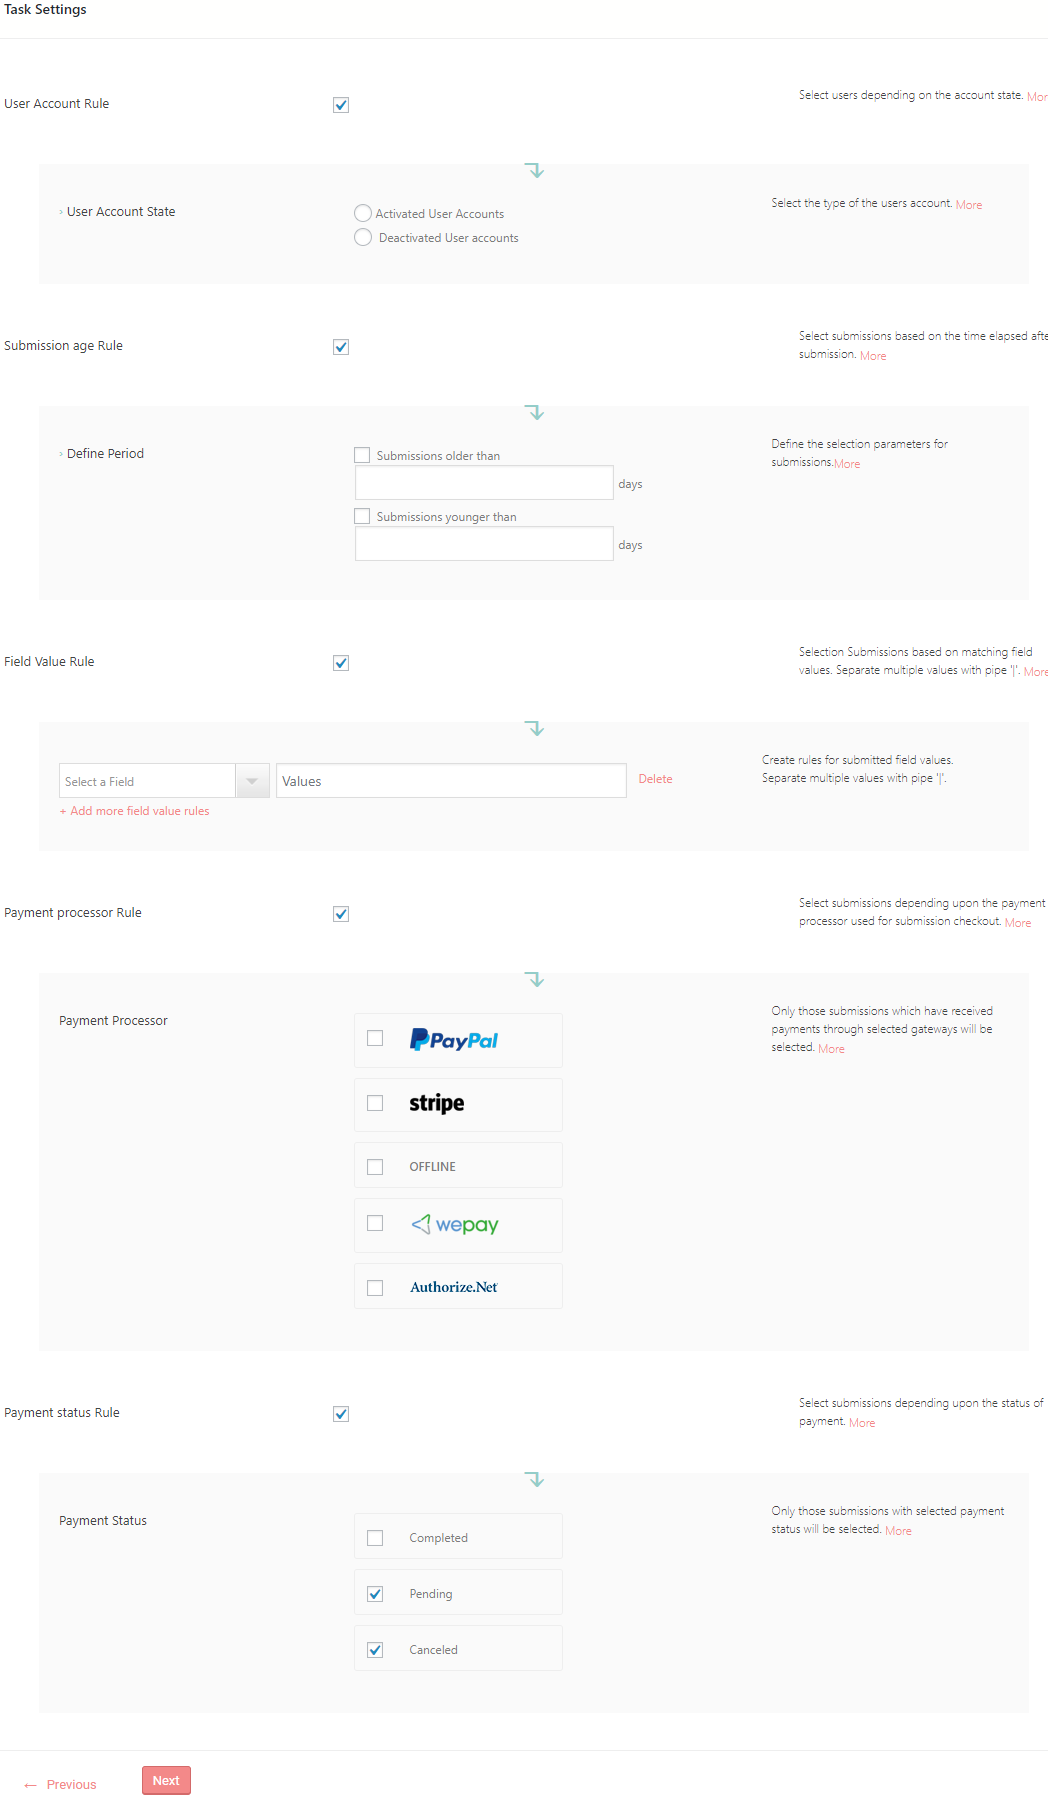
Next, the Submission Age Rule defines the age limit for submitting the form. You can specify the age from the options that appear after you check the checkbox.
The Field Value Rule chooses users based on the data field values on their forms. You can select the user data fields from your form based on which you will send the automated emails. After you check the checkbox, you can also select the fields from the dropdowns showing the fields of your form.
The Payment Processor Rule allows you to select one gateway from several payment gateways. The users with the selected gateway will be eligible to receive automated emails.
The Payment Status Rule selects users by their payment status. Payment statuses can be pending, complete or canceled.
Click Next and go to the following page. This is the page used for setting up automated emails in WordPress for your users.
Setting up Automated Emails in WordPress
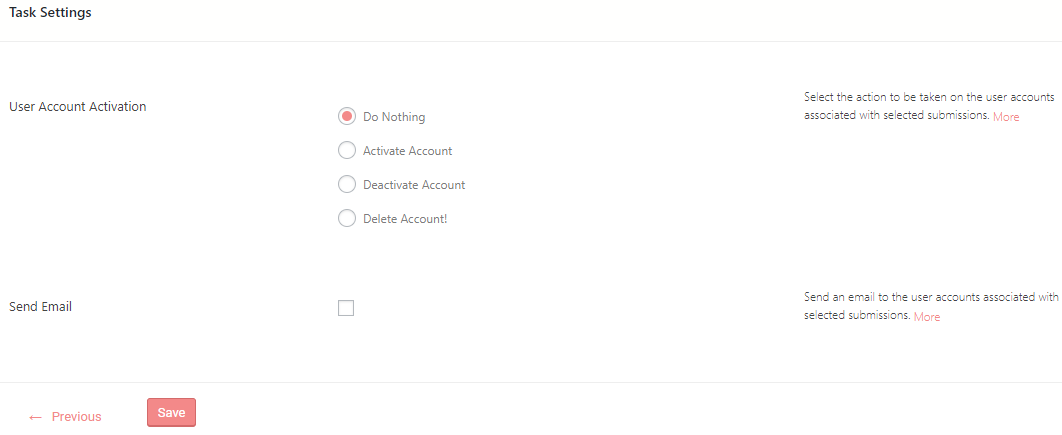
The User Account Action field gives you four choices. These include account activation, deletion, and deactivation. You can also choose to do nothing.
When you start the automation task your selection will affect the user account likewise.
The Send Email field is the main setting to compose automated emails.
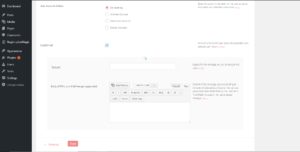
Checking the checkbox sends automated emails to user accounts that fit the selection criteria in step 2.
Next, input the content for the subject line of the email.
One can fill the Body section with HTML codes or texts. You can also insert field values by choosing a field from the Select a Field drop down. These are the fields here to which you can apply the automation rule. You can also add images, links, and videos to the email content.
Lastly, click on Save.
Now, you can see your New Task is there on the Automation page. Next, click on Run Now to start the task.
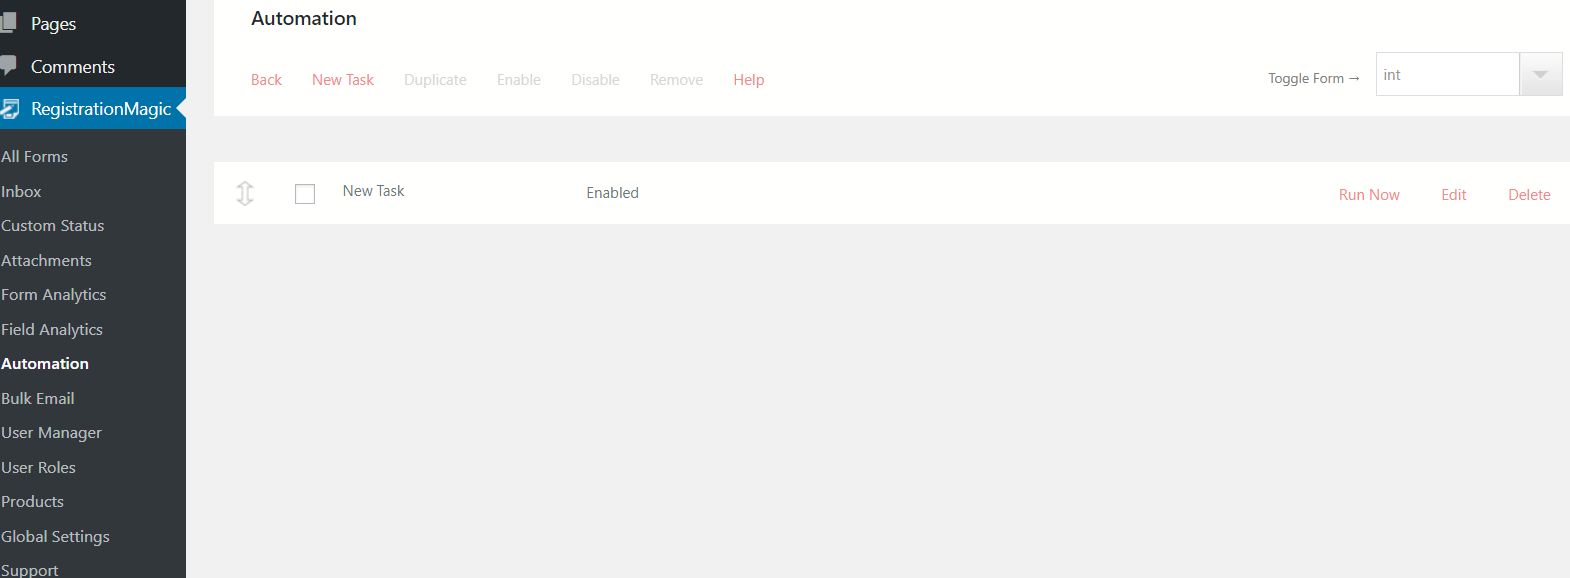
You can also click on Edit if want to make further changes to the task.
So, you see how easily we set up automated Emails for WordPress forms with RegistrationMagic. However, you can apply multiple rules and setup as many automated emails as you like, as per your need.
Usage of Automated Emails
So, with RegistrationMagic, it was quite simple to send an automated email after every WordPress new user registration. You can now send account verification or deletion warning emails to your users.
Also, since there were options to insert link and media to automated emails sending fancy emails with offers and discounts is a cakewalk.
There are also, options to include the username or first name fields of a user in these emails. Thus sending personalized emails on birthdays or special days of your users is now quite an easy task.
This way your users feel prioritized and so they keep coming back to your site. These emails basically, make the relationship between a site and its user more cordial. When users find your site name on their mailbox frequently they tend to visit your site more often. Yet the admin does not need to write every single mail.
Automated emails also come in use if you want to send out words to many people in one go. Whether its an invitation or a sudden meeting in your office. RegistrationMagic’s automated emails can notify all your staff with you having to compose just one mail.
So, rely on this plugin to take care of most of the manual work on your site. As you focus on managing your business more professionally.
- Complete Automation Guide for WordPress Forms - July 20, 2024
- WordPress User Management Plugin Guide - July 18, 2024
- Add CAPTCHA in WordPress Login and Registration Form? - July 16, 2024
- How to Send Automated Welcome Emails in WordPress - July 15, 2024
- WordPress User Roles, Permissions & Role Editor [Complete Guide] - July 14, 2024
- How to Display Custom Success Message in WordPress Forms - July 12, 2024
- Publish Registration Forms and Display Registered Users - July 11, 2024
- How to Approve WordPress User Accounts Without Logging Into Dashboard - January 25, 2021
- How to Set up Two Factor Authentication in WordPress - April 4, 2019
- How to Edit or Replace Default WordPress Registration Form - April 2, 2019
