Configure Registration Form in WordPress with RegistrationMagic
Subscription based membership sites need forms with flawless content and functionality. To do so, a site owner needs to configure registration form in WordPress and customize it to serve their purpose. Usually, a WordPress form building plugin can add necessary relevant elements to the form to make it more dynamic and efficient.
Numerous sites offer form templates to help users create professional forms. However, registration forms downloaded from the internet might not include every field that the user requires. Also, why go for common form templates when you can custom make your unique registration form.
RegistrationMagic is one such plugin that allows users to configure registration form in WordPress. Added to that, it has its own archive allowing users to download any form from its extensive list. You can download any WordPress registration form from its site for free.
By using this plugin, one can easily modify forms like the way they want to, or create a new form in case they need to. Numerous preset fields, login options come with this WordPress registration plugin to make efficient forms.
In this article, we will learn to configure registration form in WordPress with RegistrationMagic.
Adding Fields to the Form
Right after installing the RegistrationMagic you will find the plugin menu on your site dashboard.
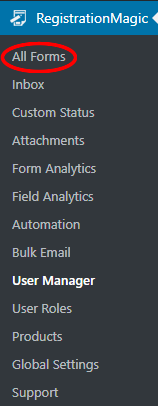
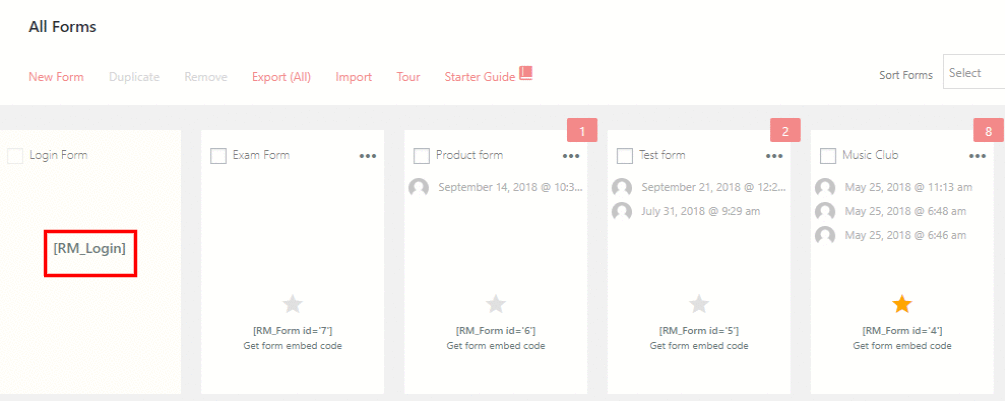
The first link on the menu All Forms will take you to the all All Forms page. This page will show you all the forms that you create through this plugin. Also, there is a Login Form on this page, with its own shortcode on the form cover. Users can publish a login form in any page on their site with this shortcode.
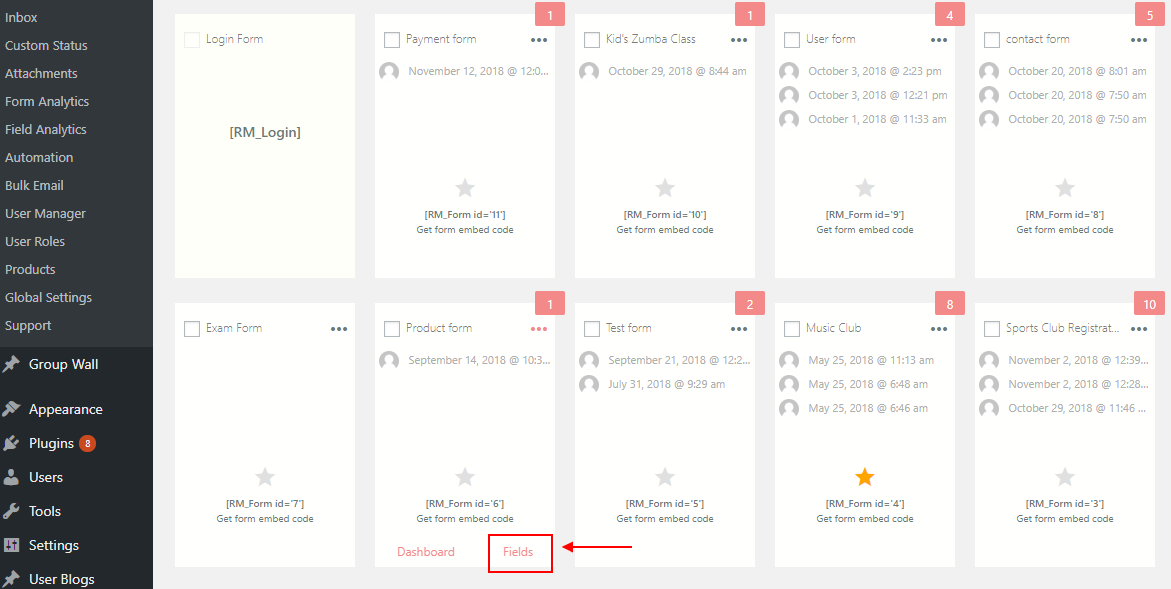
The forms in the All Forms page will show two links on the form cover if you hover the cursor on it. These are the Fields and the Dashboard link.
By clicking on the Fields link users will land on the Fields Manager page. Then when you click on the Add Fields link at the top left corner of the page, you can start adding the user data fields to the form.
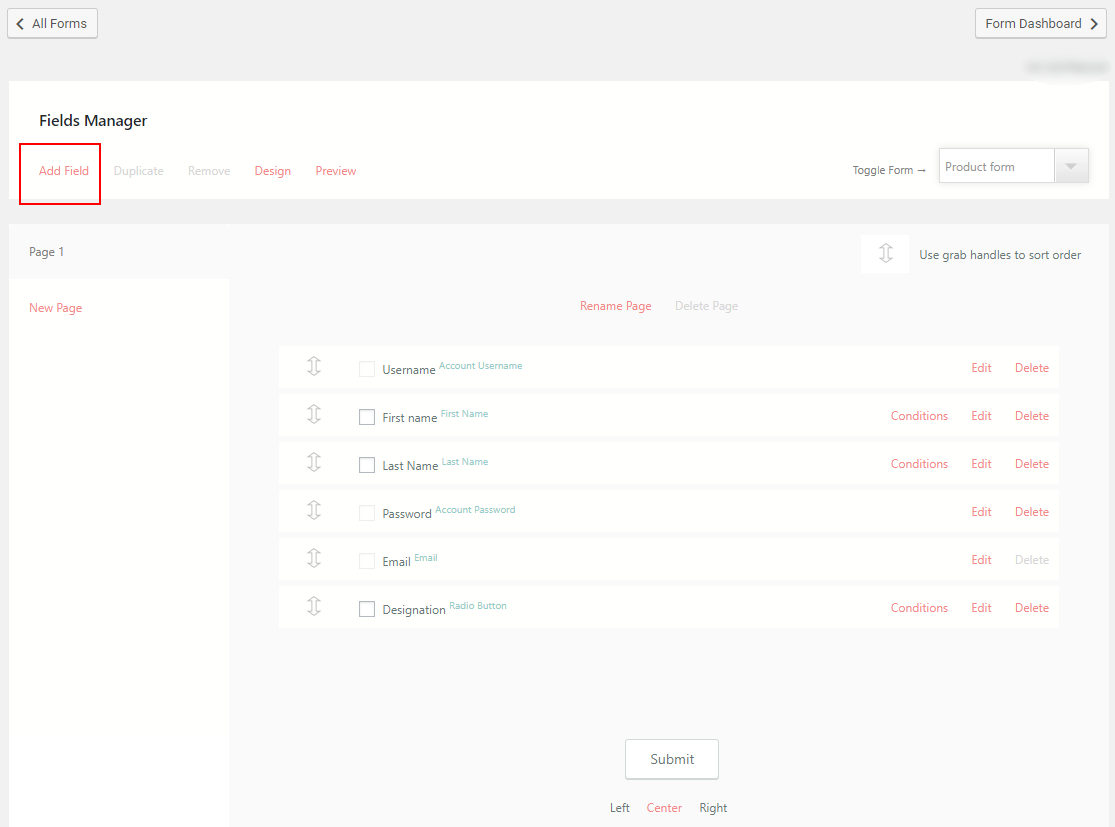
Now, a pop up will appear with all the preset fields of this plugin, those which you can add to your WordPress form.
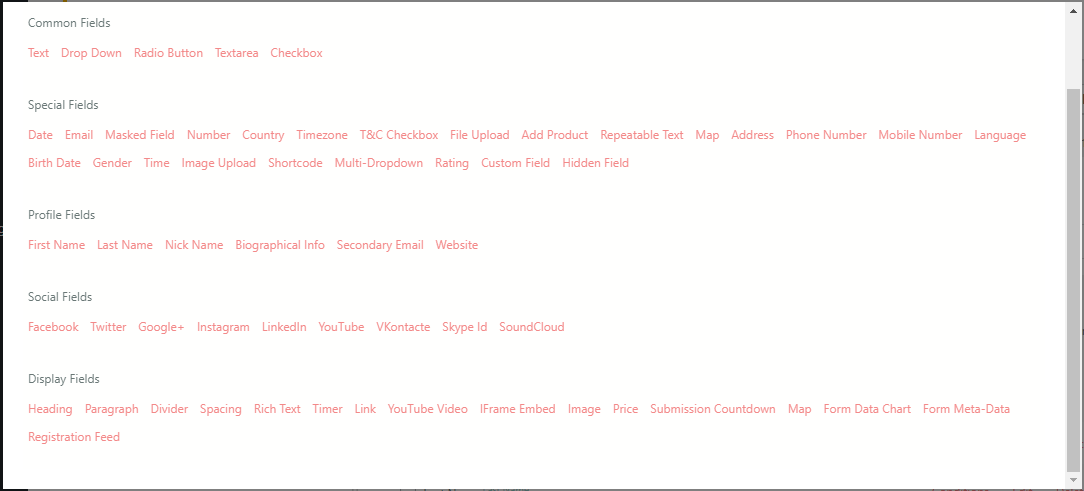
From here you can select the form type and configure the content for the frontend form. This way one can add numerous fields to their WordPress registration pages. Users can configure form number field to profiles images or time zone to social media links to their forms.
Configure Registration Form in WordPress from Form Dashboard
You can also adjust the number of submissions one single user can make. There are many other WordPress form security measures you can take with RegistrationMagic.
Go to the All Forms page from the plugin menu on your dashboard. The form we aim to configure in this case is the third form to the right. Hover your cursor on the form cover. Then, click the Dashboard link to configure the form.
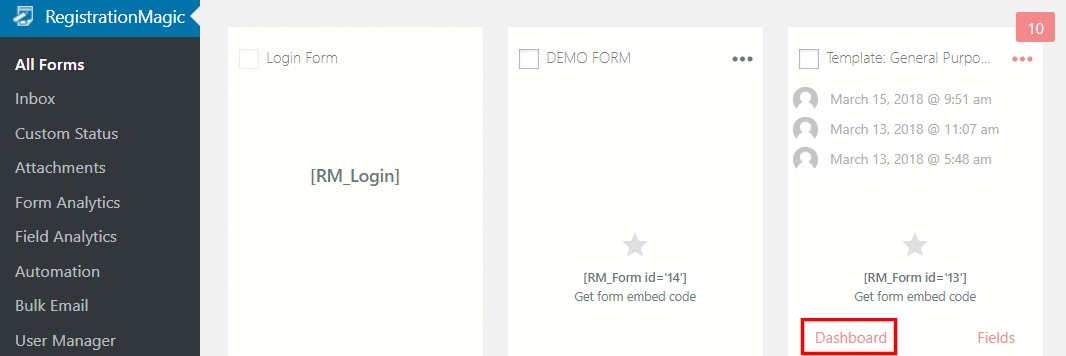
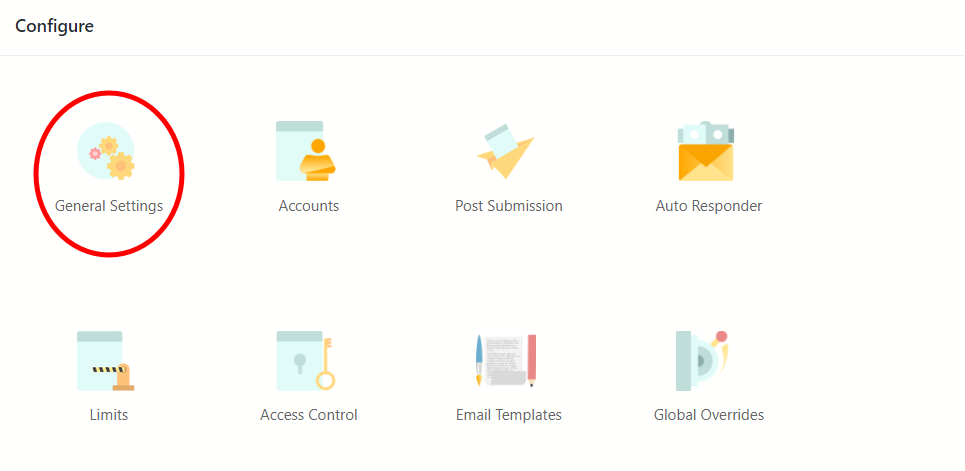
The Dashboard displays details of every form submission. In addition, it displays an analytical graph showing the form submissions made over time. Other options allow you to Build, Configure, Publish and Analyze the form dashboard. One can tweak any form setting from this section.
Scroll down to the “Configure” section which is the third subheading from the top. Next, click on General Settings and start to configure registration form in WordPress for the selected form.
Configuring the Form Template
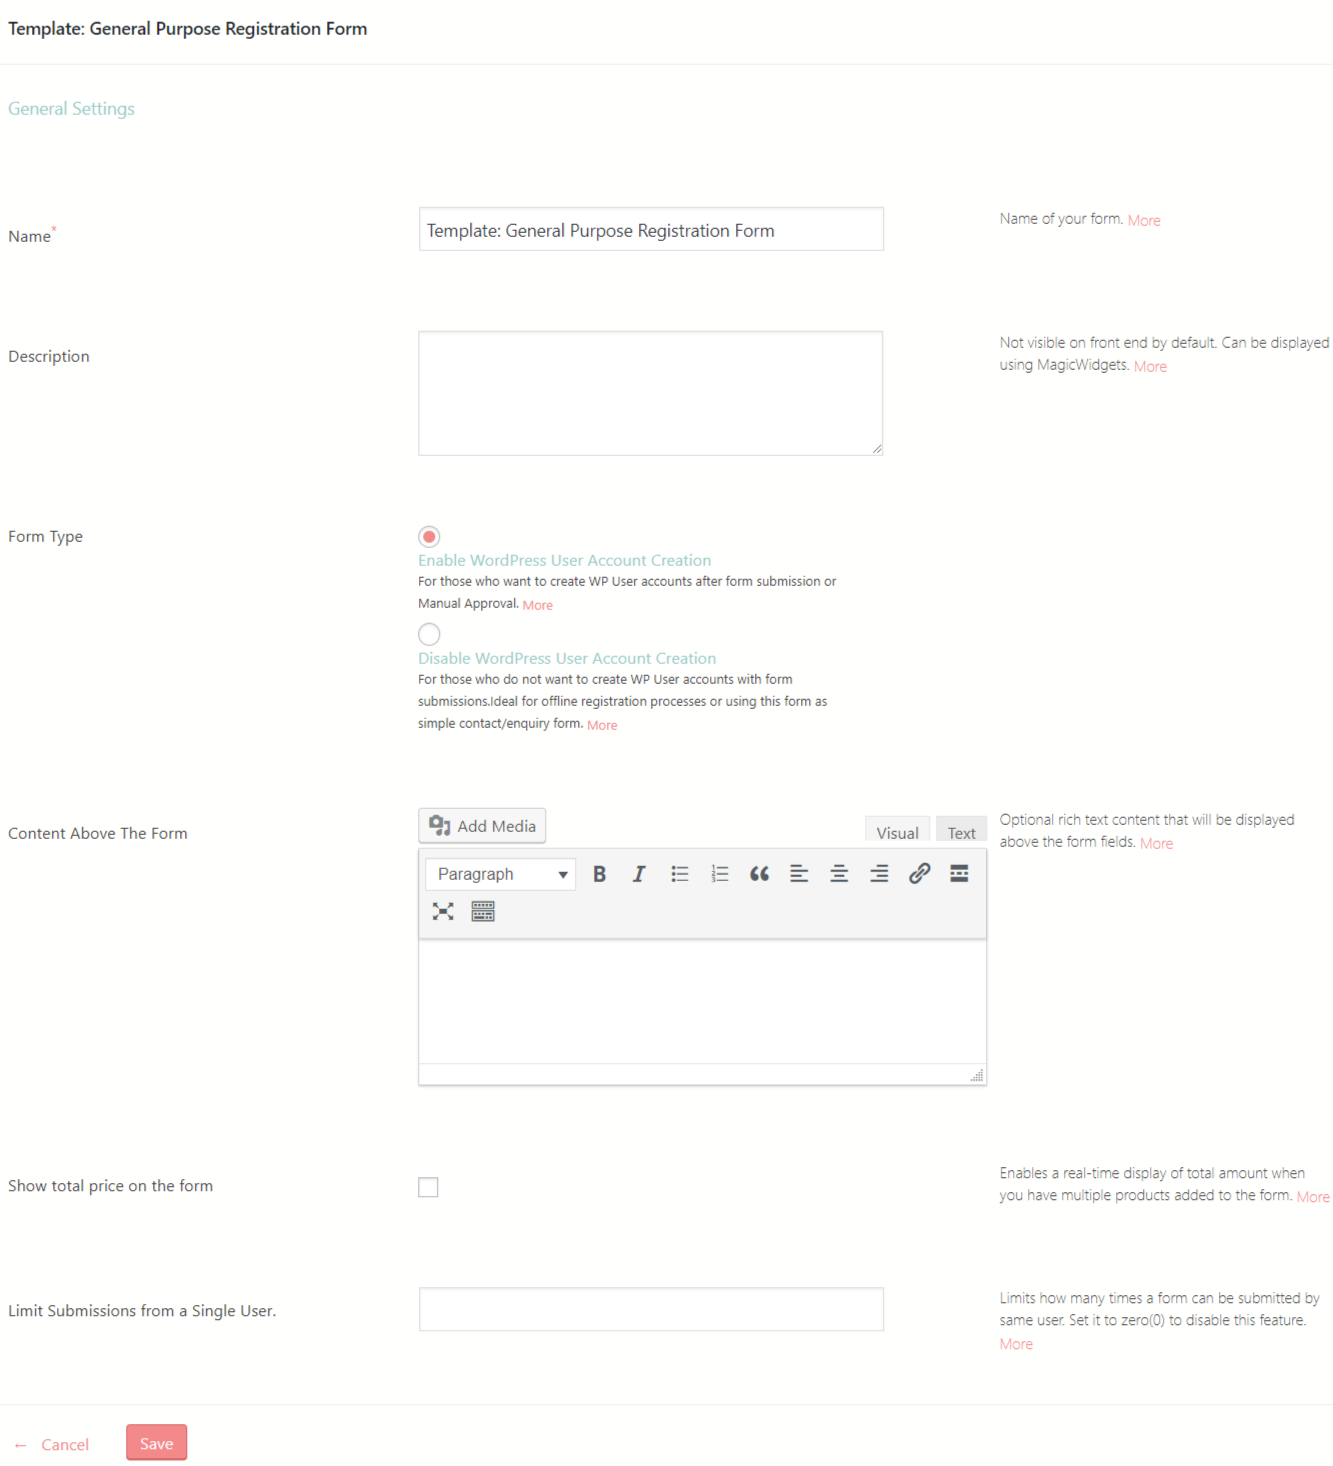
You are now on the General Settings screen of the form. The form name will display on the form cover as the form title. Form title usually is invisible to the frontend users. However, you can display your form title on the frontend with the help of the Form Meta Data widget.
The Form Description field allows you to include a brief summary of the form. Include details, features and use cases of the form in this input box.
Selecting the Form Type is quite crucial if you are looking to configure registration form in WordPress. This plugin allows the use of two form types.
- Enable WordPress User Account Creation: This form type registers users on site with successful form submission. Thus it is used for WordPress new user registration.
- Disable WordPress User Account Creation: This form type doesn’t auto-register users immediately with successful form submissions. This is for users who submit the form to address a query or make form submissions in general. In other words, it is also called a WordPress contact form.
Frontend Form Elements
The Content Above the Form field integrates an input box where you can include a text that’ll display on the frontend. This text appears just below the form title. You can address certain terms and conditions or guidelines for filling up this form in this space.
In case your form embeds multiple products, you can display the total sum of the products on your form. The total price updates itself with the addition/subtraction of every product during form submission. To sum up, checking the Show Total Price on the Form checkbox helps you configure WordPress form payment.

The underlying field defines the Form submission limit for a user. You can insert a number to set a limit for the maximum number of times a single user can submit the form. As a result, you increase the security of your form.
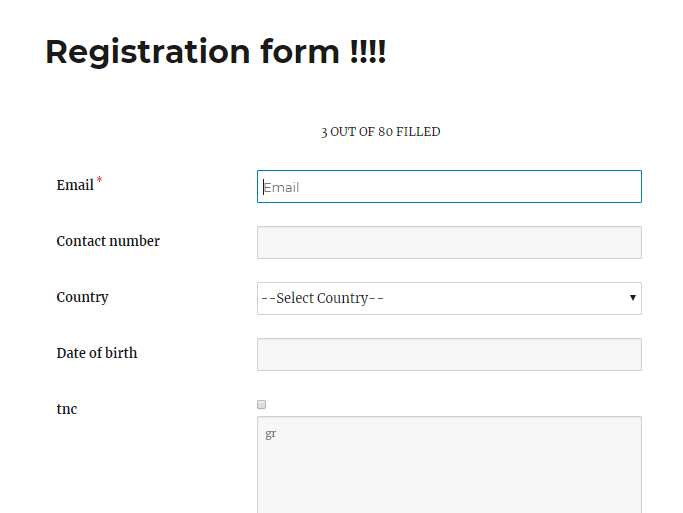
Thus, avoiding spams and fraudulent submissions using this field. Now, click on “Save” to complete the form configuration.
Smart Forms for Smart Solutions
You saw how easily we could configure registration form in WordPress. The General Settings menu of the plugin offers multiple solutions in one page. These give you the basic means to configure your content, security, and type of form. With RegistrationMagic, users can easily convert a contact form into a registration form.
Thus you can use a contact form to collect user details on your site. Then, convert the same form into an account creation one so that your users get a user profile on your site. If you want to maintain a lightweight site then this is a great solution.
Also, the security and payment option on the forms become very useful for e-commerce sites. Who count their revenue on user conversion. So any spam user restricts their authentic user count thus limiting users to one form submission comes in use. Also, form payments in RegistrationMagic come with multiple payment processors like Stripe, PayPal and offline options. Thus opening up options for transactions directly through your form. Allowing you to collect membership charges, cart totals via WordPress forms
For more information on RegistrationMagic, visit our Facebook page.
- Complete Automation Guide for WordPress Forms - July 20, 2024
- WordPress User Management Plugin Guide - July 18, 2024
- Add CAPTCHA in WordPress Login and Registration Form? - July 16, 2024
- How to Send Automated Welcome Emails in WordPress - July 15, 2024
- WordPress User Roles, Permissions & Role Editor [Complete Guide] - July 14, 2024
- How to Display Custom Success Message in WordPress Forms - July 12, 2024
- Publish Registration Forms and Display Registered Users - July 11, 2024
- How to Approve WordPress User Accounts Without Logging Into Dashboard - January 25, 2021
- How to Set up Two Factor Authentication in WordPress - April 4, 2019
- How to Edit or Replace Default WordPress Registration Form - April 2, 2019
