Add WordPress Form Number Field with RegistrationMagic
One can use the WordPress form number field for taking user data in numeric values such as unique identification number, account number, etc on the registration form. Number fields are extremely essential to create a complete registration form aimed at taking only authentic users.
A WordPress form Number Field accepts numerical value inputs only. Users cannot add alphanumeric texts to this field. So, this field in a form declines any other value confirming whether the user is entering a correct data.
To broaden the scope of your WordPress registration form you need to install a form building plugin that offers custom fields to add to your form. RegistrationMagic is one such plugin that offers an array of custom user fields including the WordPress form Number Field.
So, let’s proceed to add the WordPress form number field to online forms with RegistrationMagic.
Navigating to the Number Field
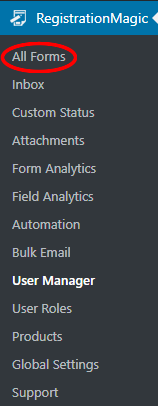
From your WordPress dashboard, go to the “All Forms” section in the RegistrationMagic Plugin menu.
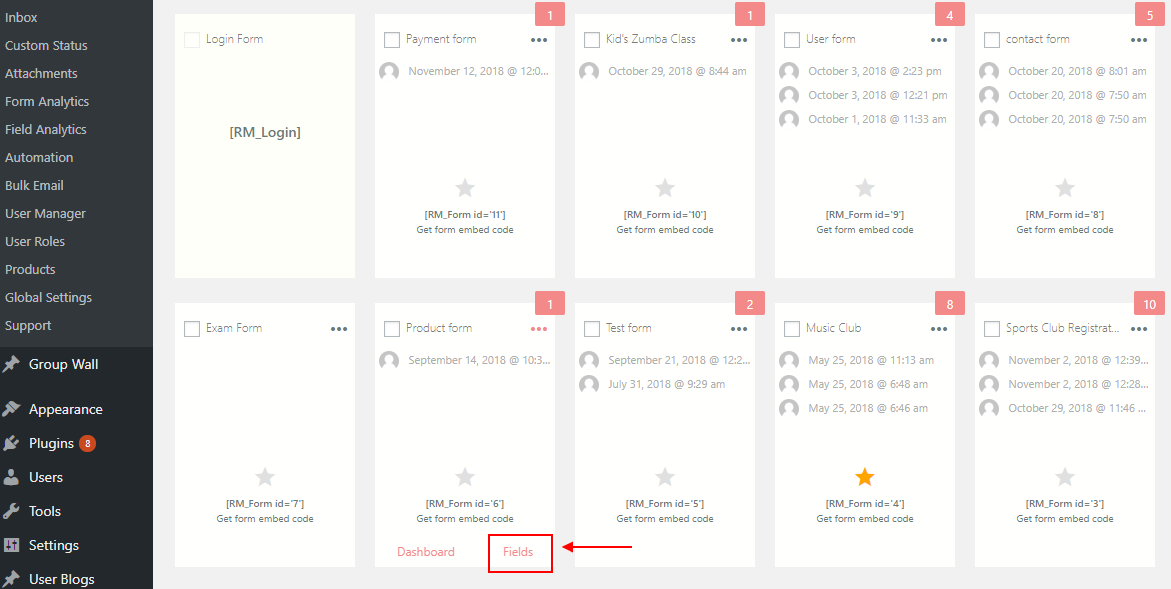
Hover over a form cover and you will find the “Fields” link along with Dashboard. By clicking on the Field link go to the “Field Manager” page.
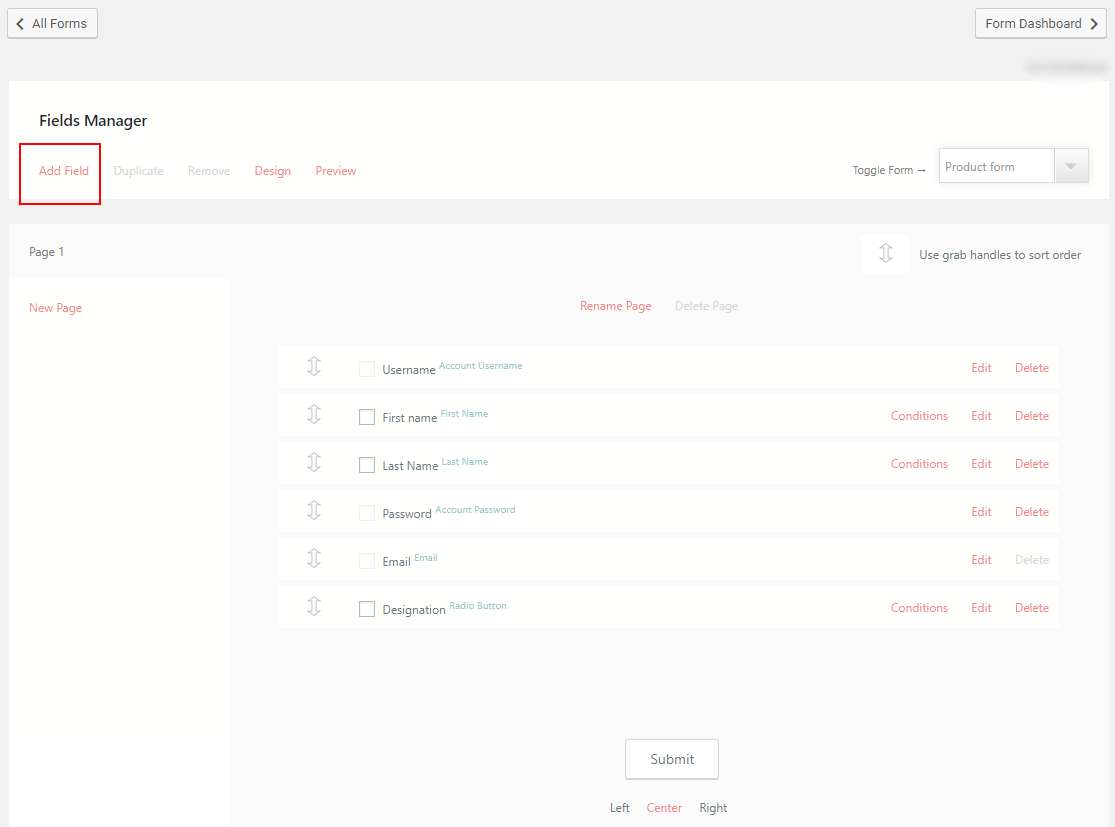
So, now here, you click on the Add Field link at the top corner of the page to see the wide range of fields from RegistrationMagic.
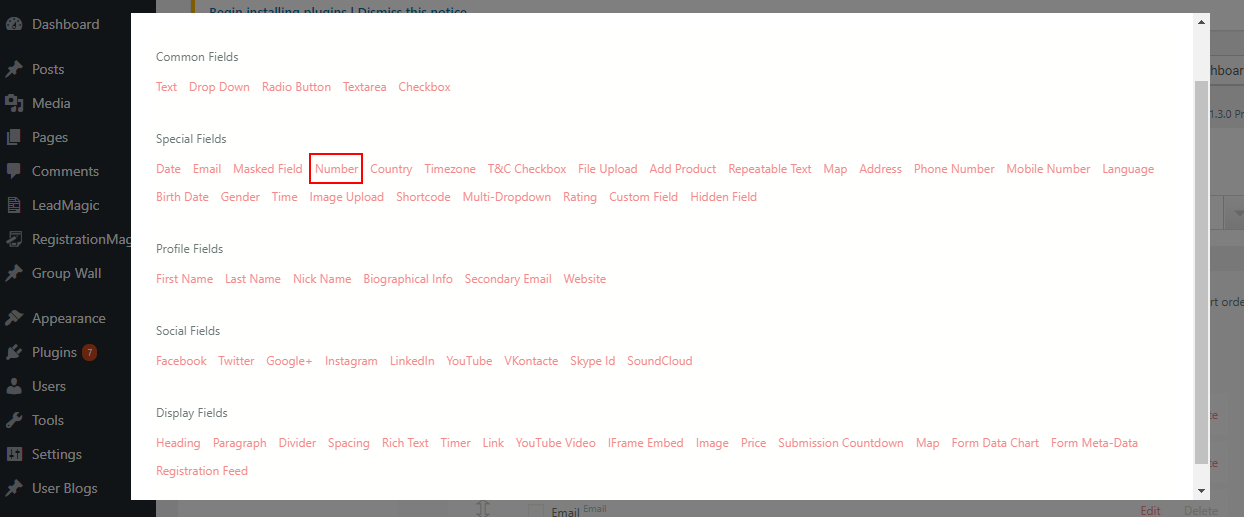
A pop-up will appear consisting of all the predefined Fields of this WordPress profile plugin.
However, any new form that you build with RegistrationMagic comes with three mandatory fields email address, username, and password. Along with them, users can choose to customize their forms with these custom fields.
So now, you will be able to see all the fields sectioned under different subheadings. Click on the Number Field under Special Fields.
A page titled “New Field” will appear. Here you will find different fields namely label, placeholder text, hover text, icon, and advanced settings.
Configuring your WordPress Form Number Field
Here the Field Type stays as “Number” since we need this field to allow the users to the only input value in numbers. Name the Label as something which will help you recognize the number field on the frontend. In our example, the Label is “Unique Identification Number”.
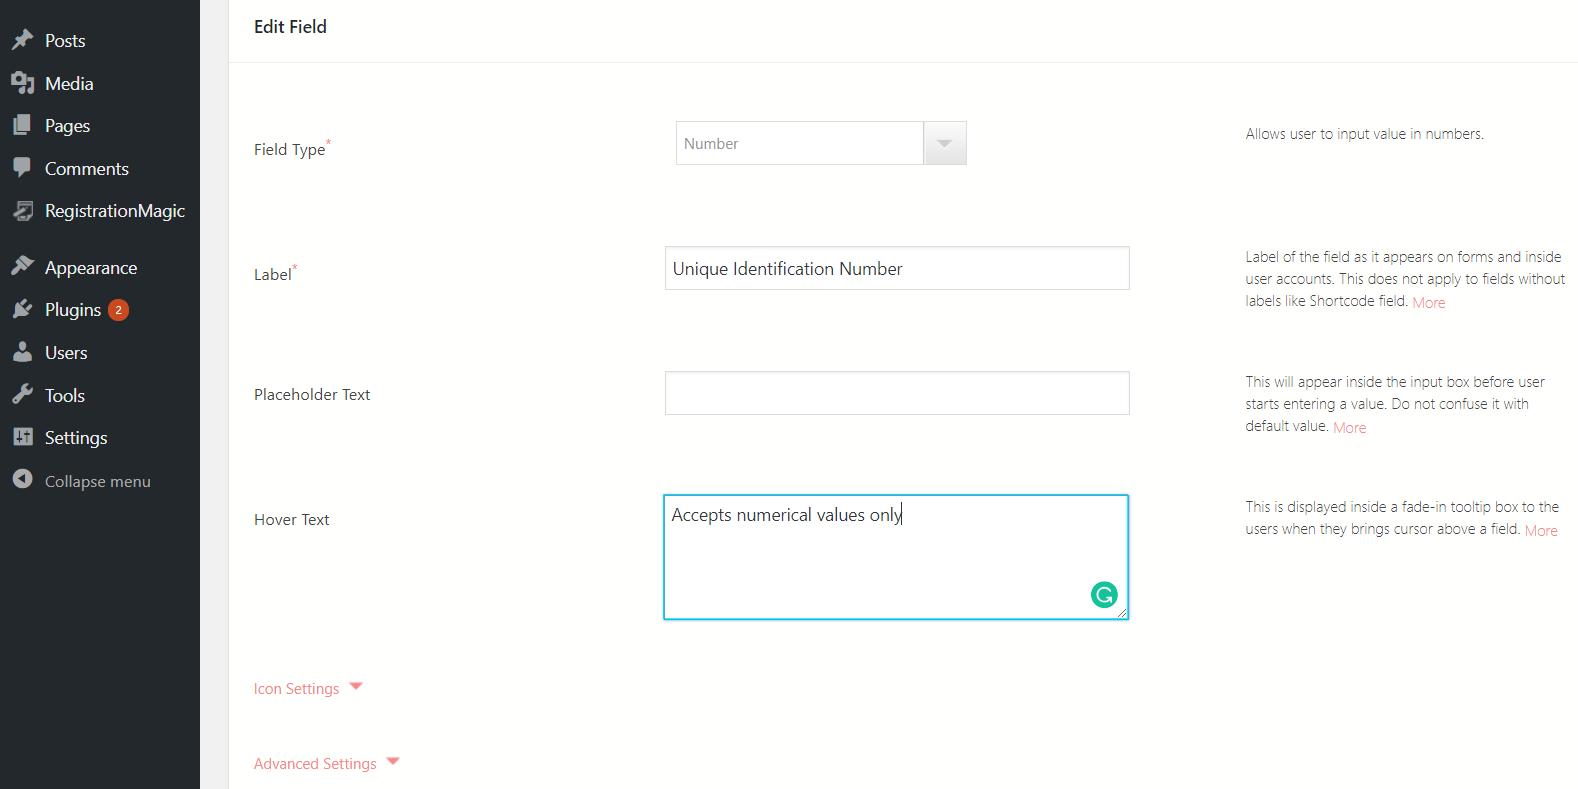
The Placeholder Text field holds the text which appears inside the input box just before the user enters the value.
The Hover Text section is to provide a basic description of the field. In our example, we have filled it with “Accept Numerical Values”.
Navigate to Icon Settings. This will create an Icon just before the field where the user will enter the text.
Next options are Icon Colour and Icon Container. Icon Color provides a particular color to the icon. Icon Container chooses the background color of icon container.
Container Capacity and Container Shape determine the capacity and shape of the icon’s container.
Lastly, scroll down and click on Advanced Settings. Here, you will find a lot of fields incorporated. Let us take them up one by one.
Advanced Options
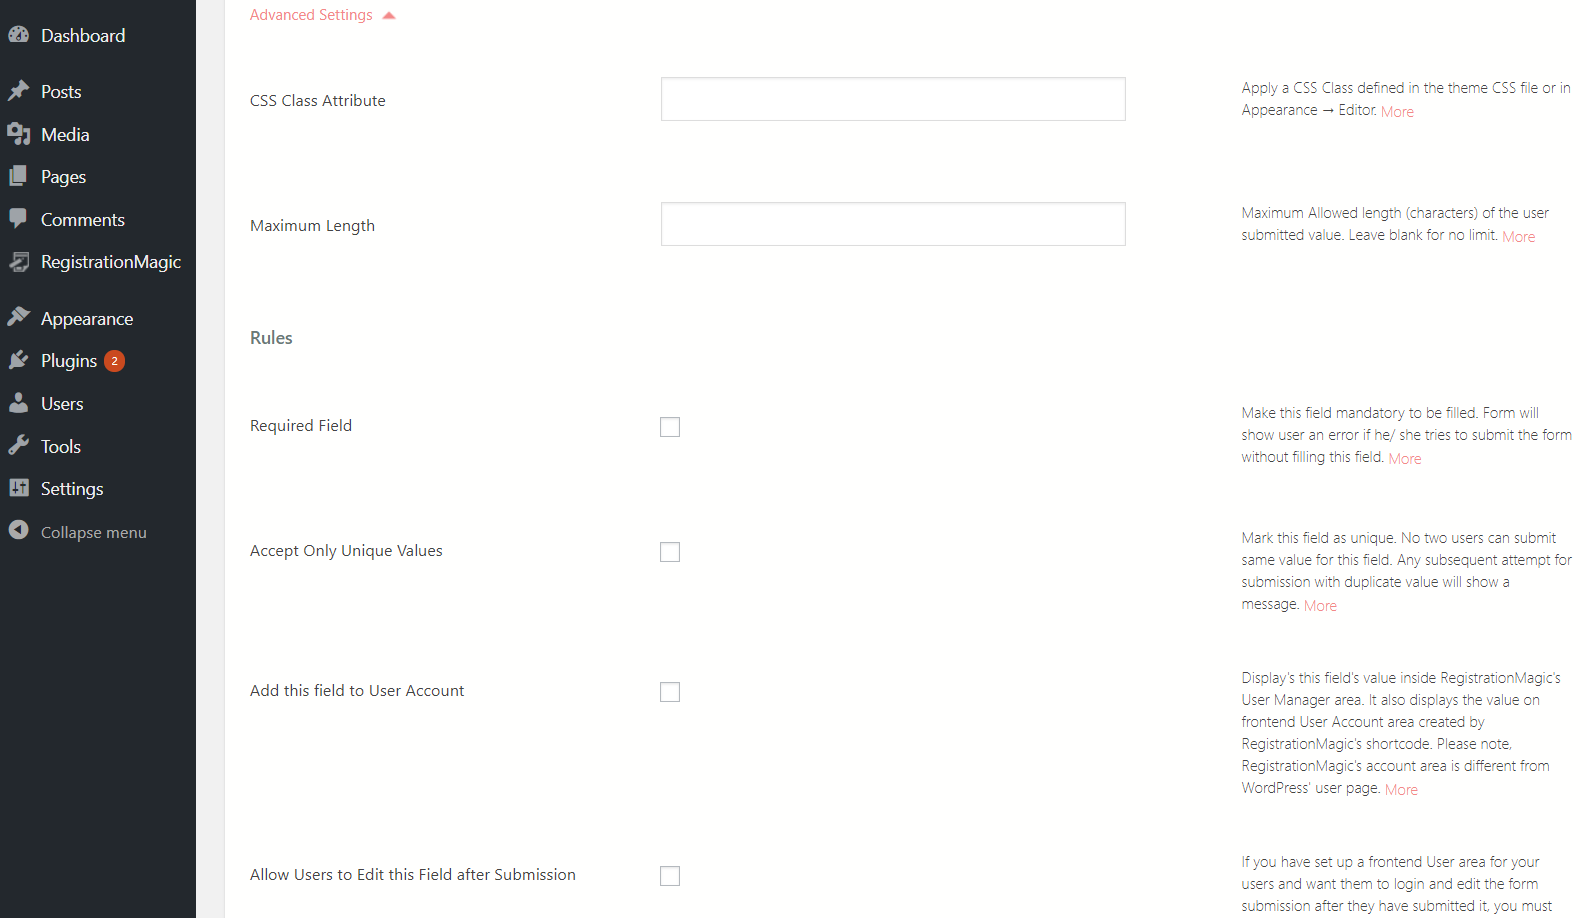
You can add CSS class attribute from here. However, the HTML must be a predefined attribute.
Then, assign the maximum number of field length as per your need. This will set the limit as to how many digits can be entered in the input box.
Next, the “Required Field” denotes that it is mandatory to fill this field.
Mark the checkbox and move on to the “Accept only Unique values”. This field determines whether you are inserting the same value again and again into the form.
Set the message as “This entry has already been used. Please use a different one”.
The next segment “Add this field to User Account” showcases this value in RegistrationMagic’s “User Manager Area”. It displays the value on the frontend of the user account developed by RegistrationMagic’s shortcode.
The last checkbox is for admins to decide whether they want to allow users to edit their data inputs even after they have submitted the form.
Finally, after configuring all the necessary settings on this page, click on the “Add to Form” button.
Configuring the Number field into your WordPress form
Copy the shortcode from the form card and navigate to Pages on your WordPress dashboard.

Click on Add New and paste the shortcode in the body section of the new page created. Click on Publish and your form is now live on the frontend.
So, your Number field set up is complete now. Now, go to the frontend of your site to see your form with the Number Field applied to it. The screenshot shared below shows how your Number field will look on your registration form.

Furthermore, admins can create a custom user area page and make all the user inputs in their registration forms appear on the frontend. Here they can access their user account and edit them whenever they wish.
A Plugin for Diverse Needs
So you see, RegistrationMagic is your answer to add more value to default WordPress forms. Thus helping site builders procure diverse data from their users. Moreover, they don’t even need to create a full-fledged site to register users. This WordPress registration form plugin helps users to create intelligent contact forms for site owners to gather contact details of their visitors.
Further, this plugin makes it really easy to register members for courses, classes or workshops. Where they can also choose to restrict user access by date in WordPress forms. Added to that, there is also an entire page dedicated to designing forms in an interesting and fun way.
So build your custom registration forms and attract more users to your site. Thus create more opportunities for your online business and earn more revenue with your user base.
- Complete Automation Guide for WordPress Forms - July 20, 2024
- WordPress User Management Plugin Guide - July 18, 2024
- Add CAPTCHA in WordPress Login and Registration Form? - July 16, 2024
- How to Send Automated Welcome Emails in WordPress - July 15, 2024
- WordPress User Roles, Permissions & Role Editor [Complete Guide] - July 14, 2024
- How to Display Custom Success Message in WordPress Forms - July 12, 2024
- Publish Registration Forms and Display Registered Users - July 11, 2024
- How to Approve WordPress User Accounts Without Logging Into Dashboard - January 25, 2021
- How to Set up Two Factor Authentication in WordPress - April 4, 2019
- How to Edit or Replace Default WordPress Registration Form - April 2, 2019
