Display Custom Success Message in WordPress Forms
In order to assure a user that his/her form submission has been successful, sites often display a success message. If you host a professional registration based site, then you might want to display custom success message in WordPress to confirm every successful submission. Users feel prioritized when they know they are being monitored by an authorized site owner.
RegistrationMagic allows users to create intelligent forms to serve different purposes. But the success message for every form is in general, the same. The success message displays itself on the frontend of your site.
With our WordPress registration forms plugin, you don’t need to work much to configure a success message. You can actually display custom success message in WordPress using just the “Configure” section of this plugin.
One can choose to redirect your user to a different page after form submission and display success message in WordPress. One can also keep the user on the same page and display the message there itself. So, let’s proceed with our today’s tutorial, where we discuss how to display custom success message in WordPress.
Navigate to Customize the Success Message
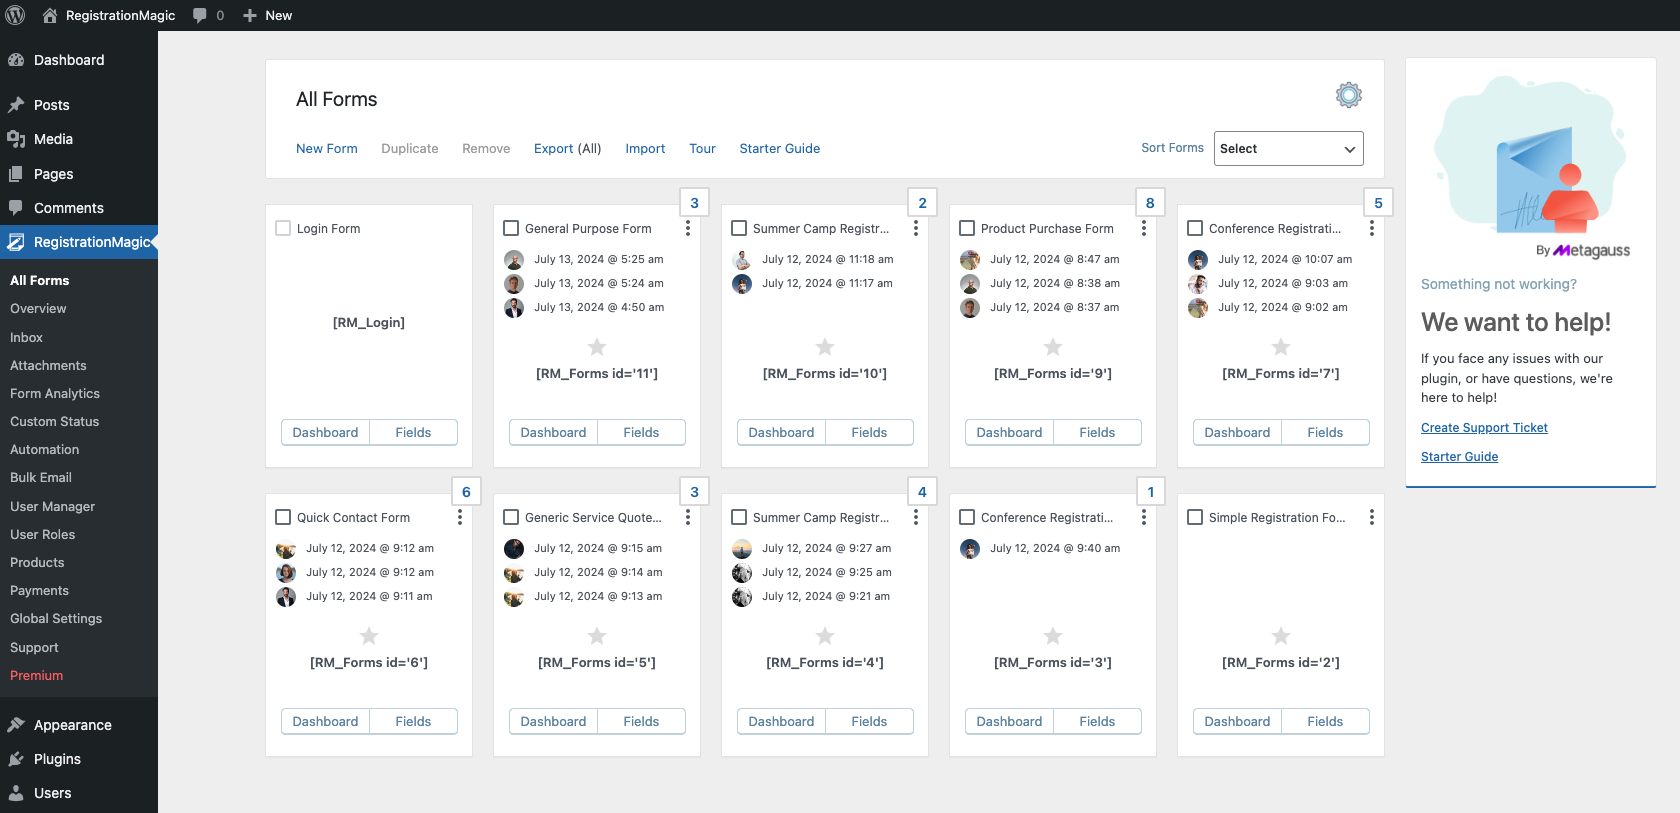
From your WP dashboard click on the plugin menu. The first tab underlying this plugin is the “All Forms” tab. Archived in this section is each and every form created to date.

In this example, we configure success message for users submitting the General Purpose Form. This is the form located to the right side of the “Login Form”.
Hover your cursor on the form envelope and click on the dashboard link. Using this section, you can manage, analyze and configure forms. From here, you also get to set WordPress user roles.
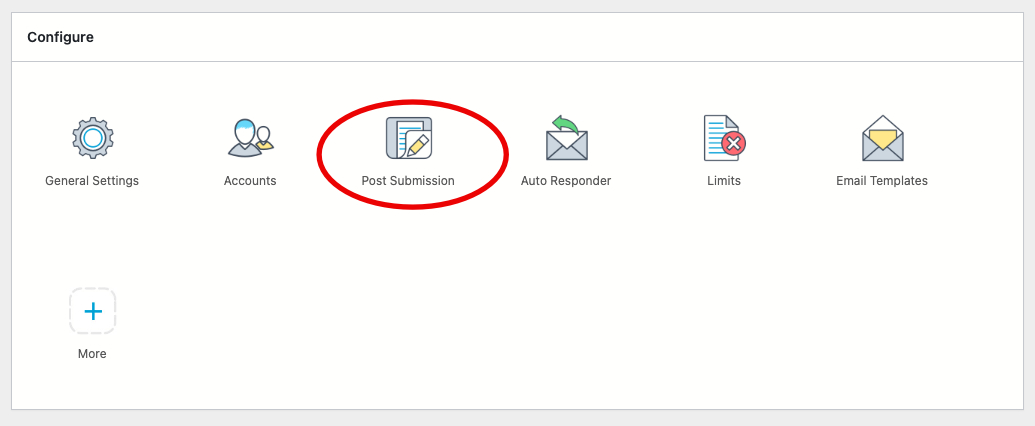
Scroll down directly to the Post Submission area. This area allows you to manage activities after a successful form submission. Using this section, you can also display success message in WordPress. So now, go to the Post Submission area to configure your success message.

Configuring the Success Message
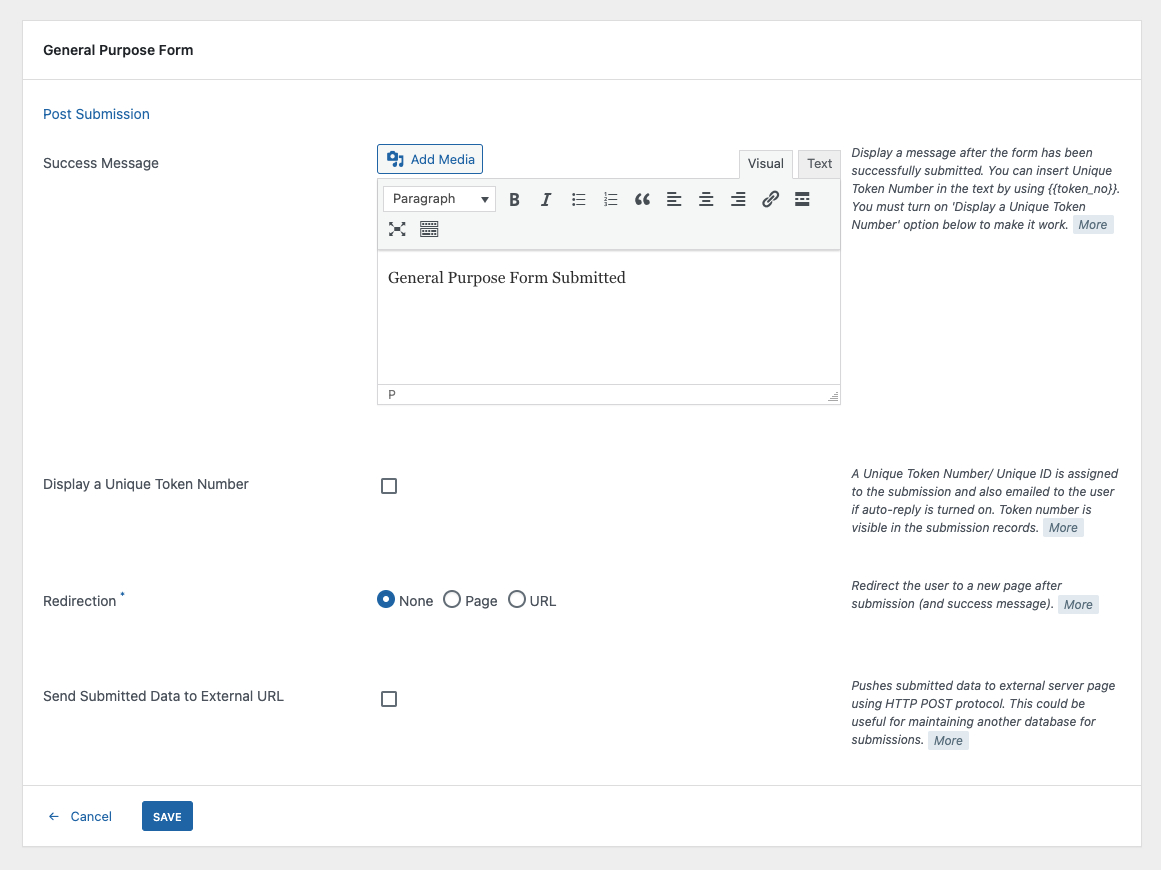
The primary field allows you to write a success message inside the input box. This is the message which users will see upon successful form submissions. You can even add media files such as an image or video to decorate the success message. In this instance, we use “The Form was submitted successfully” as the success message.

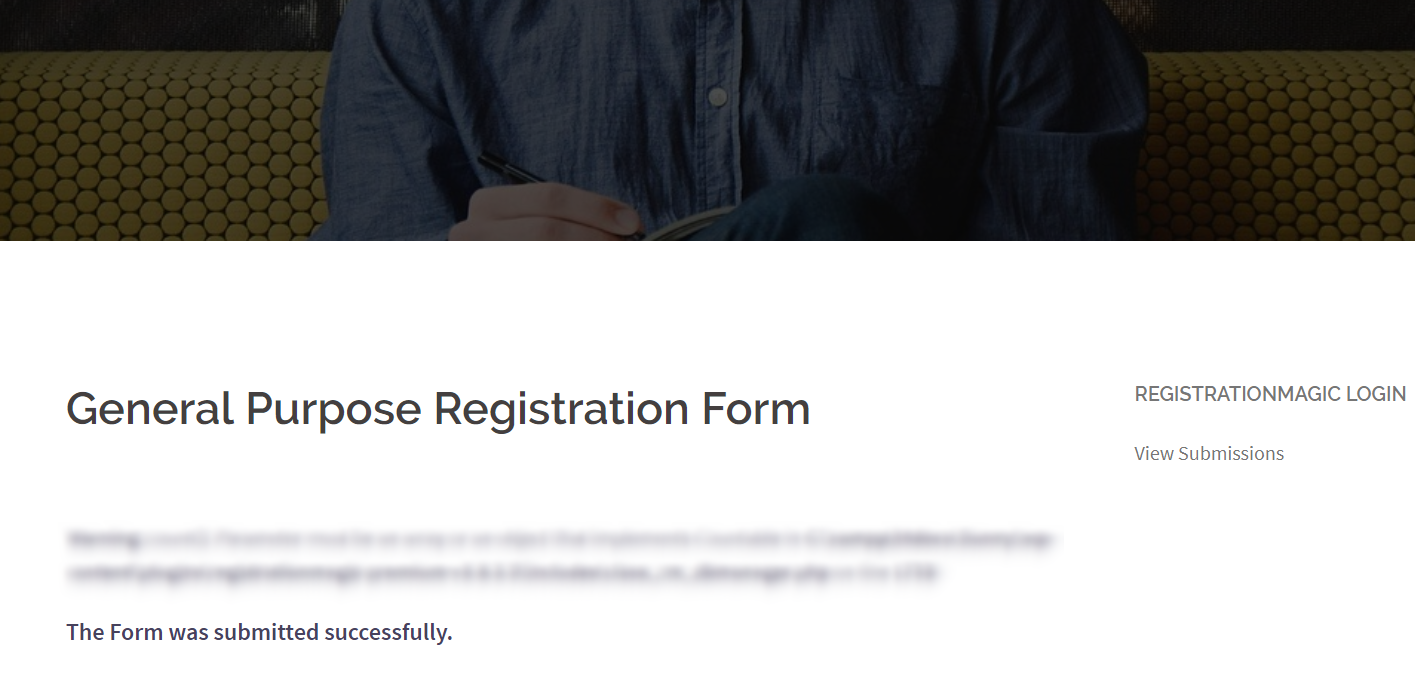
Shared below is a screenshot displaying the success message on the frontend, post form submission. Your users need to complete filling the form. Then, click on “Submit” to view this message. You can also have payments associated with your form. There you have the liberty to make your users submit form before collecting payment.

Other fields in this section help you display a unique token number. Turning on the ‘Auto Reply’ feature generates a unique token number. This token number goes into the mail inbox of the user once he/she submits the form.
Toggling the “Redirection” field takes the user to a different page after form submission. You can paste the URL or the page link where you want to redirect the user after form submission. You can also avoid redirection by selecting the “None” radio button. Consequently, your success message will be visible on the same page.
The last field, lets you submit form data to external URL. In case your current server crashes, the form data can be retrieved. As a result, you can maintain a different database for form submission.
You saw how easy it was to display custom success message in WordPress. Online form creation becomes really smooth with this plugin. It also lets you create intelligent contact form along with user registration forms. There are several fields to choose from to create functional forms. No need to code or design pages. Thus, even amateurs prefer this plugin.
- Complete Automation Guide for WordPress Forms - July 20, 2024
- WordPress User Management Plugin Guide - July 18, 2024
- Add CAPTCHA in WordPress Login and Registration Form? - July 16, 2024
- How to Send Automated Welcome Emails in WordPress - July 15, 2024
- WordPress User Roles, Permissions & Role Editor [Complete Guide] - July 14, 2024
- How to Display Custom Success Message in WordPress Forms - July 12, 2024
- Publish Registration Forms and Display Registered Users - July 11, 2024
- How to Approve WordPress User Accounts Without Logging Into Dashboard - January 25, 2021
- How to Set up Two Factor Authentication in WordPress - April 4, 2019
- How to Edit or Replace Default WordPress Registration Form - April 2, 2019

Tres bon article Merci
thank you