WooCommerce Checkout Form Custom Fields
Goal of this Tutorial - Learn how to add custom fields to WooCommerce checkout form page and capture additional user information. Also, learn how to check the captured information inside the dashboard area later.
If you are running an online store using WordPress, chances are you would be using the excellent WooCommerce plugin. Honestly, nothing rivals popularity of WooCommerce among ecommerce WordPress plugins. It’s powerful, easy-to-use, and open source system with everything to get you started right away. In a sense, it is the very embodiment of spirit of WordPress itself. But just like WordPress, in specialized cases you will need to customize or extend its functionality to completely fit your needs. That is not necessarily a bad thing since not everyone needs all the bells and whistles from start. And it also allows a flourishing WordPress community offering solutions for different types of businesses with niche requirements.
As an ecommerce site owner, one of the most common things you do is to collect information about your users. And as common knowledge says, it must be done in subtlest way possible. You wouldn’t want to riddle your store with popups and customized forms. One thing that every buyer expects while shopping online is to register an account on the site while making their first purchase. It appears natural therefore, to collect information while the user is checking out, since it is part of completing the buying process - and almost nobody minds filling out the checkout form at that moment. Now here’s the bummer - there is no built in option to modify the WooCommerce checkout form page.
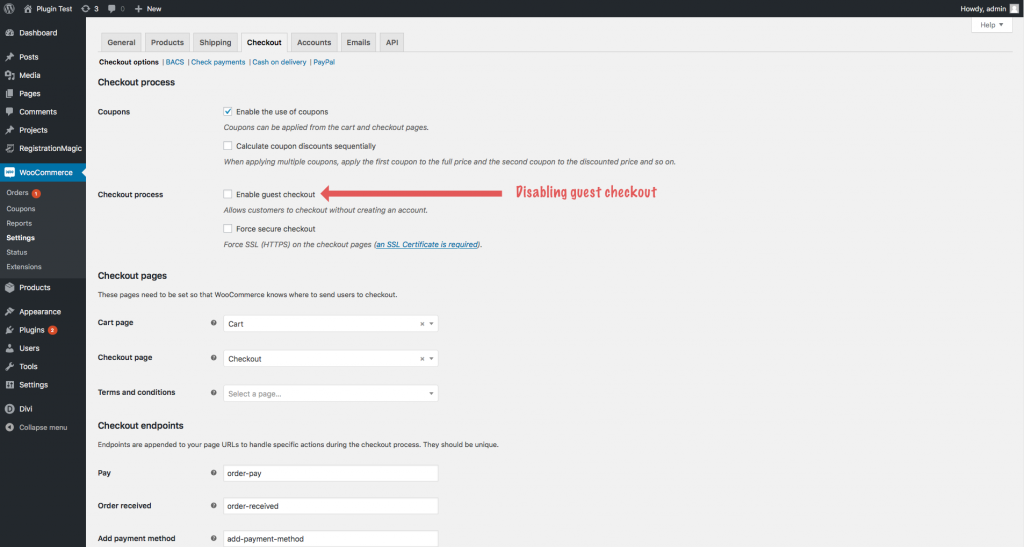
Since you have already found your way here, I am sure you would be curious to know how to get around this little problem of customizing WooCommerce checkout form. The solution below does not requires any knowledge of coding whatsoever and you won’t need tinkering with any files either. But there are couple of prerequisites that ask for very little effort. Firstly, guest checkout should be turned off in your WooCommerce Settings (Go to WooCommerce → Settings → Checkout Tab → Checkout Process and uncheck Enable guest checkout). See, if you are allowing guest checkouts, you are essentially okay with customers not creating an account during purchases, which is absolutely fine by the way. It is also quickest way to allow checkouts to new customers. But when guest checkout is turned on, WooCommerce does not renders its registration form during checkout, leaving us with no way to hook custom fields. Therefore, it is a decision you must make before moving. Secondly, you should have a copy of RegistrationMagic Premium installed and configured. Once these two things are taken care of, we can proceed with the actual implementation of customized WooCommerce checkout form.
Now to capture user information, we need a user registration form. Creating registration forms is straightforward in RegistrationMagic and you can easily add custom fields to it. While creating the registration form, please keep in mind that we will be hooking custom fields in this form to WooCommerce registration form, thus creating a single expanded form. The custom fields of this form will appear below the regular WooCommerce registration form fields.
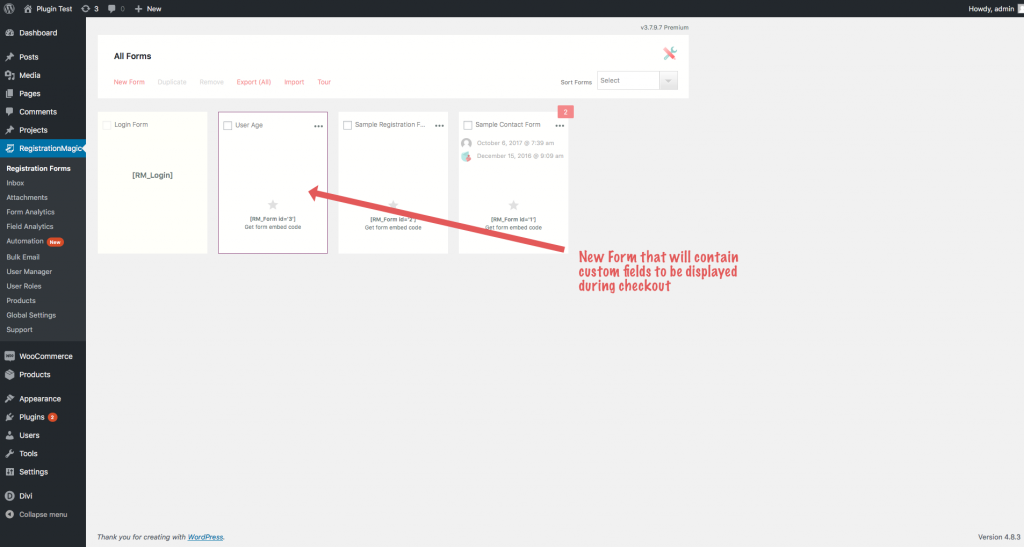
For the purpose of this demonstration and for simplicity, we will only add a single custom field to WooCommerce checkout form. Suppose we wish to collect data about users’ age while they register. This is a field not available in default WordPress profiles. First, you’ll need to create a new form in RegistrationMagic → Registration Forms → New Form. In the next popup, name it (although you are free to name it anything you want, for this example we’ll name it User Age). Keep default form type selected and save it. You’ll now see the form card appear in All Forms area.
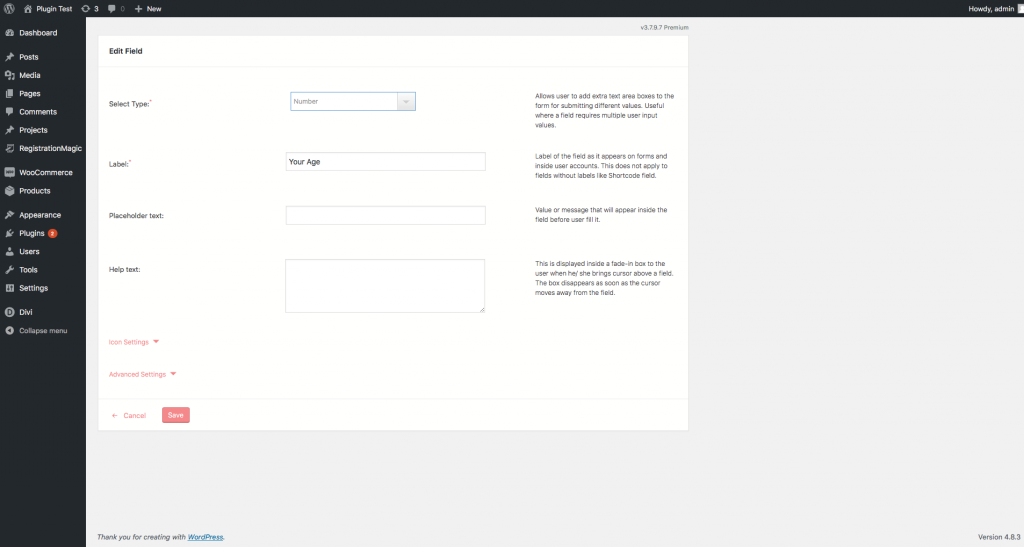
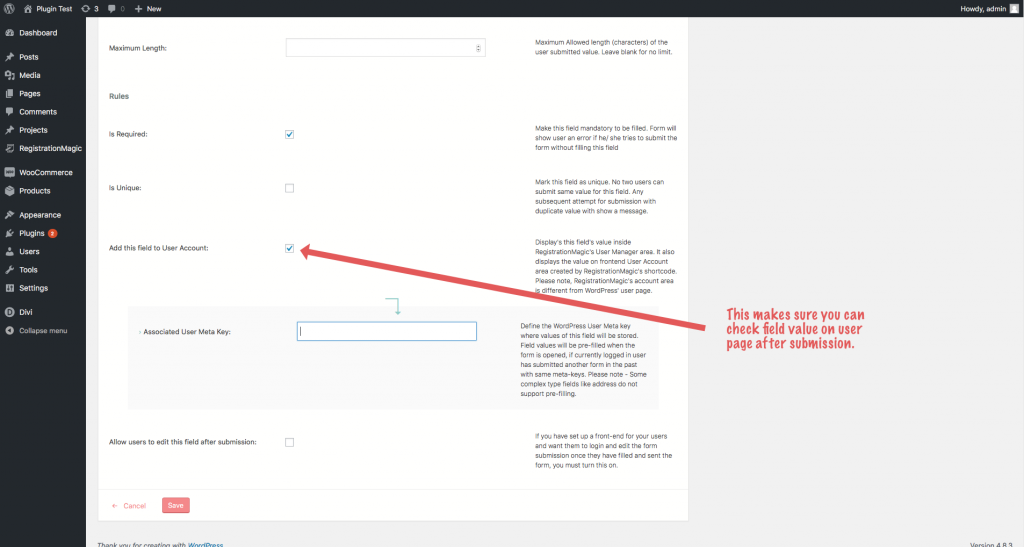
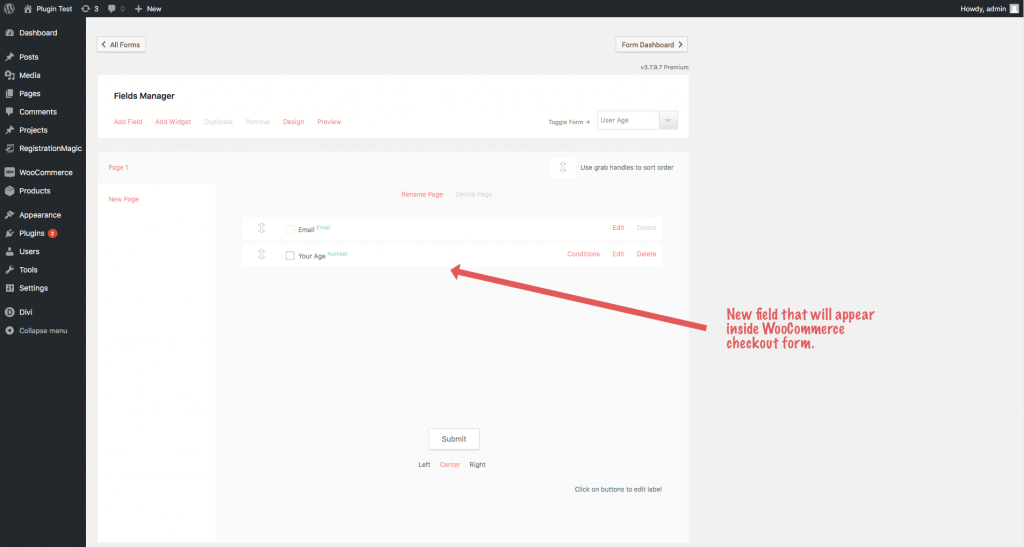
Next, click Fields link on the form card, which will take you to Fields Manager. Click on Add Field and in the new popup select Number field type. In the field settings, choose a label for this field. Here we’re labeling it Your Age. Also enable Add This Field To User Account and define a user meta key if you already have one. Additionally, if you want to make this field mandatory, enable Is Required option. Save it and you are done here.
Next, we will add this form to WooCommerce registration form. For that, go to RegistrationMagic → Global Settings and click on WooCommerce Integration tab. Inside you will find an option Registration Form with a drop down list of forms you have already created in RegistrationMagic. Select the form User Age (or whatever you had named it). Hit save.
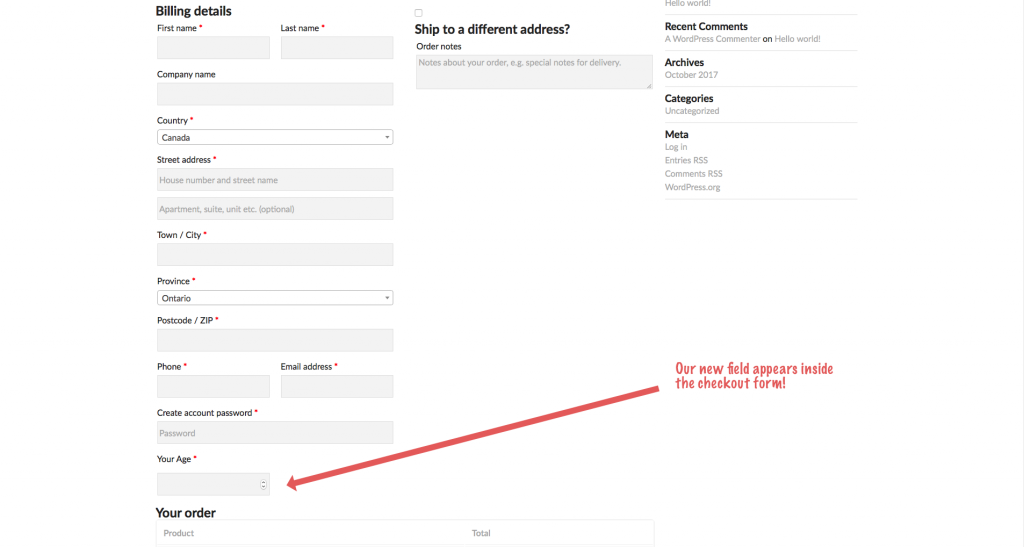
You have now successfully added the RegistrationMagic registration form to WooCommerce registration process. To quickly check it, let’s visit the store and purchase a product. Make sure you are not logged in. Add a product to the cart, click View Cart and then Proceed to checkout. On the new page you can now see Your Age file visible down below at the end of the registration form.
Fill the required information and complete the process. Congratulations! Once the order has been created, you have successfully captured some extra user information during the WooCommerce checkout process.
But how will you check it?
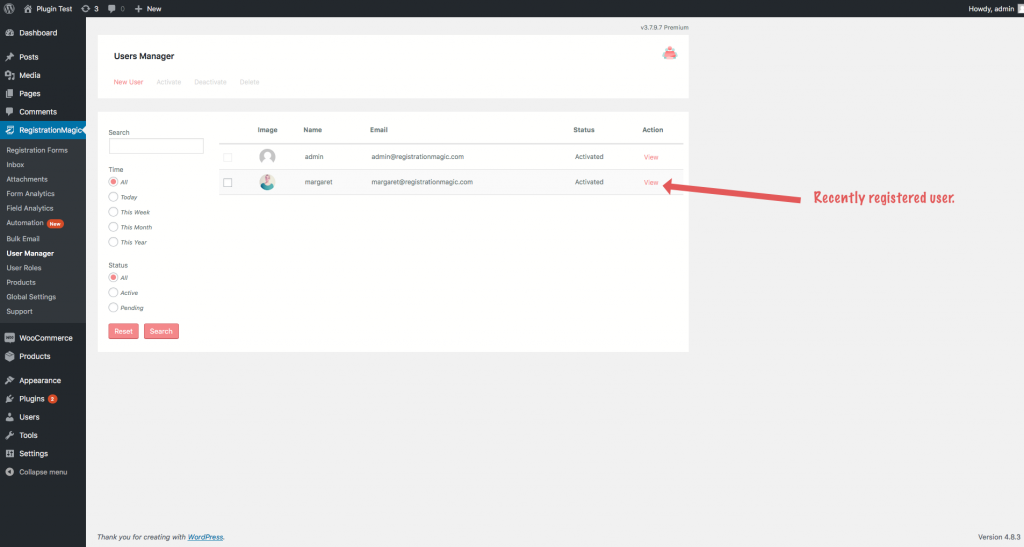
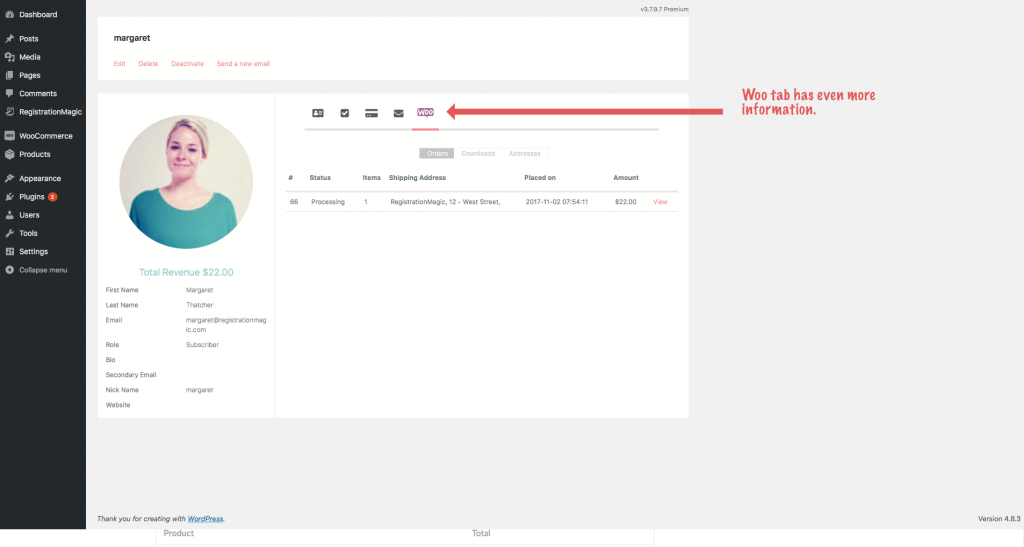
One way of doing this is by going to RegistrationMagic → User Manager inside the Dashboard. You’ll have to log in once again as admin. Here you’ll see that RegistrationMagic displays a lot of WooCommerce information right inside its User Pages. Click on View in front of the recently registered user.
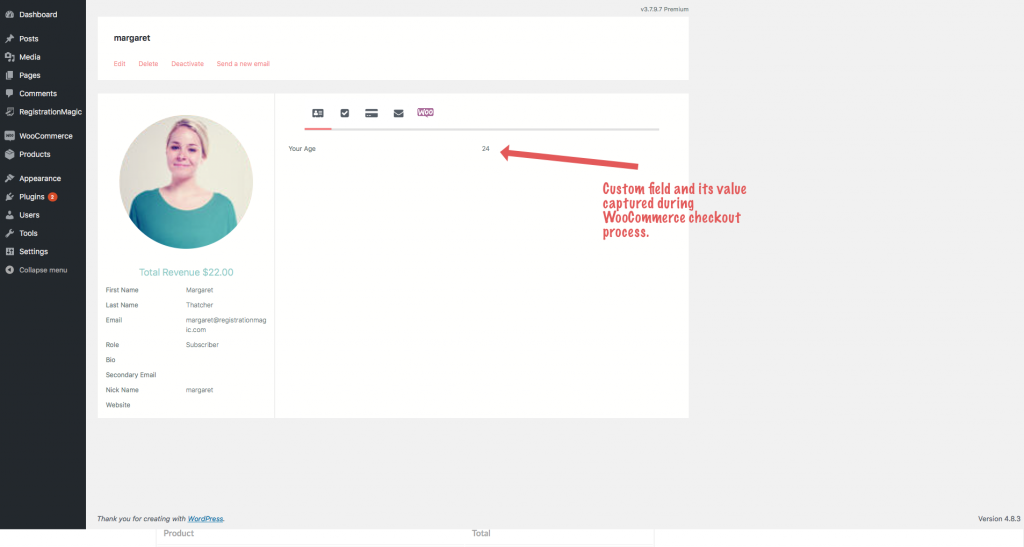
In the first tab, you’ll see the label Your Age with value on the right side. If you had added multiple custom fields, all of them would have been visible here.
Click on the tab with Woo icon and you will see the order this user just placed. You can view and edit the order from here.
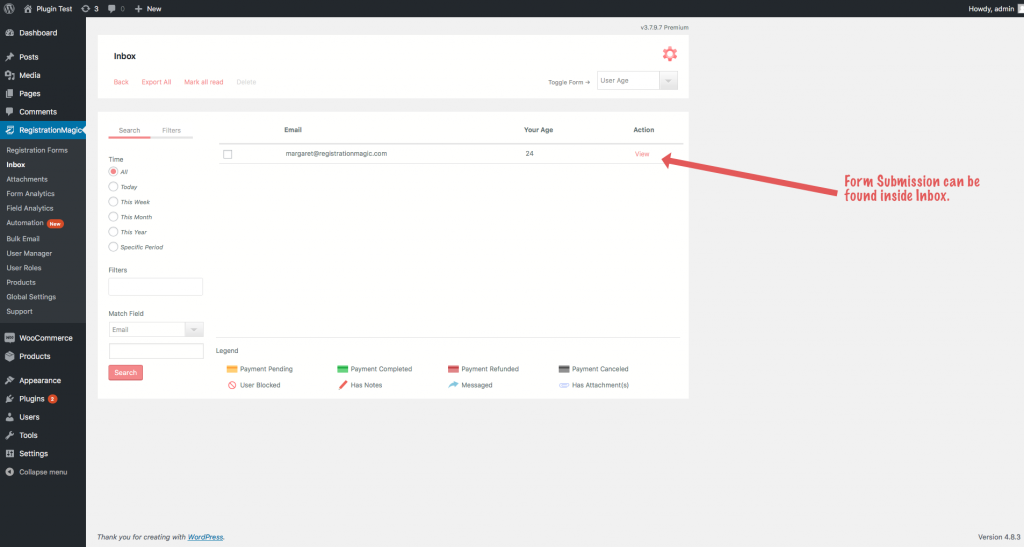
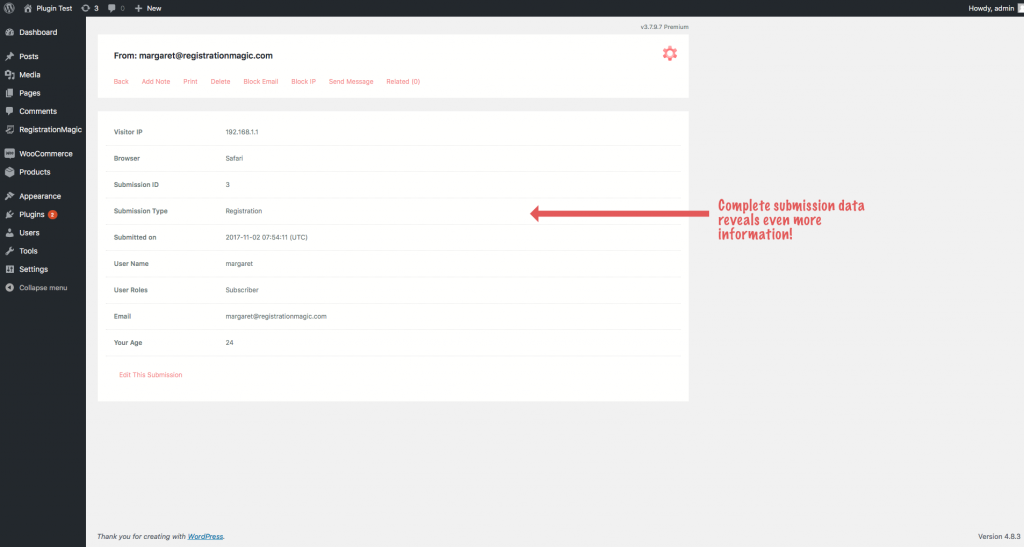
There’s also some meta information that RegistrationMagic captures about the user without any actual user input. To check that, visit Inbox in RegistrationMagic and view the Submission received with the last registration. You will see it has captured user IP, Browser Name, Submission Time, and of course the age.
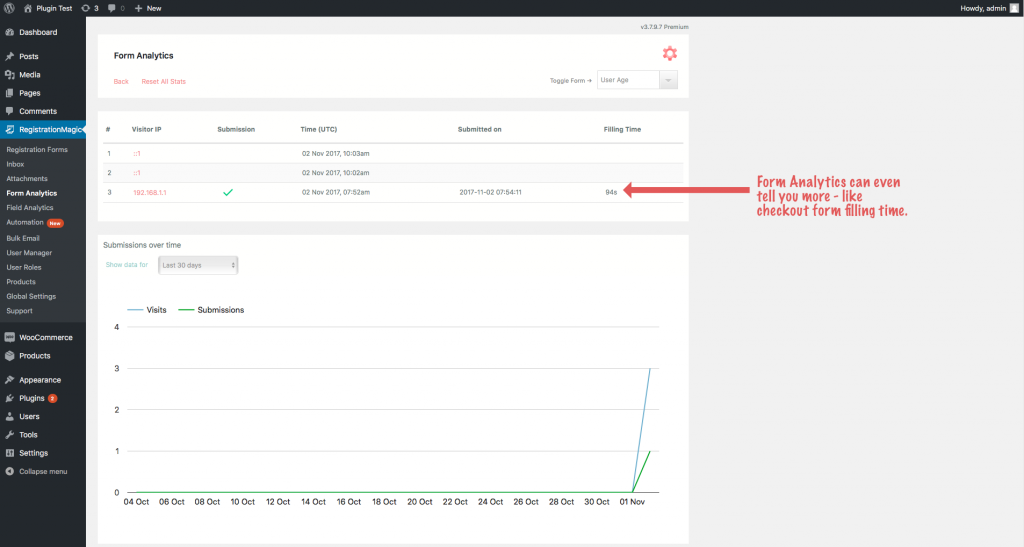
You can find even more information in Form Analytics and Field Analytics areas like the time user took to fill out the WooCommerce Checkout form, or pie chart for option list custom fields.
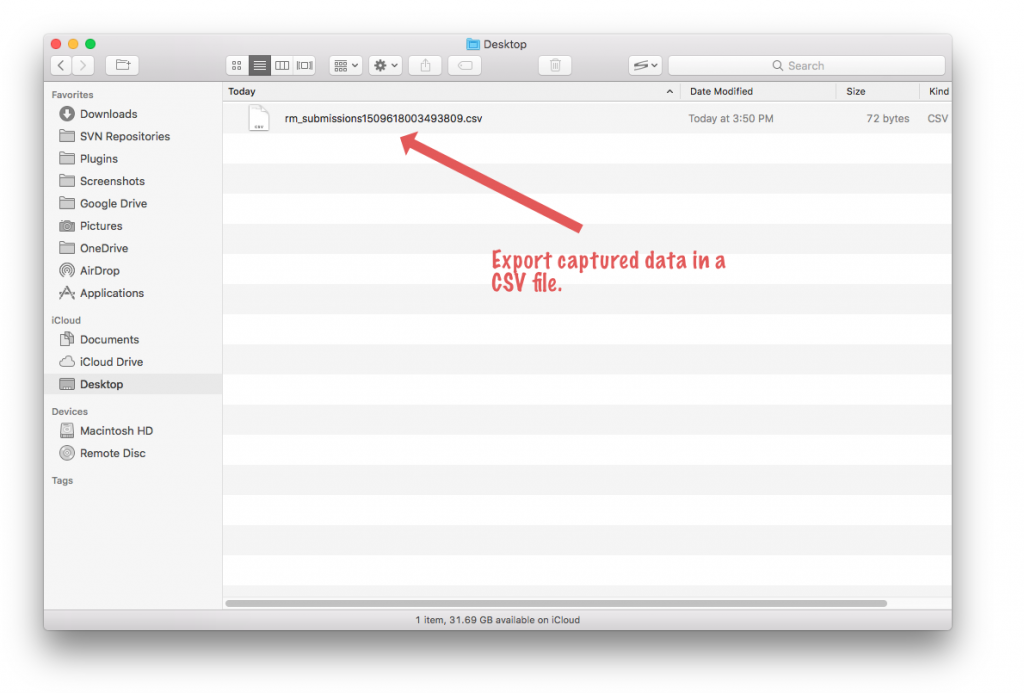
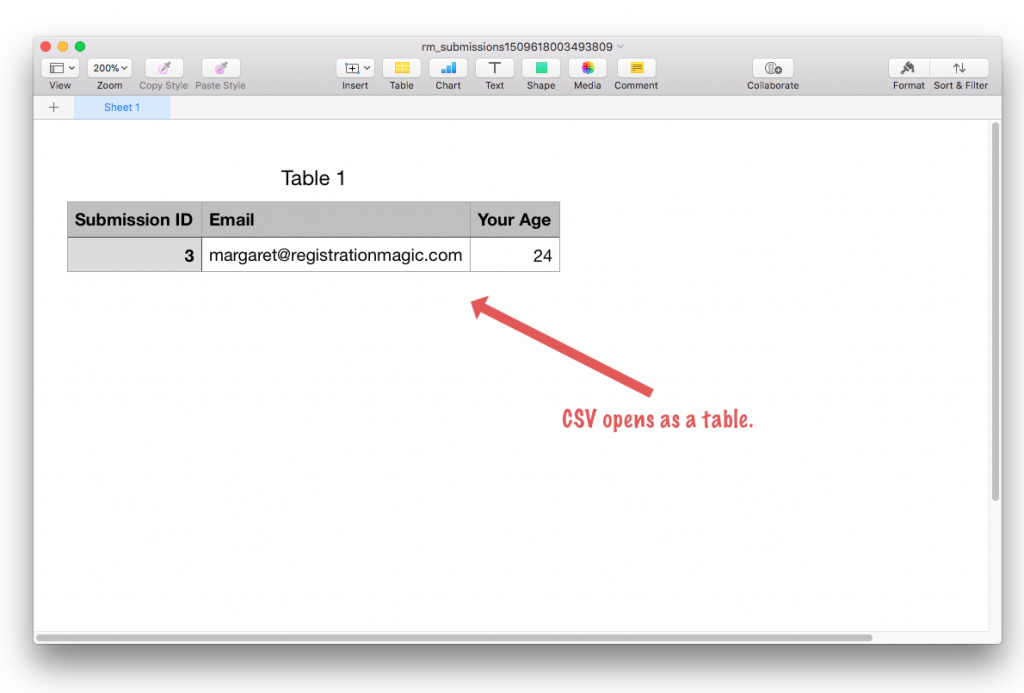
For further analytical and data mining purposes, you may want to download the captured custom fields information in a file that can be opened inside spreadsheet program on your computer. You can do that by visiting the Inbox area and selecting the form from the dropdown - User Age, in our case. And click Export All. It will download a CSV file on your hard disk which can be easily imported into popular spreadsheet programs like MS Excel, Apple Pages etc.
As you can see from above example, combining RegistrationMagic with WooCommerce opens up a host of new opportunities about how users data can be captured through WooCommerce Checkout Form. We hope you will find the information useful and easy to implement. If you have any questions, feel free to ask in the comments below and we’ll get back to you. Cheers!
About RegistrationMagic
RegistrationMagic Editorial Staff (rmagic) is a team of WordPress registration experts and major contributor to the development of RegistrationMagic - WordPress User Registration Plugin.- RegistrationMagic Starter Guide - August 4, 2024
- WordPress Registration Shortcodes List - July 10, 2024
- WordPress Payment Form Guide: Setup Payments on Registration Form - July 8, 2024
- Experience the Unfolding Magic! - August 4, 2023
- List of Guides for WordPress User Registration Process - July 28, 2023
- Frequently Asked Questions About WordPress User Registration Forms - July 28, 2023
- How to display registration forms on WordPress site? - July 26, 2022
- WordPress User Registration Custom Status Guide - April 9, 2022
- How to add or update user profile fields using WordPress forms - August 5, 2020
- Boost RegistrationMagic User Profiles With ProfileGrid Integration - February 19, 2019

no me aparece la opcion en la versión gratuita de enlazarlo con woocommerce ayuda 🙁
WooCommerce integration with RegistrationMagic is a feature of premium version of RegistrationMagic.
Please i need to create service booking form with customise fields additionally then lead to continue to checkout and where the users can fill the booking and payment then receive confirmation email. Your best advice will really help.. best
Using RegistrationMagic, you can add required fields on the registration form. The users can fill the form and after form submission, the users will automatically be redirected to pay. A new user email as well as an auto-responder can be sent to the users upon registration.
If you integrate WooCommerce along with RegistrationMagic, the registration process will be handled by former instead of latter. With our plugin, you can add as many extra custom form fields to the WooCommerce registration form as needed. Note that the payment process shall also be handled by WooCommerce. For more information please check the documentation: https://registrationmagic.com/customize-woocommerce-checkout-form-page/
I bought the premium version of RM, how can I add custom forms to products – like attendee information from selling event tickets?
Hi Joshua,
Please advise if you are looking to pull existing information about an attendee from the database and auto-fill into the form? If yes, there’s a system to connect forms fields to WordPress’ user meta table. With RegistrationMagic products can be added to the forms otherwise.
I have been using Free version of RegistrationMagic and did fine in creating forms, including the DROP DOWN list field, but I needed the File Upload option for my form. So I bought the RegistrationMagic Premium plugin and installed on my WordPress.
Thus, problem occurs. In the All Forms area, I created a new form. I chose the “Add Field” and in adding the Field, I chose “Drop Down” as the Select Type of field. However, in my attempts to add text area where I can write options for Drop Down list, nothing happened. I clicked on the “Click to Add more”, nothing happened.
Please help as I need to add more text areas so that I can write or list my options for the Drop Down. Please help!
The issue might have been due to script conflict. We have released a new version on RegistrationMagic with numerous improvements and script optimization. It should fix the problem; please install and verify.