Why Import and Export registration forms to WordPress?
Before commencing the tutorial to import and export forms to WordPress, we would like you to get a clear concept of the import/export functionality. Let us discuss this from the admin’s point of view.
Suppose you have two websites A and B.
Website A is set up with WordPress forms. Let’s think you want to clone a form from website A to B. That is, you would like to import and export forms to WordPress website B. You would require the exact fields and features embedded in your form in website A for the form on website B.
There are two different ways that you can choose to drive this procedure.
Without Import and export
Firstly, you can create a form manually, assign fields and other values to it. However, this would take a lot of time. If you get a request to add somewhat around 50-60 fields, you might require all the time in the world.
With adjustment of settings and notifications, it will take a lot of time to complete the import/export action.
With import and export
In order to save time, RegistrationMagic incorporated this feature where you can export forms from website A to B.
RegistrationMagic’s forms would provide you with an exact copy including the fields and other specs. This is a great backup tool for admins.
Keep in mind that the import/export might fail if the file format is not XML. Make sure your import is in the XML format so that data corruption can be prevented.
How to import and export forms to WordPress?
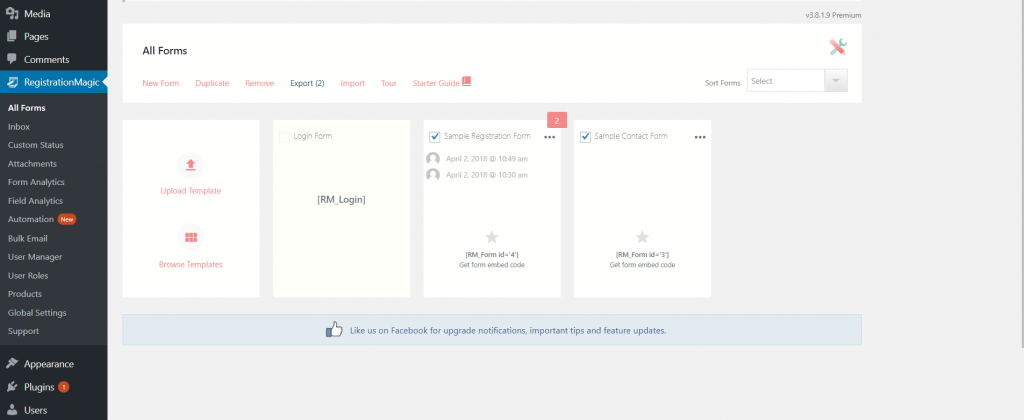
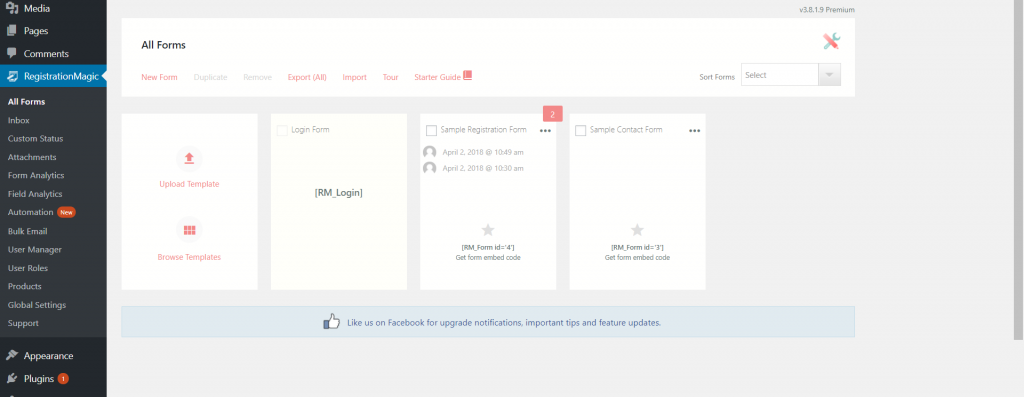
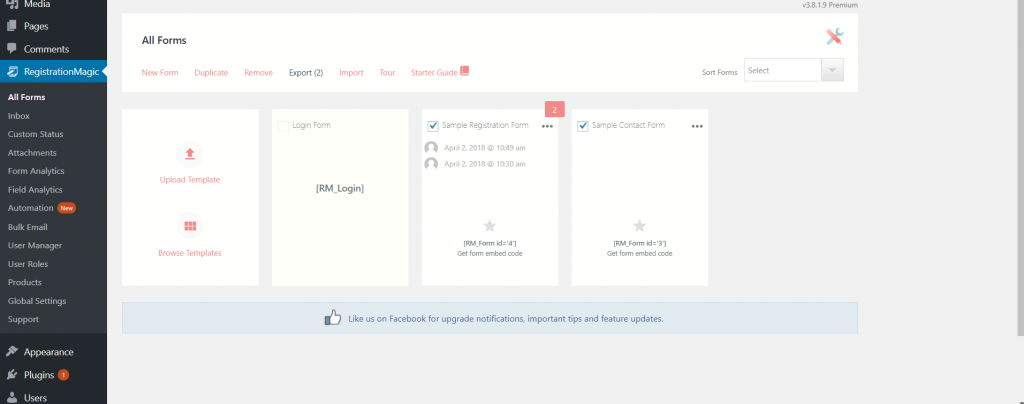
From your WordPress dashboard go to RegistrationMagic and then click on “All Forms”. You will see a page full of forms which you had already created.
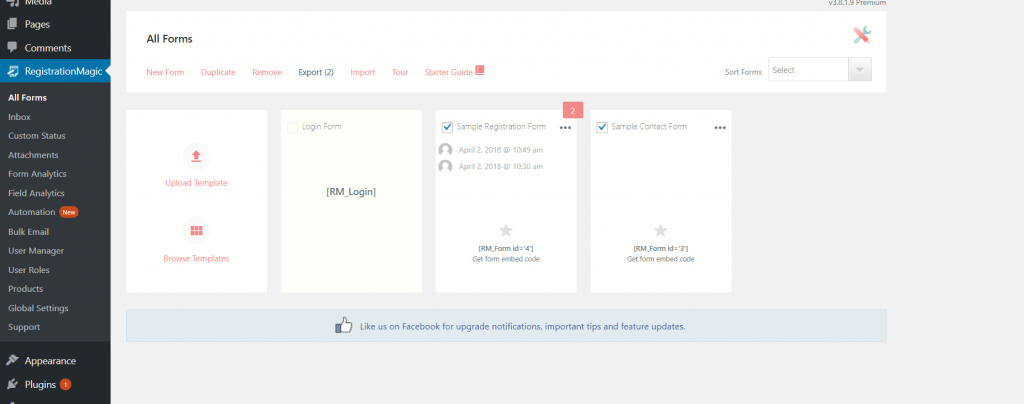
Mark the checkboxes for any number of forms you would like to export. Then from the operation bar click on “Export”. Since we have selected two forms here, we will be exporting those two.
You will be immediately notified that an XML file with the name RMagic(1) is being added to downloads. Keep it saved on your system.
Now go back to “All forms” and click on “Import” from the operations bar.
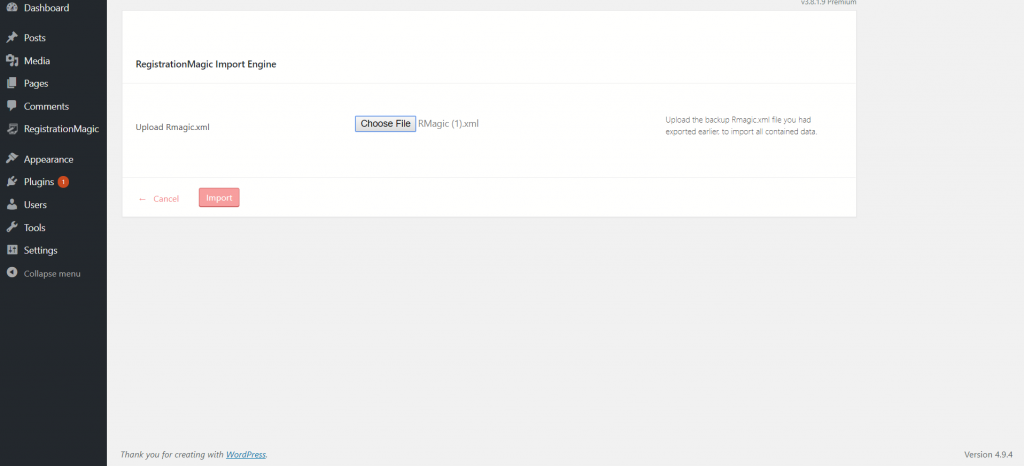
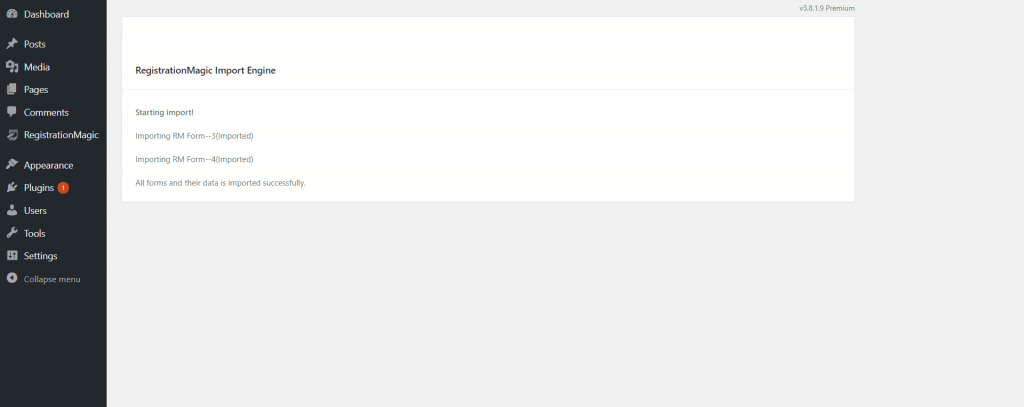
This will navigate you to a page titled “RegistrationMagic Import Engine” prompting you to upload the RMagic.xml file.
Click on choose file and upload the RMagic(1).xml file. Once complete click the “Import” button.
RegistrationMagic will notify you that both the forms have been imported along with their data as well.
Your import/export process ends here.
Go back to the “All Forms” section under RegistrationMagic. You will be able to view exact clones of the first two forms arranged side by side. This completes our tutorial to import and export forms to WordPress sites.
- Complete Automation Guide for WordPress Forms - July 20, 2024
- WordPress User Management Plugin Guide - July 18, 2024
- Add CAPTCHA in WordPress Login and Registration Form? - July 16, 2024
- How to Send Automated Welcome Emails in WordPress - July 15, 2024
- WordPress User Roles, Permissions & Role Editor [Complete Guide] - July 14, 2024
- How to Display Custom Success Message in WordPress Forms - July 12, 2024
- Publish Registration Forms and Display Registered Users - July 11, 2024
- How to Approve WordPress User Accounts Without Logging Into Dashboard - January 25, 2021
- How to Set up Two Factor Authentication in WordPress - April 4, 2019
- How to Edit or Replace Default WordPress Registration Form - April 2, 2019

Hi,
I have two issues regarding importing..
1, My backup, when imported, doesn’t include conditions for my fields. How do I resolve this please?
2. I have a new form with lots of conditional fields, is it possible to specify these conditions when I create an XML file dynamically?
Thanks. I awaits your reply
1. While exporting and importing the forms, the condition fields will not work. We have added the note for this in the tour section. Please refer to the following link: http://nimb.ws/fVRDgE.
2. Could you please clarify the requirement regarding specifying conditions in XML file dynamically, in order to allow us to assist you further.