Dive into the world of webinars with a webinar registration form using the RegistrationMagic plugin. Webinars are crucial for personal and organizational growth, making efficient registration necessary. Further, this article reveals the step-by-step process of making a webinar registration form, crucial for better event promotion, gathering participant details, and improving the learning experience. Check out the ultimate guide to easily create your webinar signup form and enhance its effectiveness.
What is a webinar registration form?
A webinar signup form is an online tool made to get important info from people who want to join web seminars. Further, it easily fits into websites, letting participants sign up and giving organizers the necessary details. Furthermore, it usually asks for names, contacts, and preferences, making event management smoother. So, this form is key for getting people involved and improving everyone’s experience, making things organized for both organizers and participants.
How to create a webinar registration form for your WordPress website?
Before going ahead make sure to ‘Install’ and ‘Activate’ RegistrationMagic plugin on your website using this link.
With RegistrationMagic, form creation becomes limitless. This versatile plugin empowers you to design countless forms for your website, spanning from event registrations to admission forms. Enjoy the freedom to customize and modify fields as needed, offering unparalleled flexibility for tailoring forms to your specific requirements. Elevate your website’s functionality effortlessly with RegistrationMagic, a powerful tool for seamless and unrestricted form creation.
Try RegistrationMagic for Free.
Creating a webinar form through RegistrationMagic: Step-by-step guide
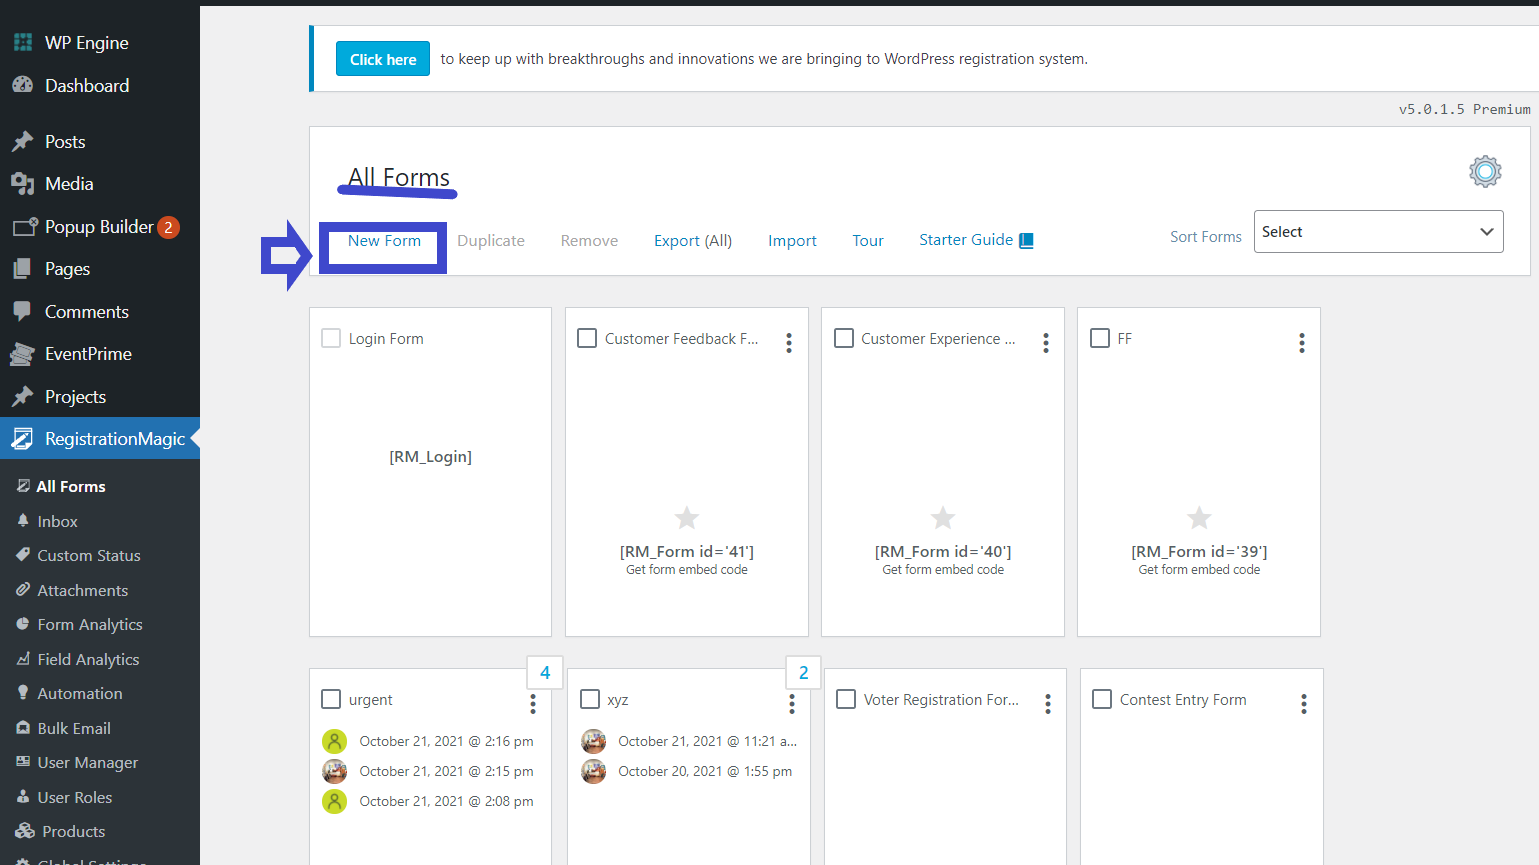
Step 1: Adding a new form using RegistrationMagic.
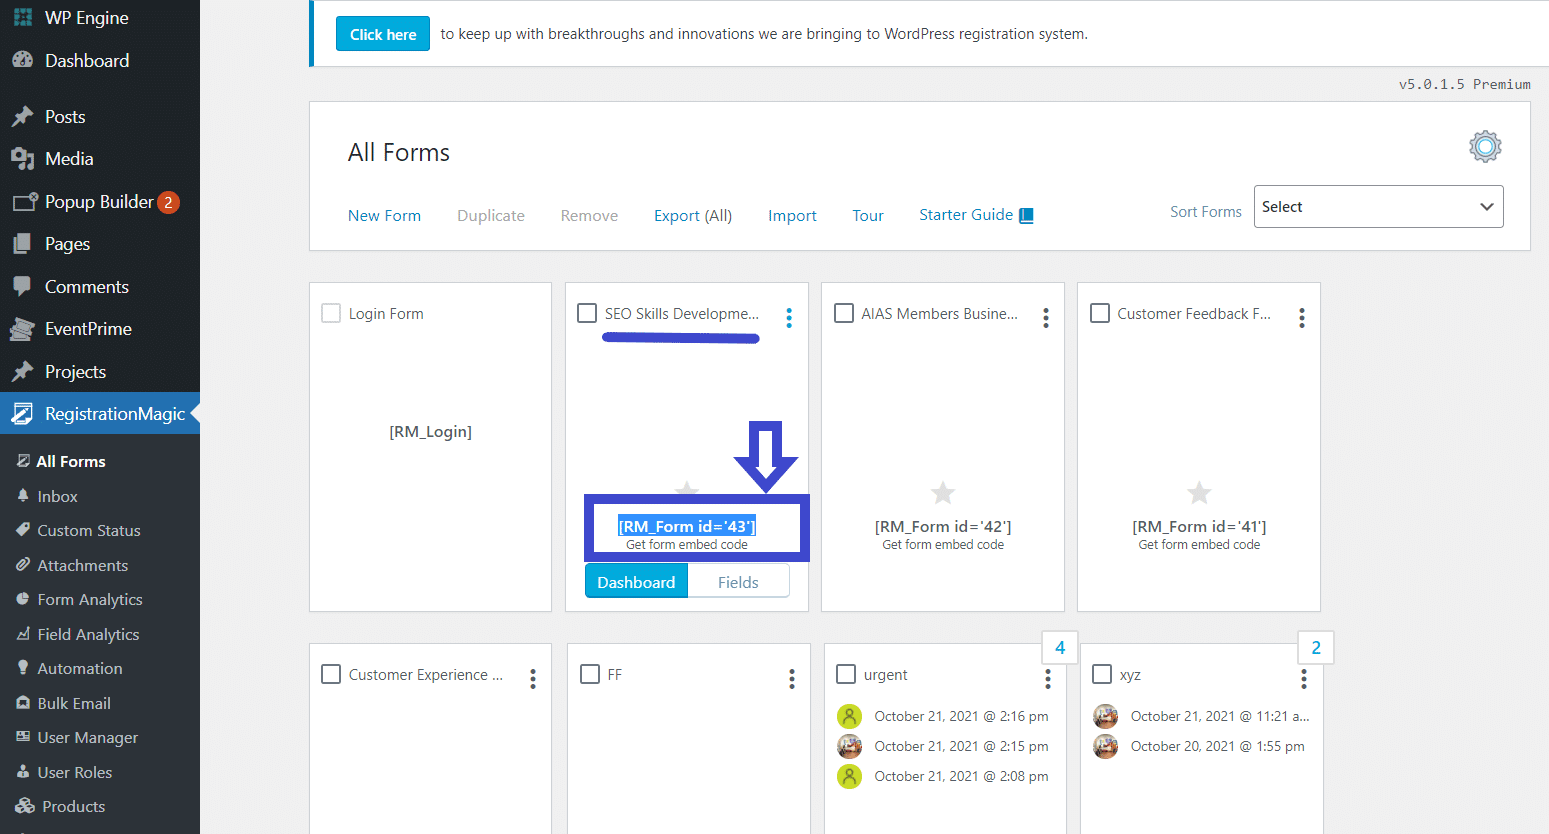
- Firstly, click on the RegistrationMagic plugin and click on “All Forms“.
- Next, click on “New Form” to create a new webinar form.
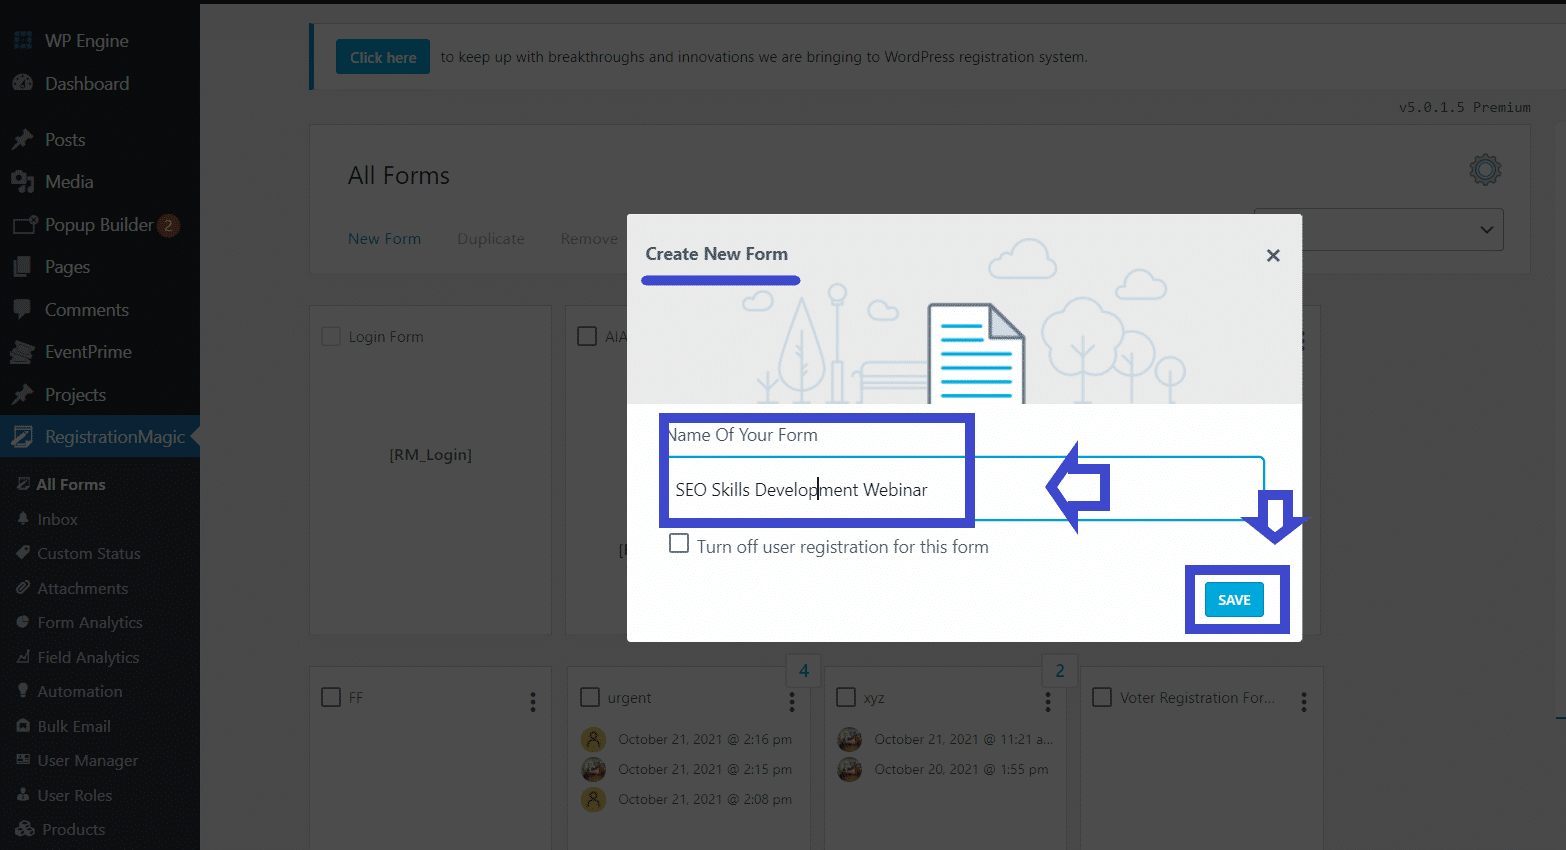
Step 2: Adding a new name for the form.
- In the window that says “Create New Form“, add a title for your form.
- Since we’re creating a webinar registration form, that’s what we’ll name it. For reference, we’ll take the example of a webinar registration form conducted by a business for SEO skills development.
- We’re fashioning a very basic form here with no videos or images attached. This doesn’t mean you can’t do that. We’ll tell you how to do that in the coming steps.
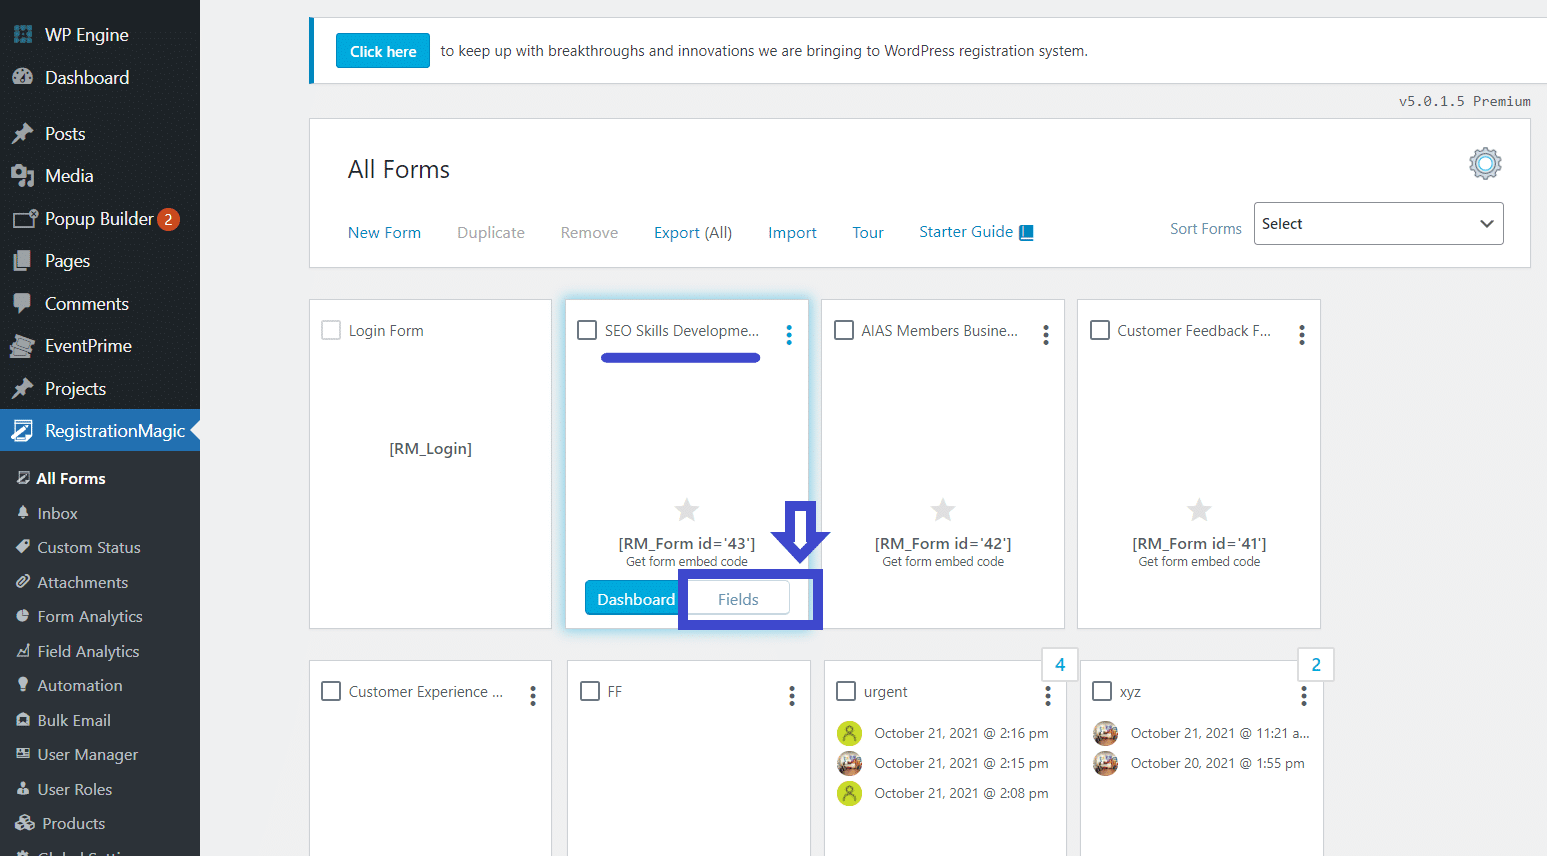
- After that, from the ‘All forms page’, click on your new form’s ‘Fields’ section to proceed to add fields.
You’ll land on this page. This is the page from where you need to add all fields. This page is called the ‘Fields Manager’ page.
Steps for adding form fields
- From the above image, you can refer to the ‘Fields Manager’ page for adding all form fields.
- All the fields are to be added to the form from the ‘All fields’ section. You’ll find every single field you’ll require here.
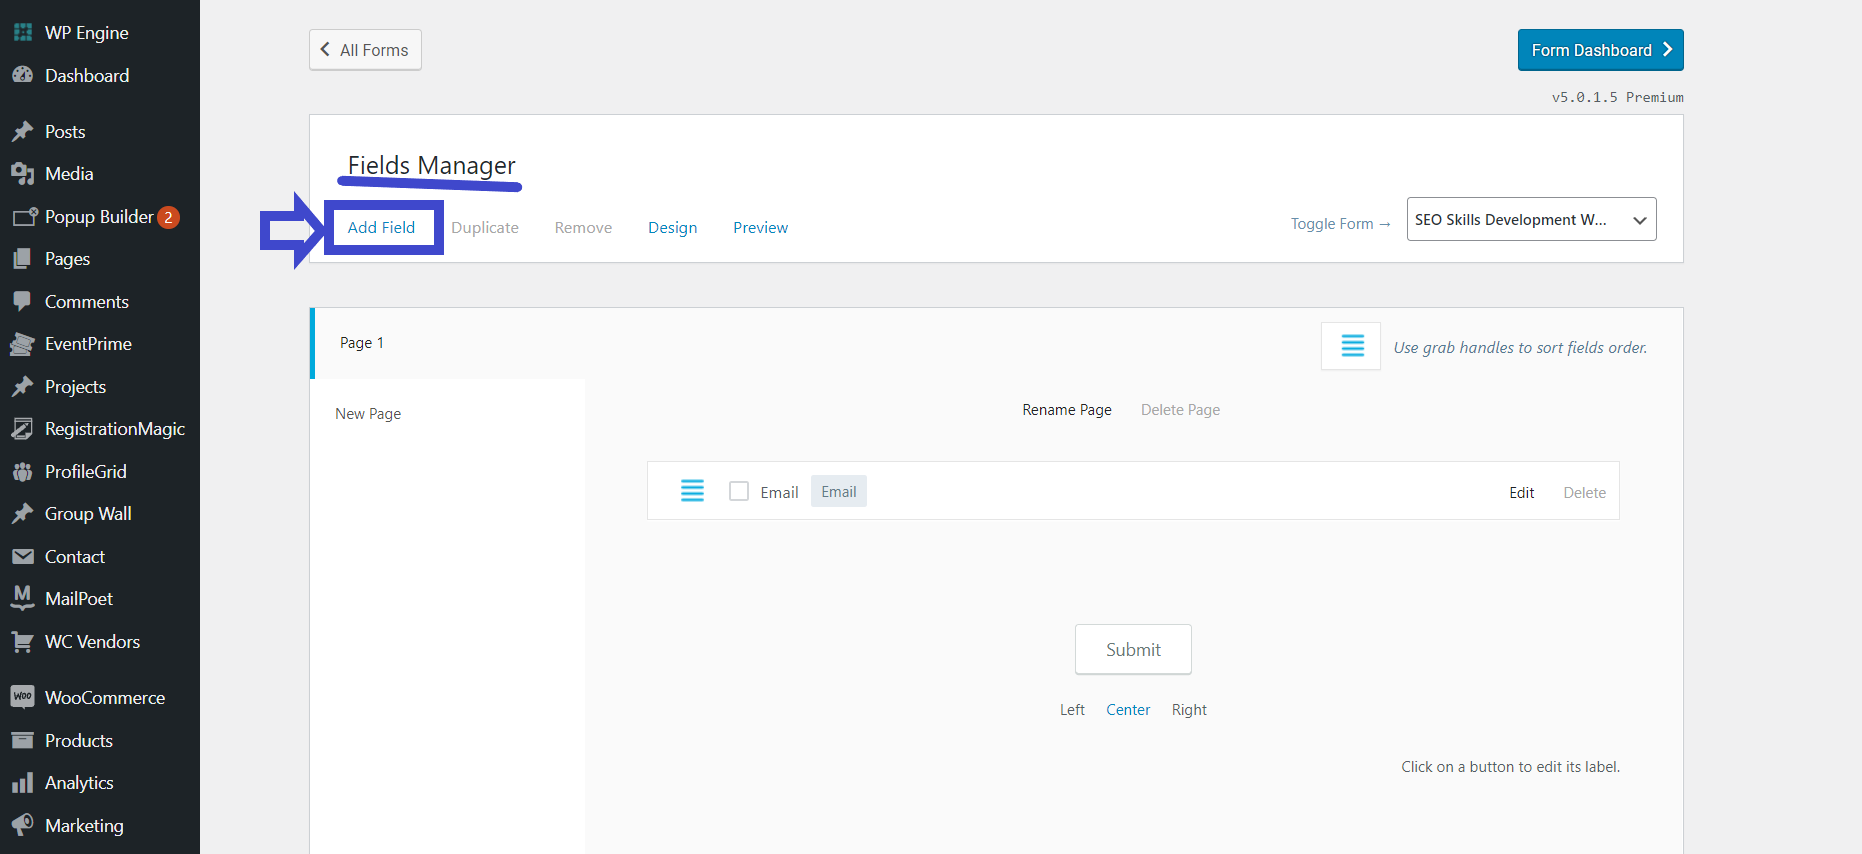
- For instance, text, radio buttons, checkboxes, video links, images, etc. all lie under this category.
- Just to gander at the good, here’s a glimpse of the vast range of categories under the ‘Fields’ section that you can use. We’re creating a basic and precise event registration form here. However, we won’t make use of all these fields.
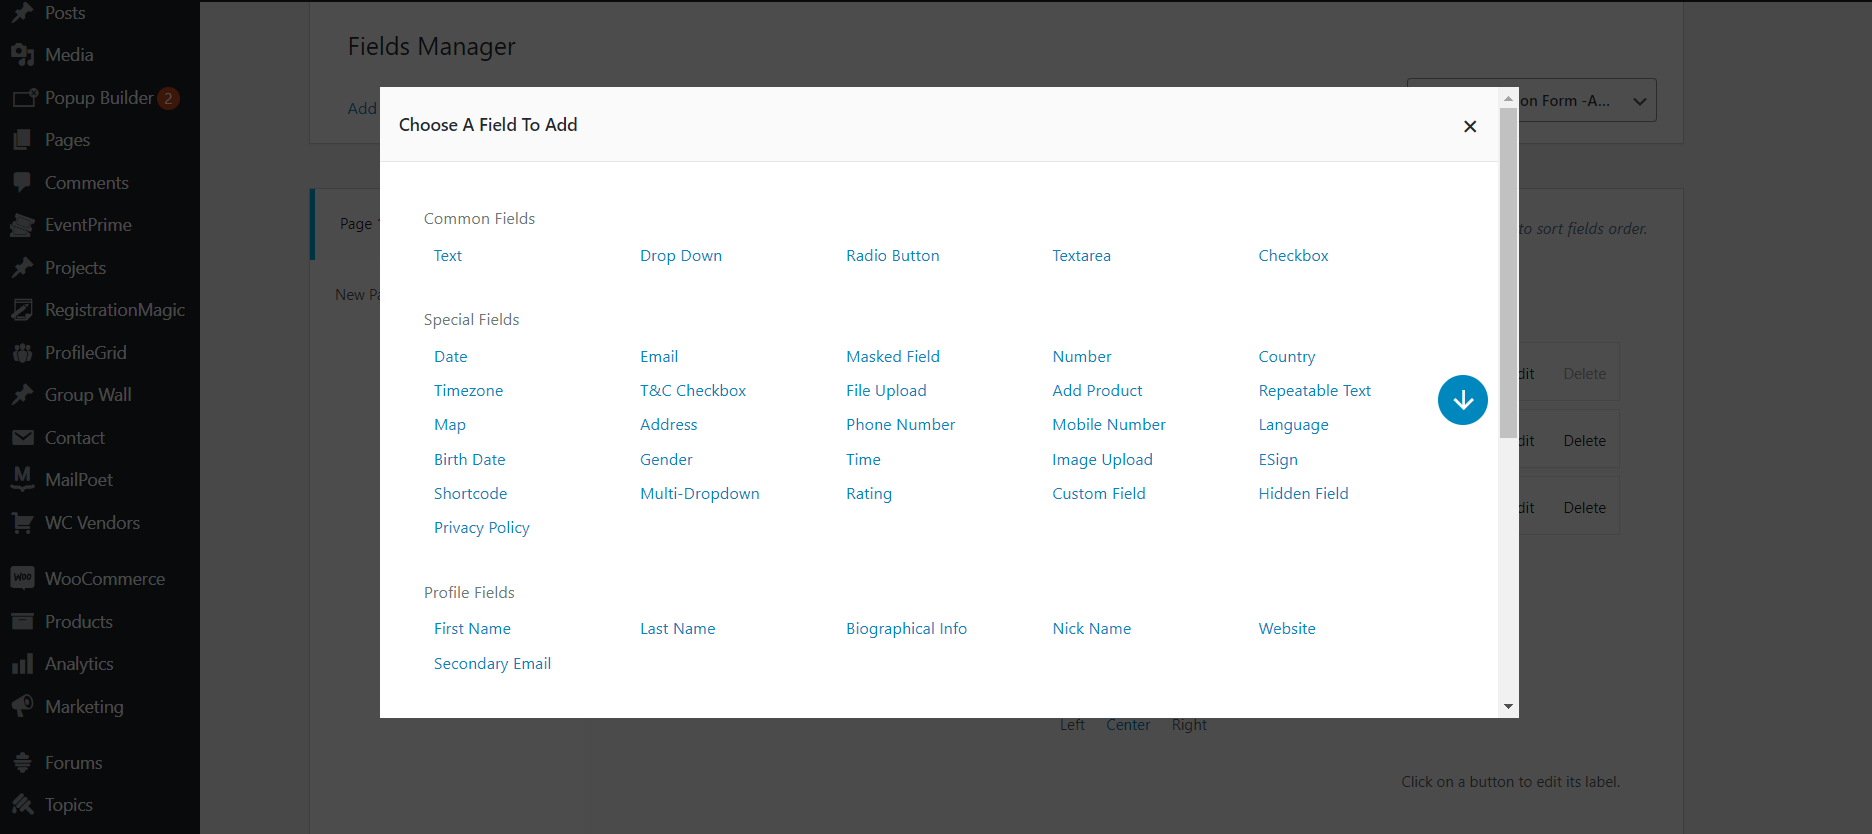
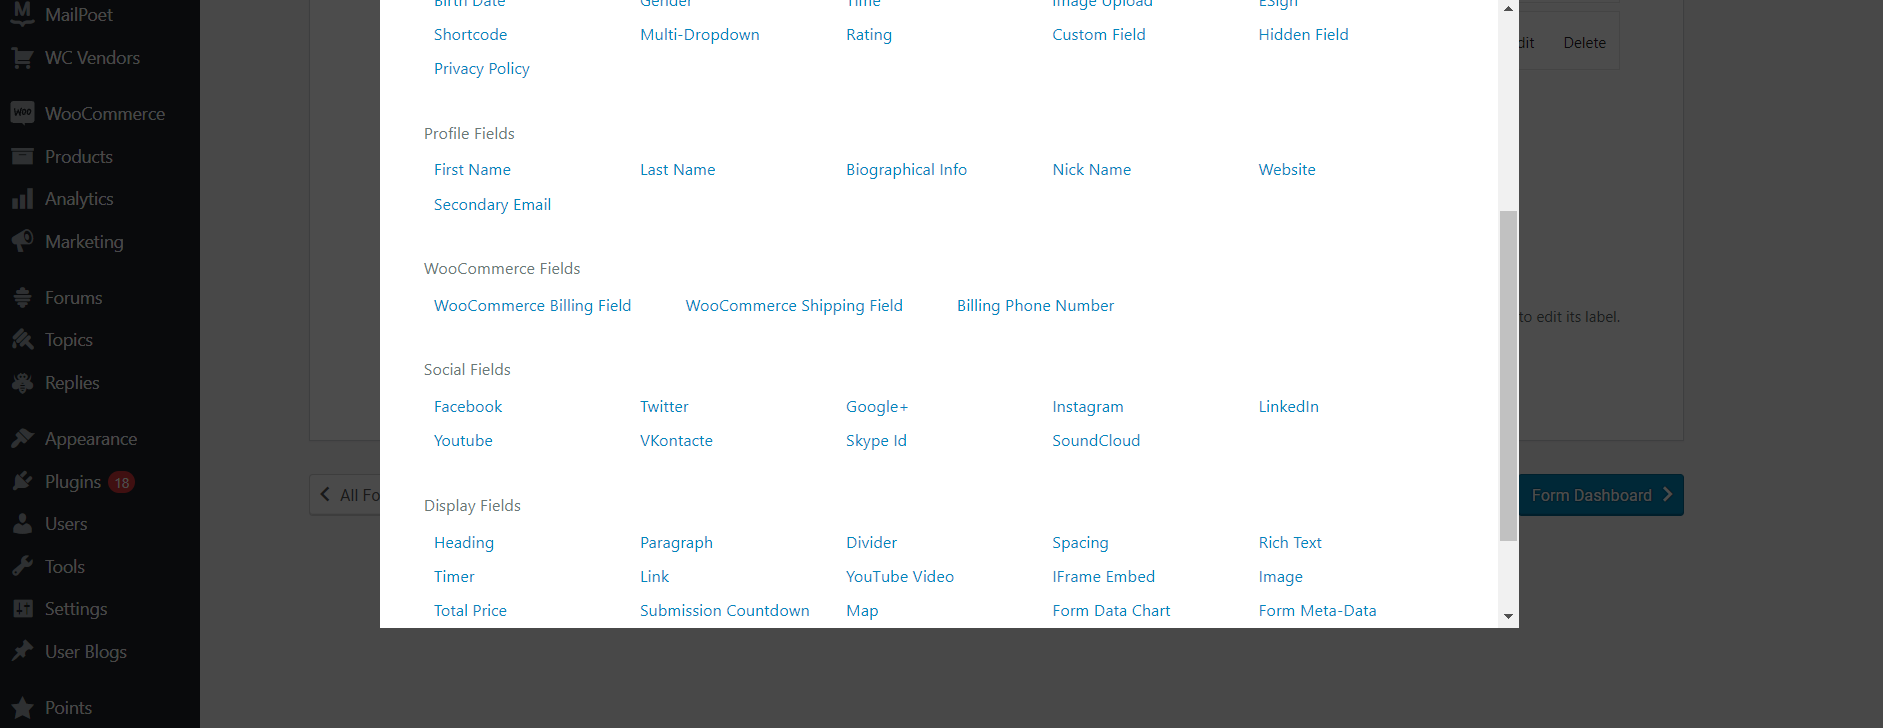
- Therefore, to understand all functionalities better, you can try adding fields and then deleting them as per your wish.
Step3: Adding fields to the form
Since the form we have in mind is a very basic and open one, we won’t make it extra refined. Therefore, we’ll add only a single sheet to the form. If need be, you can always create multipage forms easily through RegistrationMagic.
Let’s start adding fields to our form:
Just go to the ‘All Fields’ section and start clicking on the fields you’d like to add to your form. We’ll first add all basic fields and label them before moving on to the others.
Once a field is labeled, scroll down and click on the ‘Add to form’ option to add it to the form.
Basic Fields
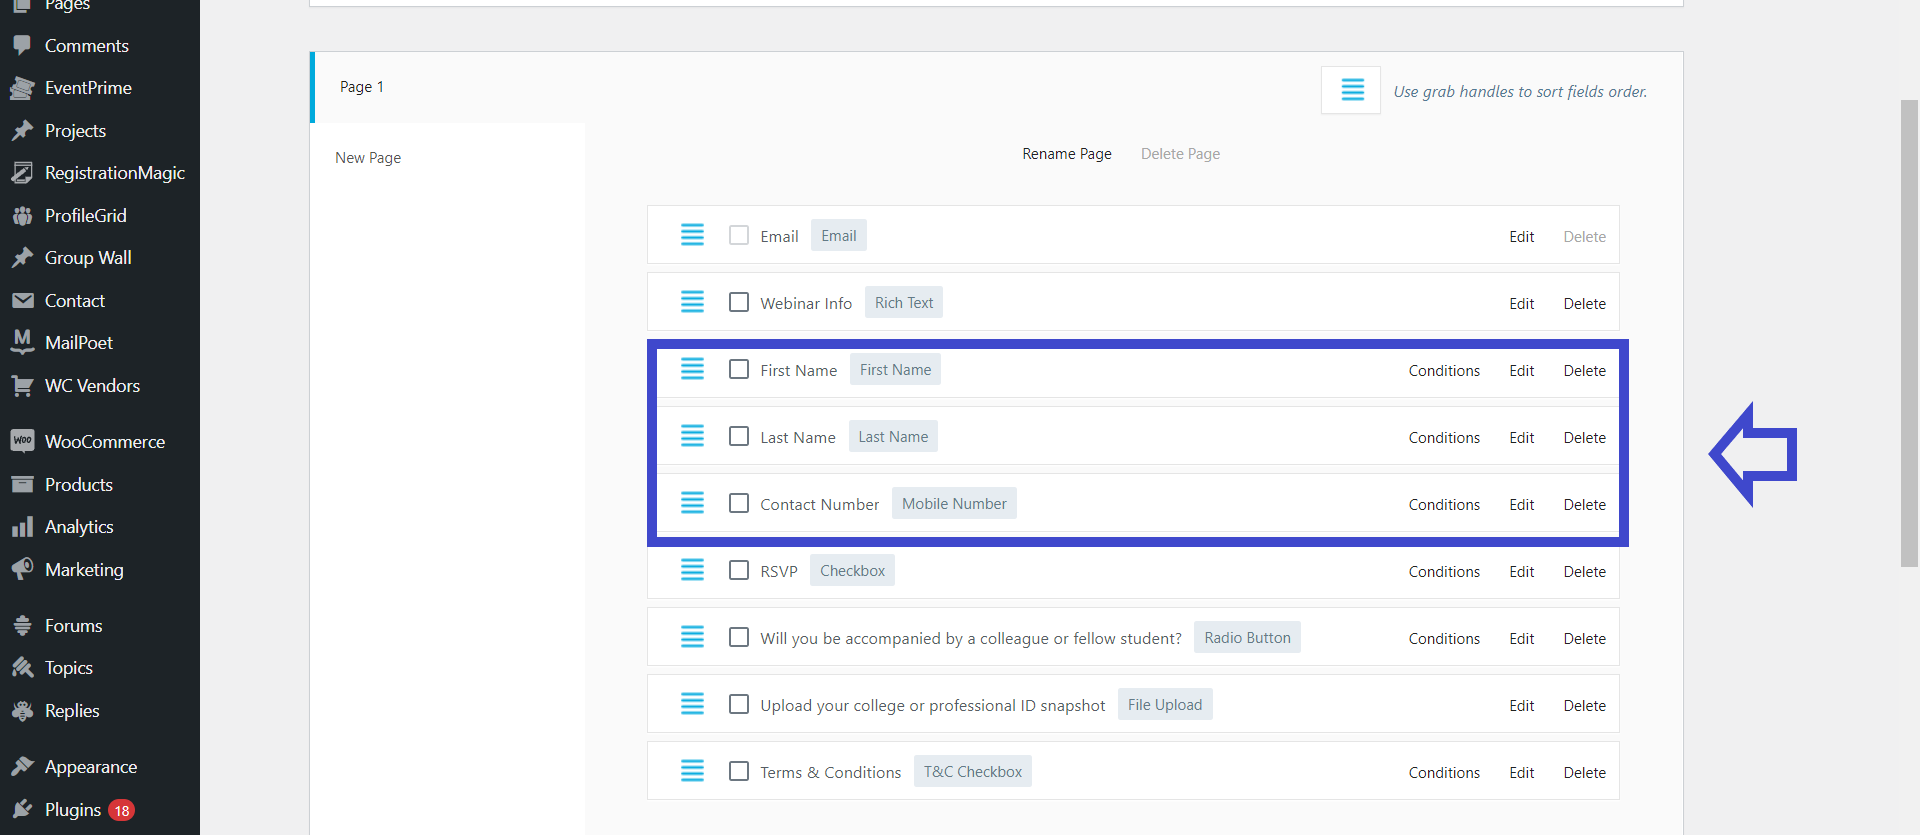
- The email field is a default field in all RegistrationMagic forms. We can’t remove it from any form and is a mandatory field.
- The first and last name fields are two different fields added to the form for the obvious reason of getting the full name of the participant.
- We use the mobile number category to get the contact number of the person. You can customize this according to your reach specifications. This means you can add this field for international or local purposes.
Advanced Fields

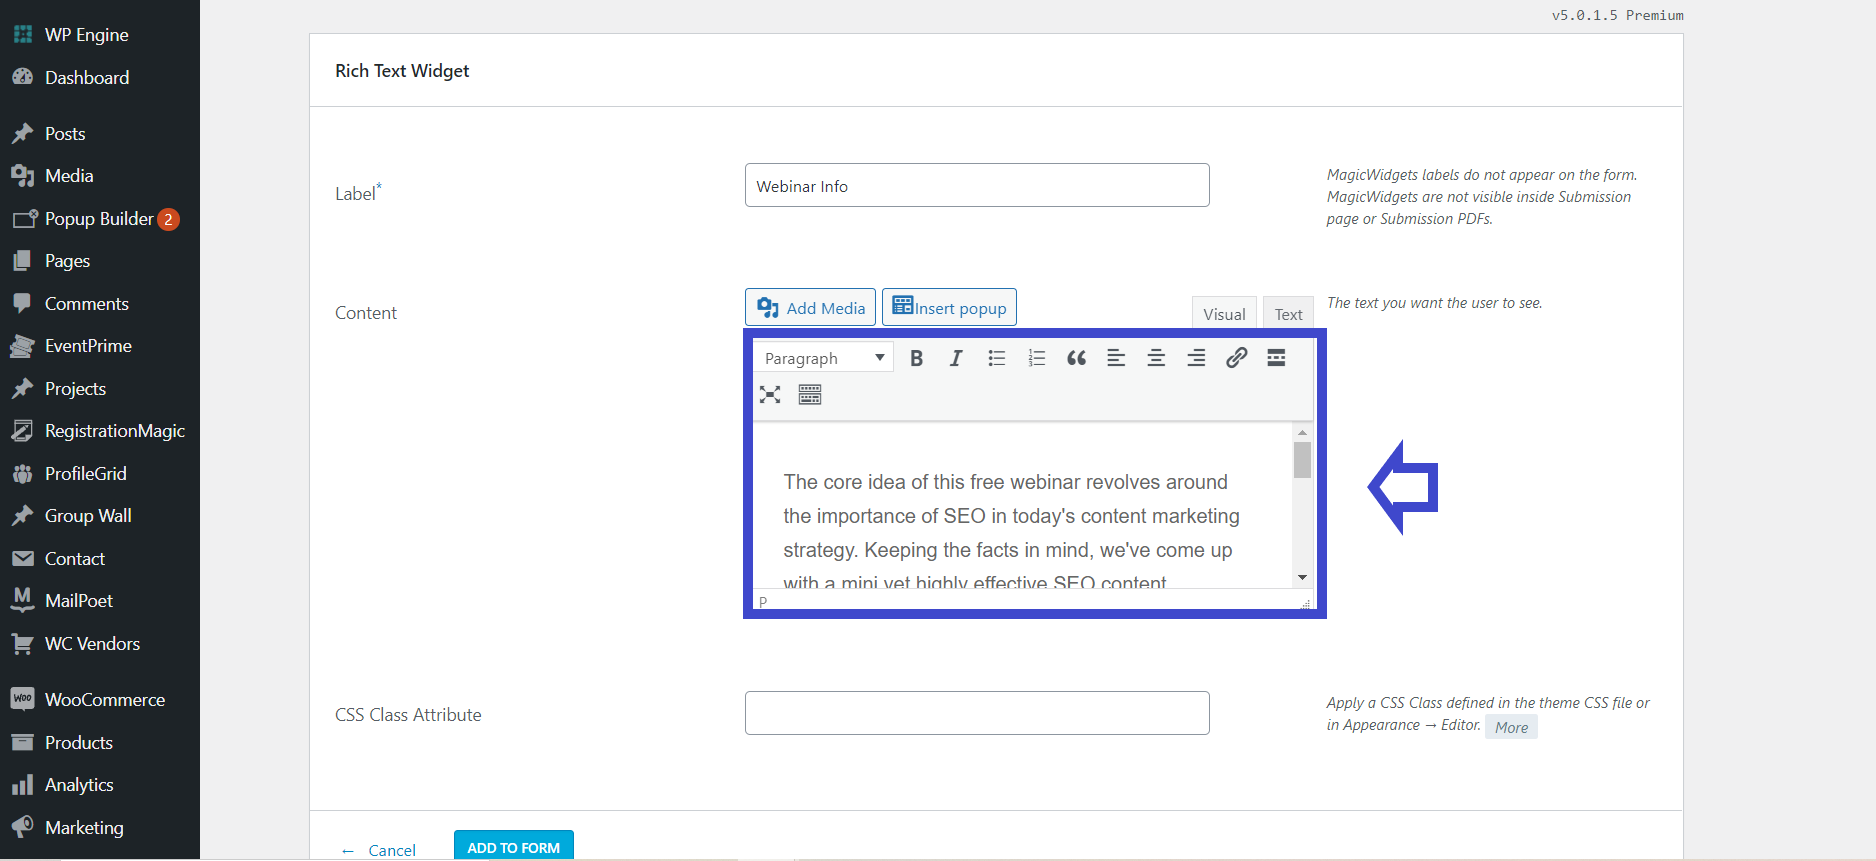
- We use the rich text field to add some messages to the form. The participants cannot respond to this message. It’s just for display.
- The checkbox field implies multiple option selection-based questions. Here we have used it only to confirm one option -RSVP.
- We have used the radio button field to let the attendees select if or not they’re bringing a plus one.
- We use the file upload option to ask the participants to upload their official ID cards for verification purposes.
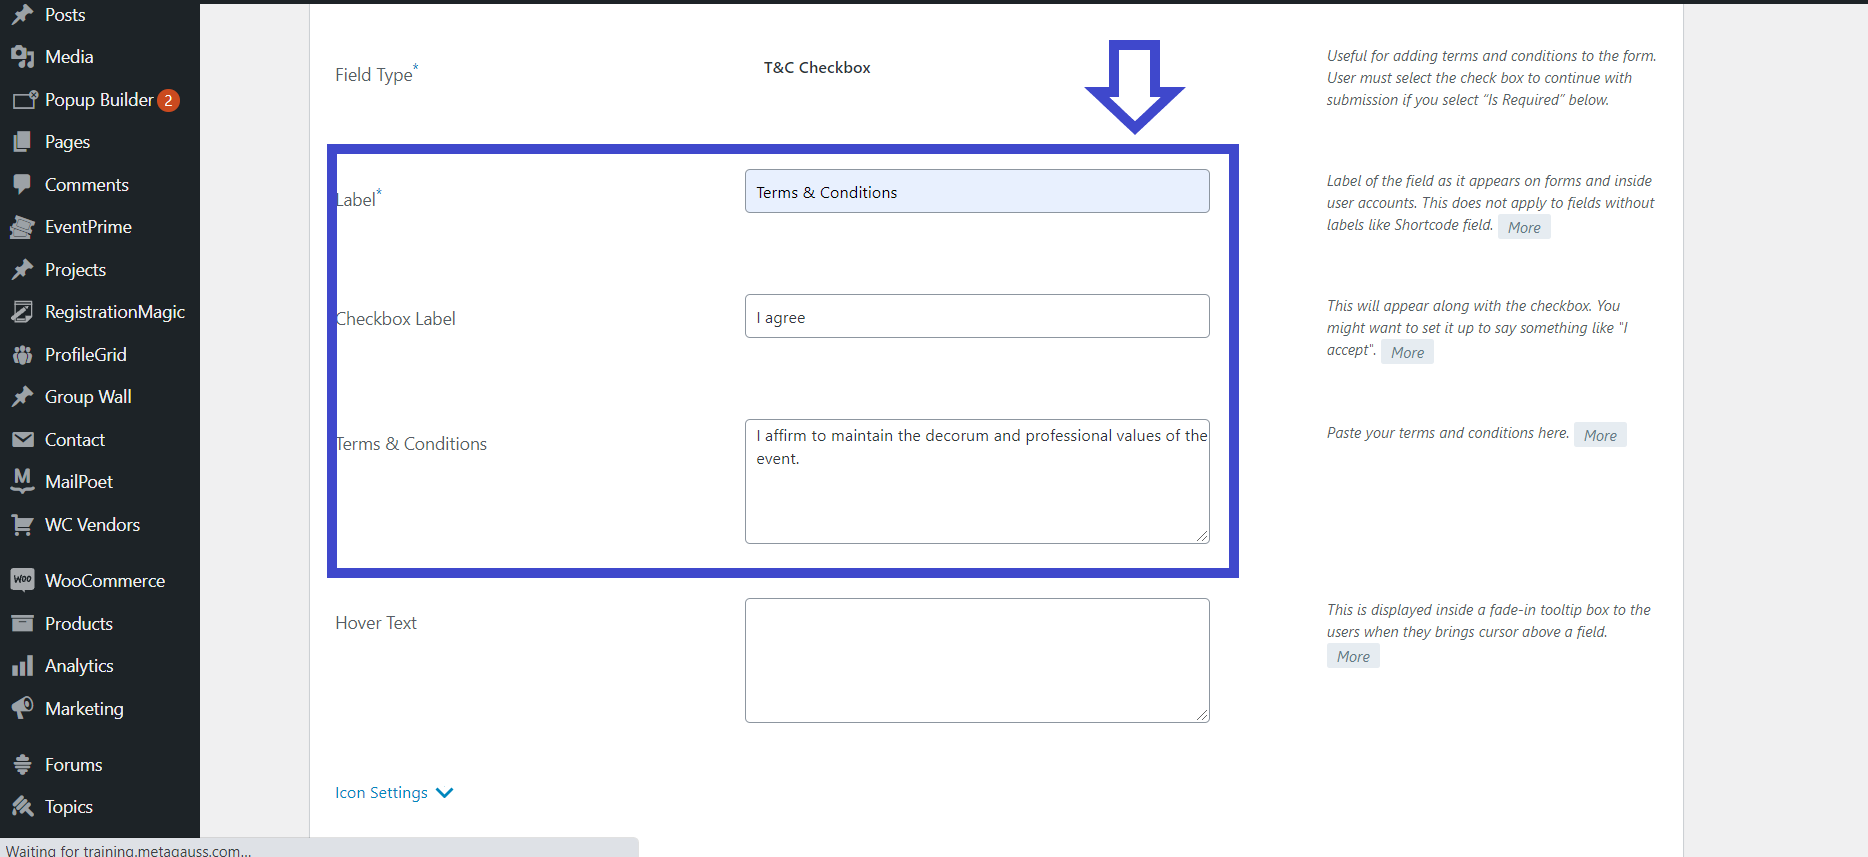
- The terms and conditions field obviously signifies the same. The field is used here to ask the participant to affirm to adhere to the decorum of the webinar.
With that, we’ve added all the necessary fields to our form. You can mark which fields are compulsory and which aren’t from the field settings themselves.
Additionally, you can also change the visuals and aesthetics of your form as much as you want through RegistrationMagic.
Step4: Publishing the form
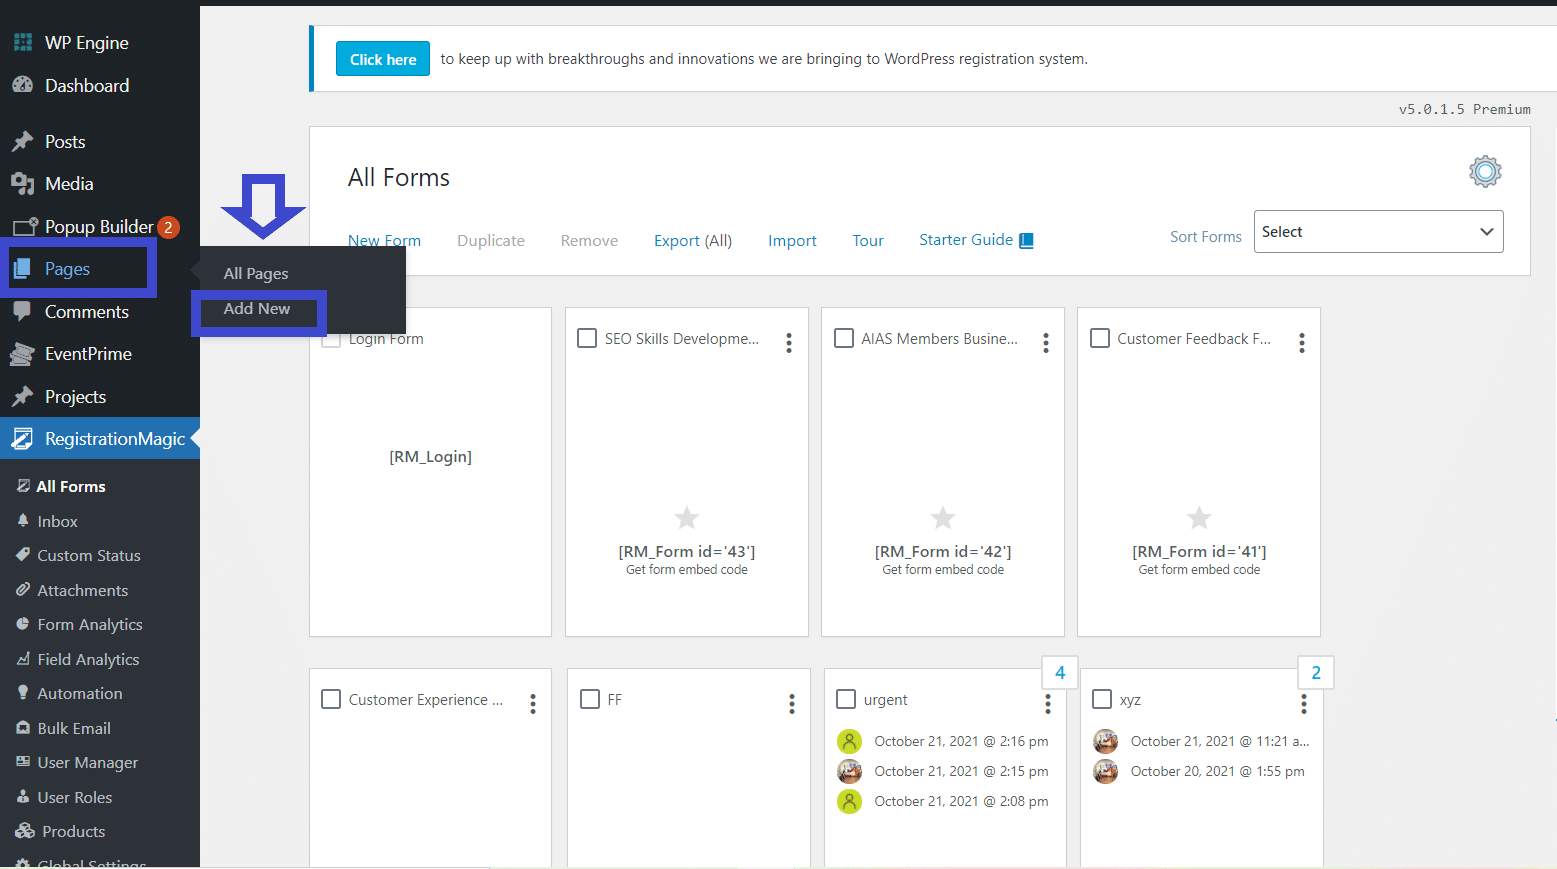
Copy the shortcode to a new page
Go back to the ‘All forms’ section. Copy the shortcode of the form
Now go to the ‘Pages’ section of the website backend. Click on ‘New page’
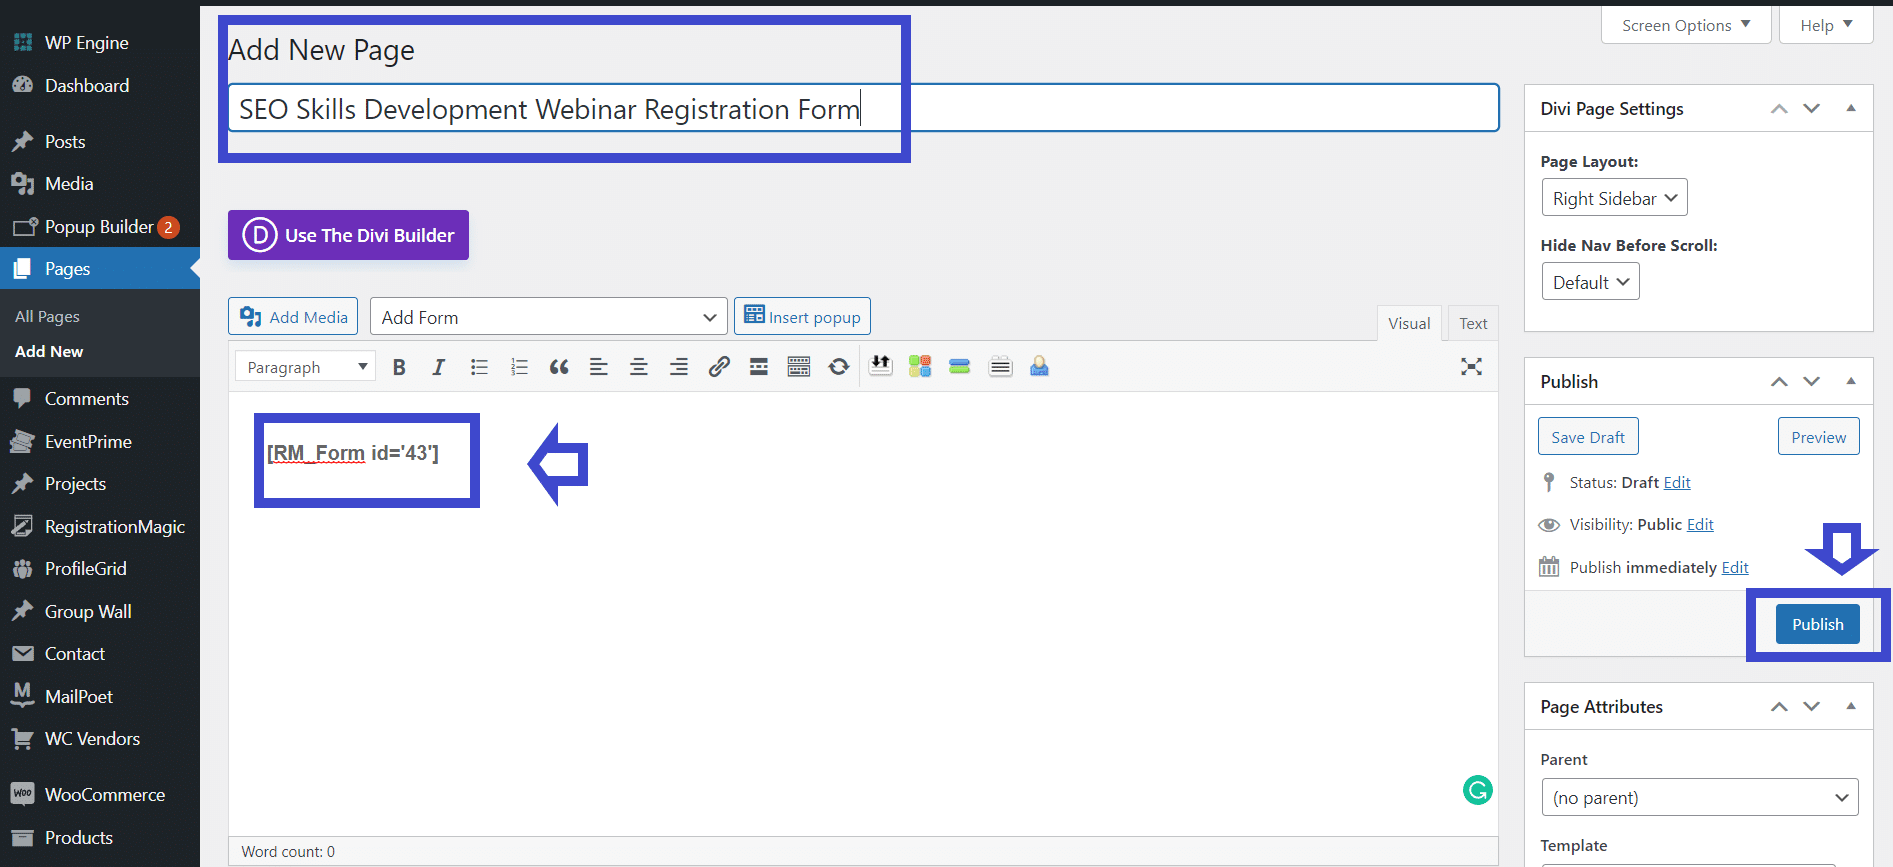
With that, the entire form publishing process is complete. However, if you wish to add this to the main menu of your website, you can go to the ‘Appearance’ option on the website backend options and add this form to the menu and save it.
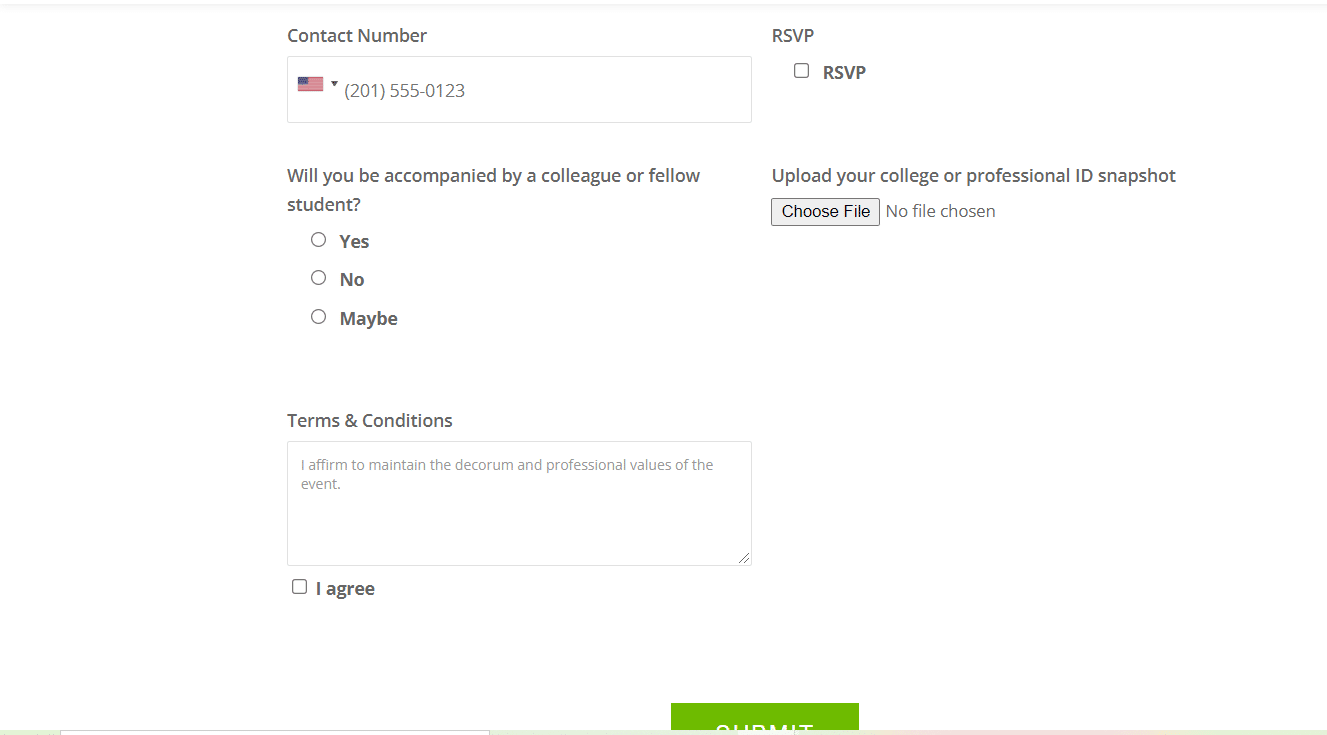
Frontend view of our sample webinar registration form
This is how your form will appear to the participants on your website front end.

To sum up, creating a webinar registration form in WordPress is made easy with RegistrationMagic. It helps gather participant details and promote events smoothly. The plugin is flexible and customizable, ensuring a user-friendly registration experience. With RegistrationMagic, enhance your webinars, connect with your audience, and navigate online spaces effortlessly.
- How to Manage User Registration Status in WordPress - August 8, 2023
- Send Emails to Registered Users in WordPress with Ease - August 6, 2023
- How to Create a User Registration Form on WordPress - September 22, 2022
- Registration Based WordPress Contact Form Plugins - September 15, 2022
- Create a Job Application Form on WordPress Website- In Depth Guide - September 14, 2022
- How to create an efficient Marriage Registration Form in WordPress - November 26, 2021
- How to make a flexible vendor registration form for your business - November 24, 2021
- Creating a Smart Membership Form for Your WordPress Website - November 22, 2021
- How to create a digital Preschool Registration Form - November 18, 2021
- How to make a creative Dance Registration Form with RegistrationMagic - November 16, 2021