Discover the art of crafting a powerful email newsletter signup form in WordPress with RegistrationMagic. This tutorial navigates you through seamless creation and customization, elevating user engagement on your website.
What is a newsletter signup form?
Think of a newsletter signup form as a doorway to effective email marketing. It’s like a personal tool for gathering important info, like email addresses and what customers like. You’ve probably seen it as a pop-up on websites. But it’s more than just a way to advertise—it helps build real connections with customers. When businesses consistently share good stuff, like quality content, they can build a group of loyal customers. This form isn’t just about reaching more people; it’s also great for getting leads that can turn into sales. If used well, newsletters and the community from signup forms can make a strong impact, bringing stability and trust for businesses in the online world. So, if you’re looking to boost your business with content marketing, this is the place to begin!
How to create a newsletter signup form in WordPress?
Before going ahead make sure to ‘Install’ and ‘Activate’ RegistrationMagic plugin on your website using this link.
Meet RegistrationMagic—a handy tool that helps you easily make many different forms for your website. You can use it for things like signing up for events or making custom admission forms. The options are endless! This tool lets you make forms just the way you want, with lots of fields and easy changes. Picture this: making a cool signup form for your online newsletter is just one cool thing RegistrationMagic can do. Make your website better and get people more involved with this awesome tool!
Try RegistrationMagic for Free.
Steps to create a newsletter signup form
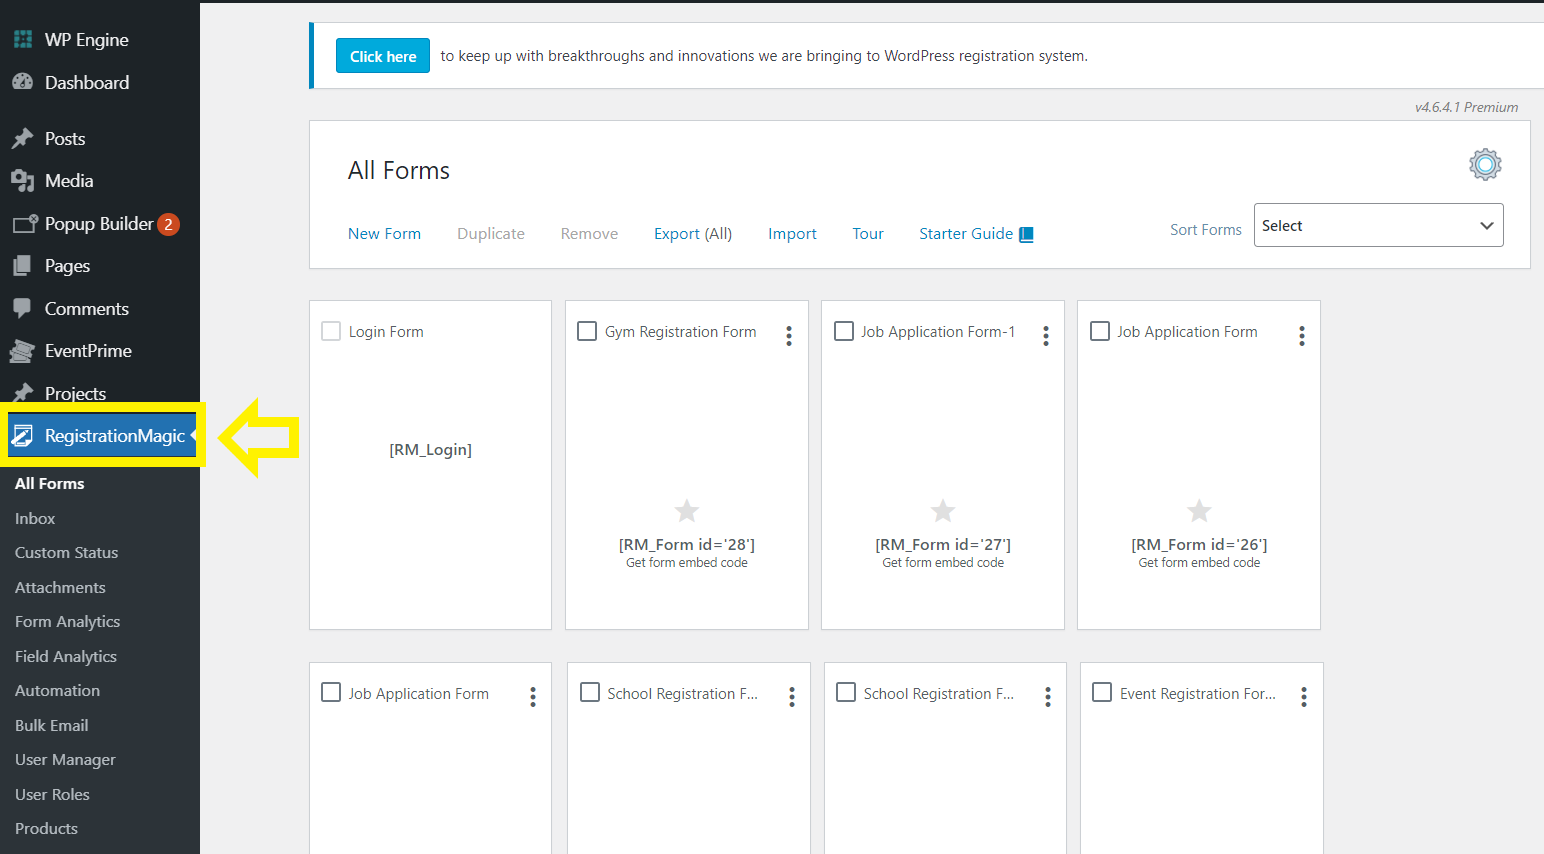
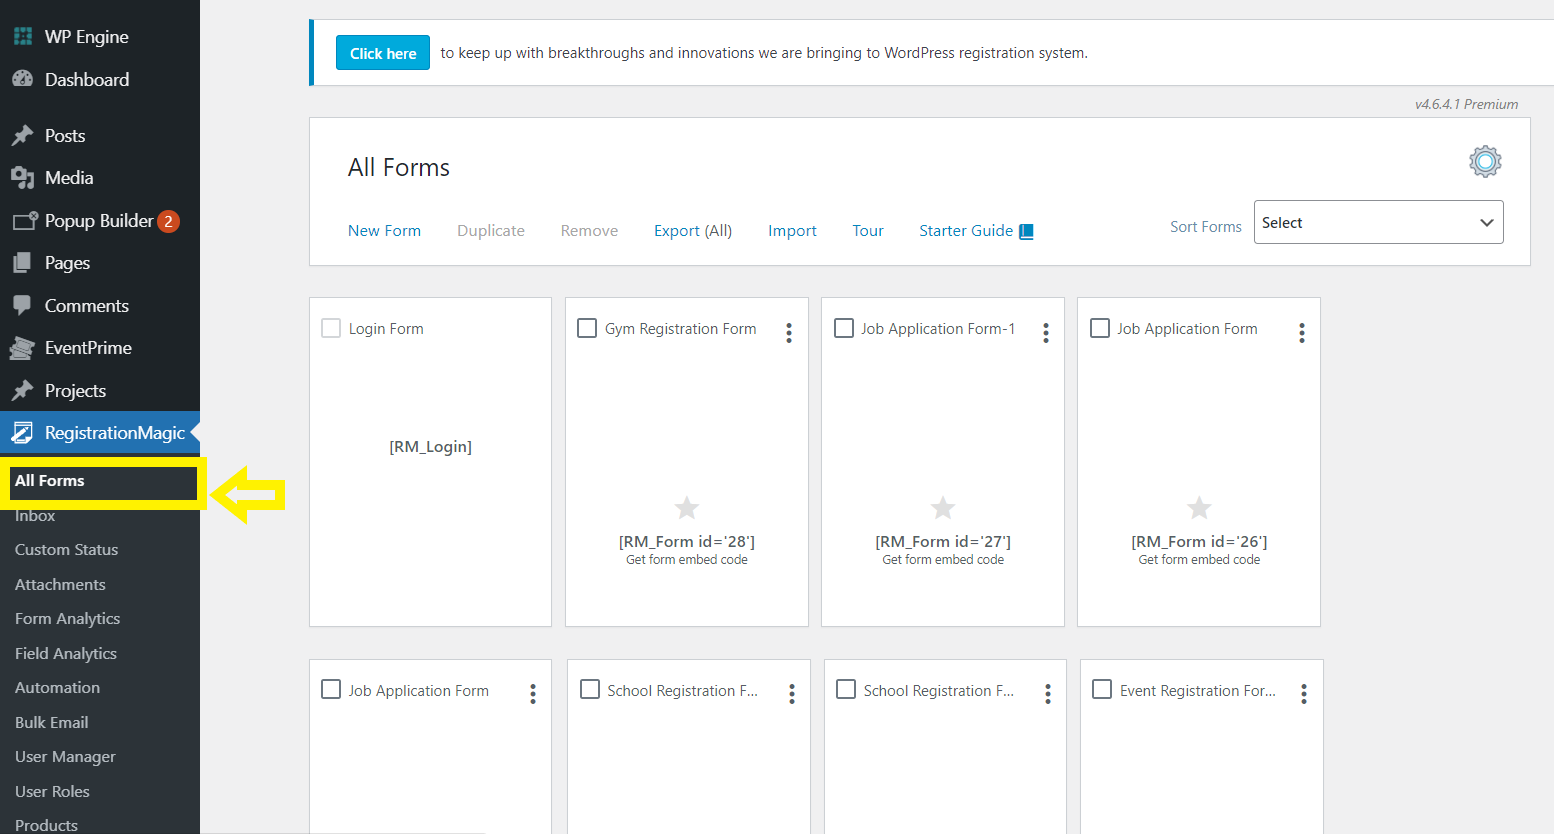
Step 1: Adding a new form using RegistrationMagic.
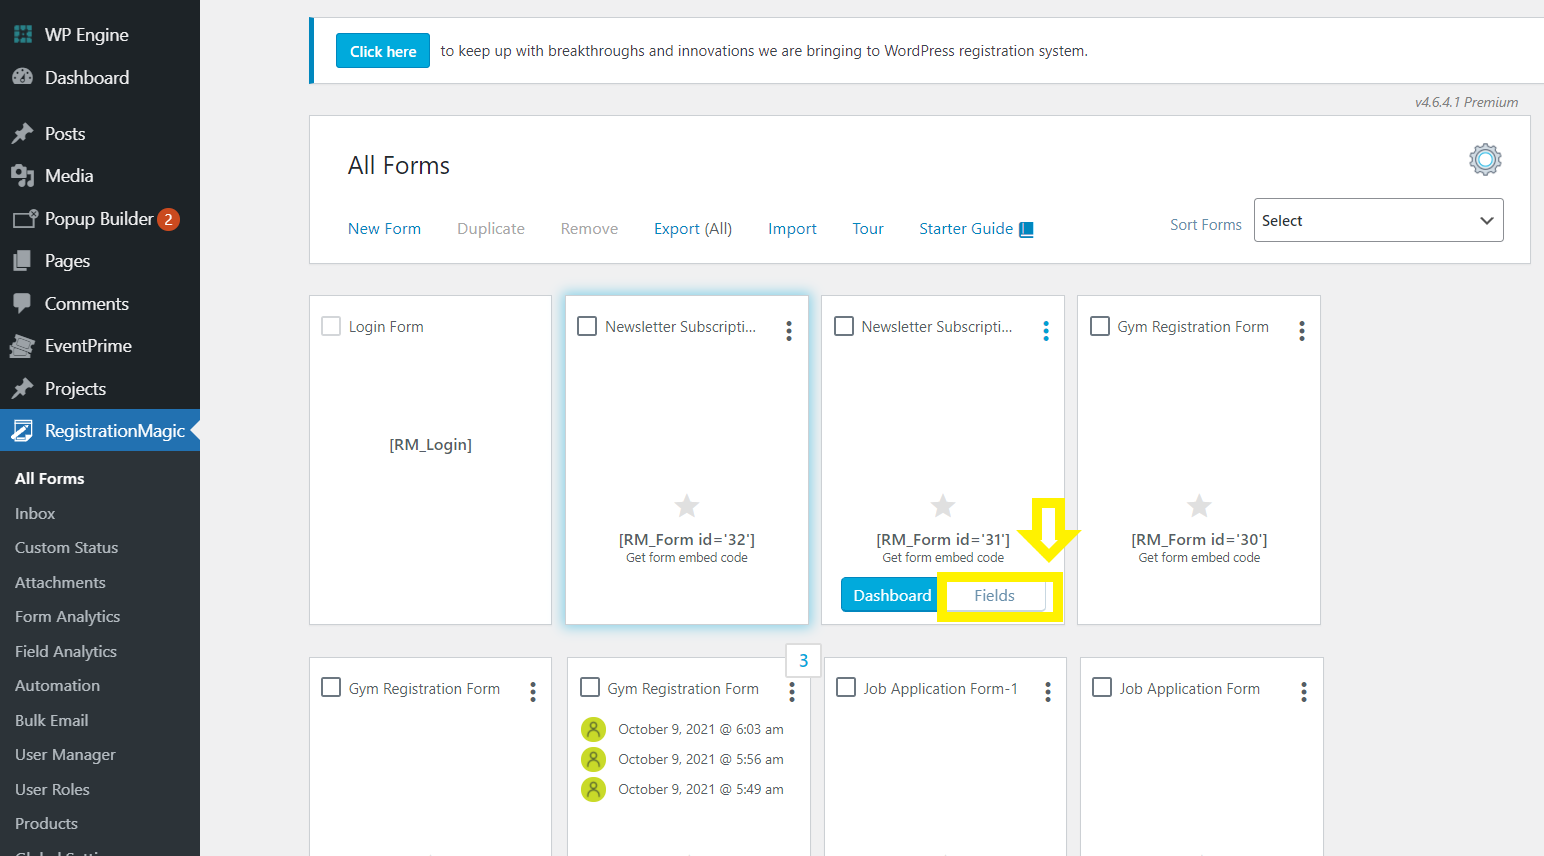
- First, click on the RegistrationMagic plugin and click on “All Forms“.
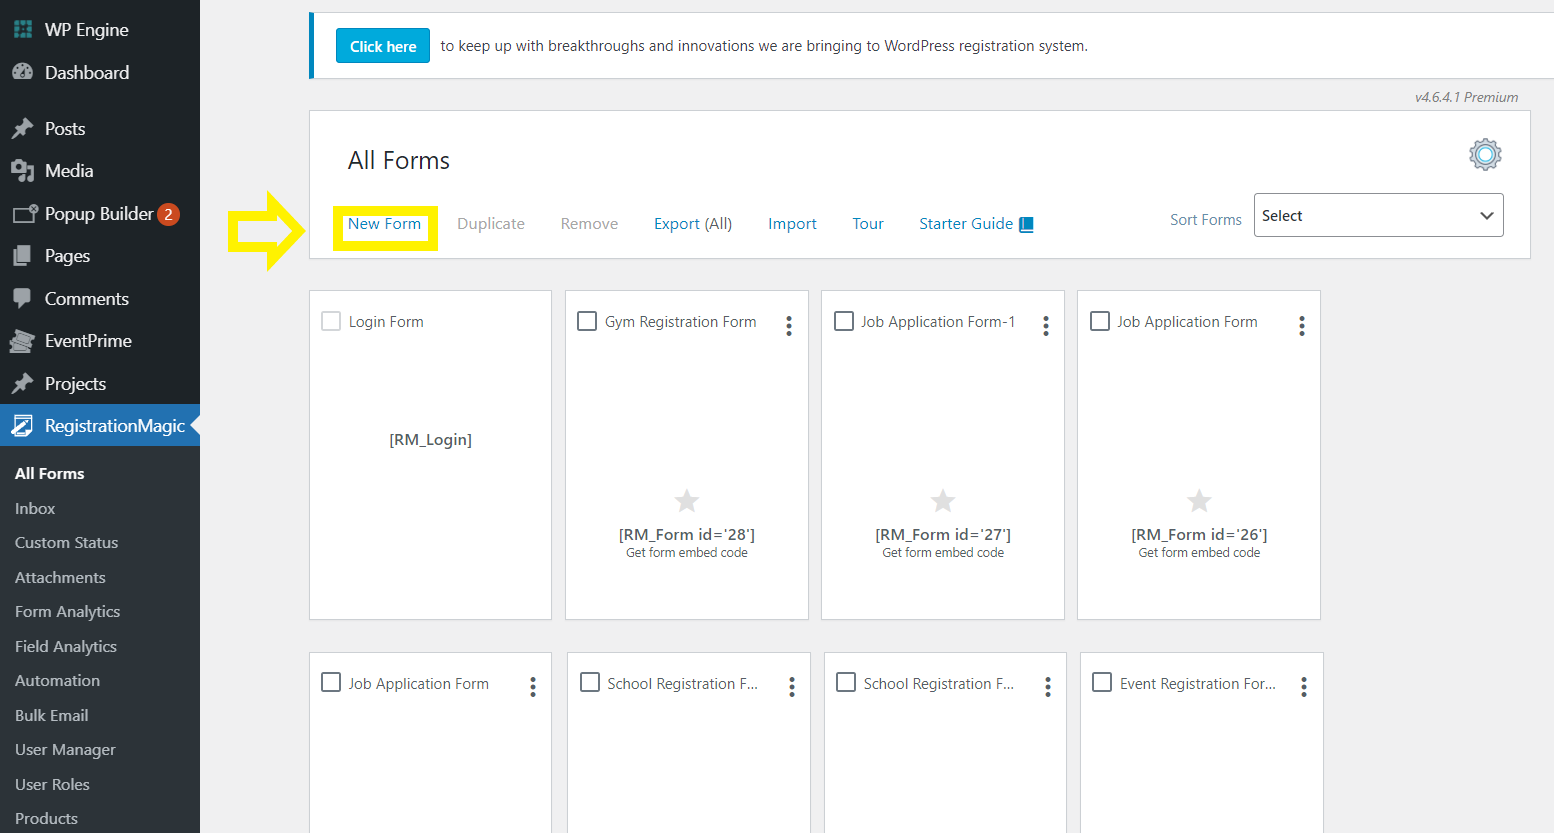
- Next, click on “New Form” to create a new newsletter signup form.
Step 2: Adding a new name for the form.
- In the window that says “Create New Form“, add a title for your form.
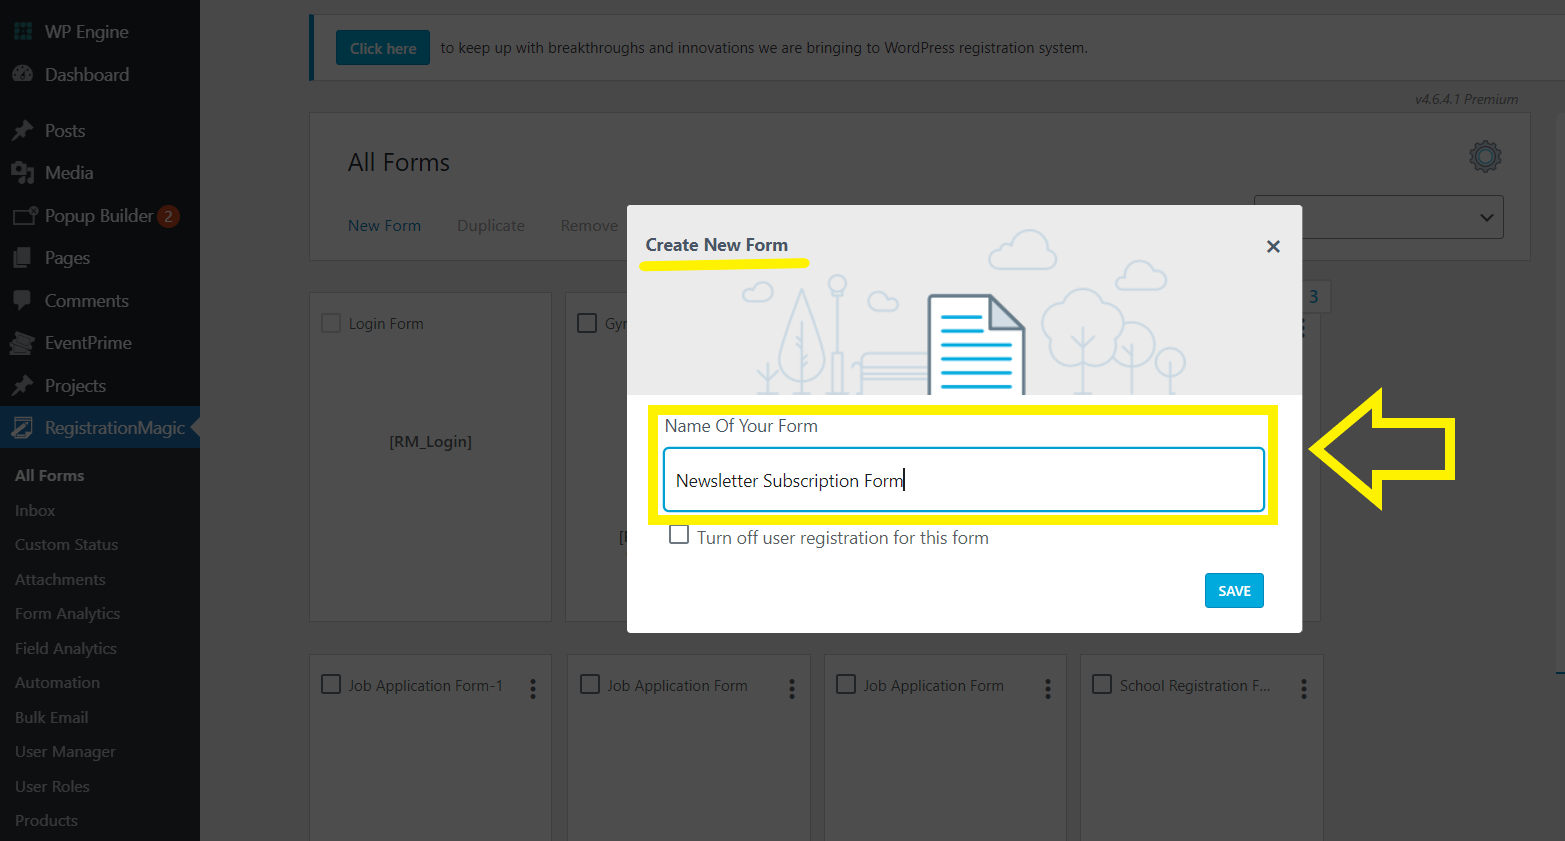
Since we’re creating a form for newsletter subscription, that’s what we’ll name it.
‘Save’ the form and move to the next step
Step 3: Add Fields
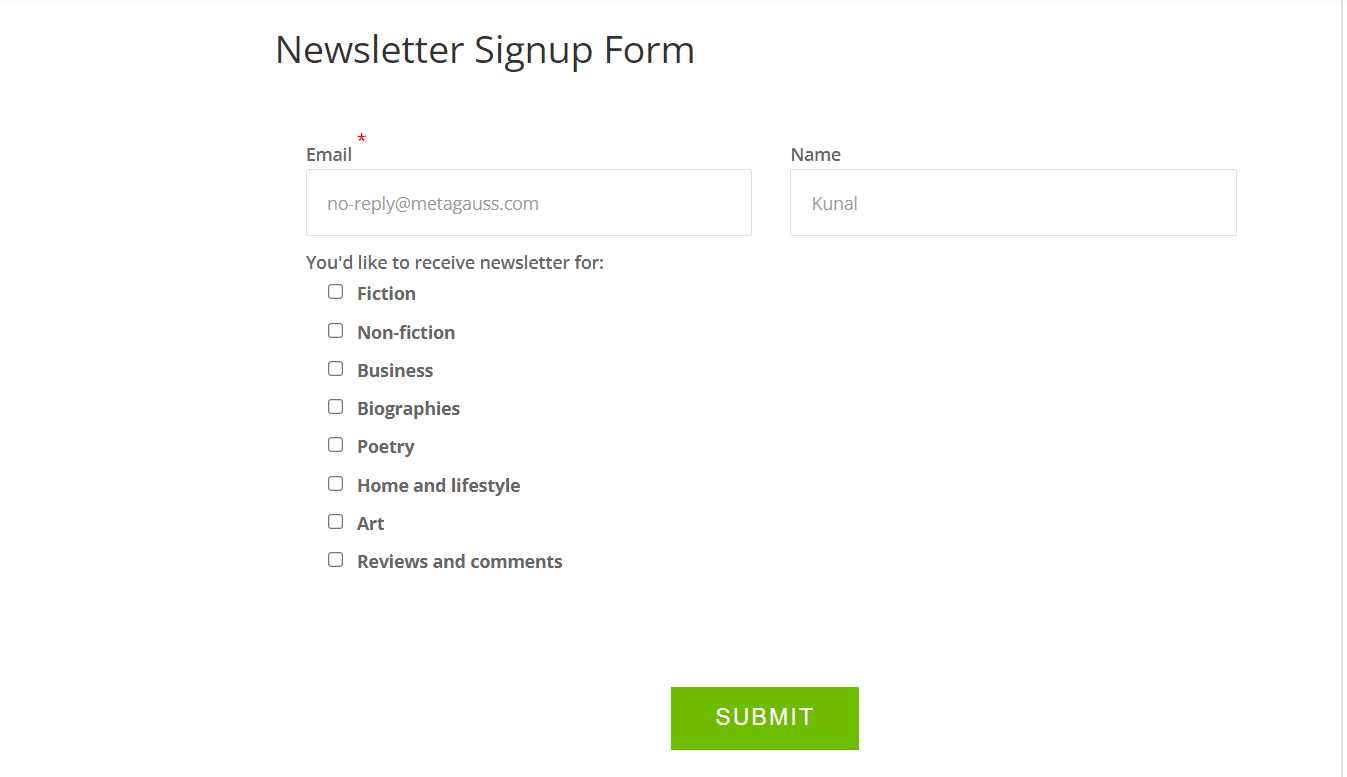
For reference, we’ll create a newsletter registration form for a bookstore that provides book reviews too. Since newsletter forms are to be kept extremely crisp, we’ll create a single-sheet easy form.
We’ll add three categories to the form:
- Name
- Email address
- Book genre preferences
Click on the ‘Fields’ section of your form to start adding different fields from the ‘All Fields’ option
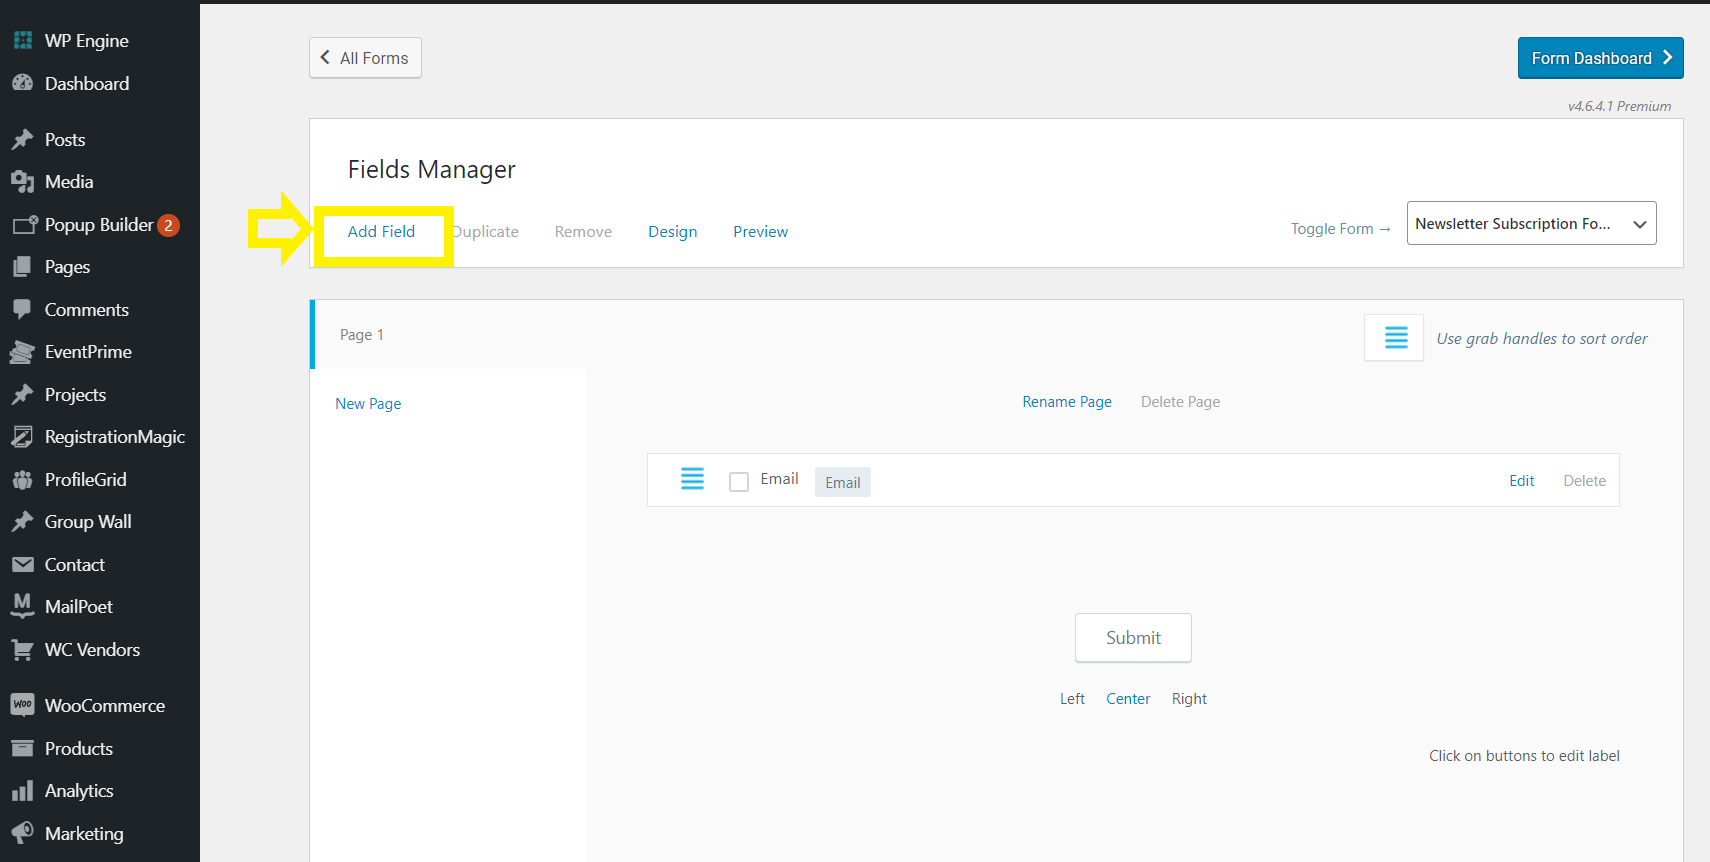
As you can see in the image above, the email field is added to the form by default which means we’ll now have to add the other two fields.
To add a Name, go to the ‘Add Fields’ option under the ‘Profile Fields’ and click on ‘First Name’
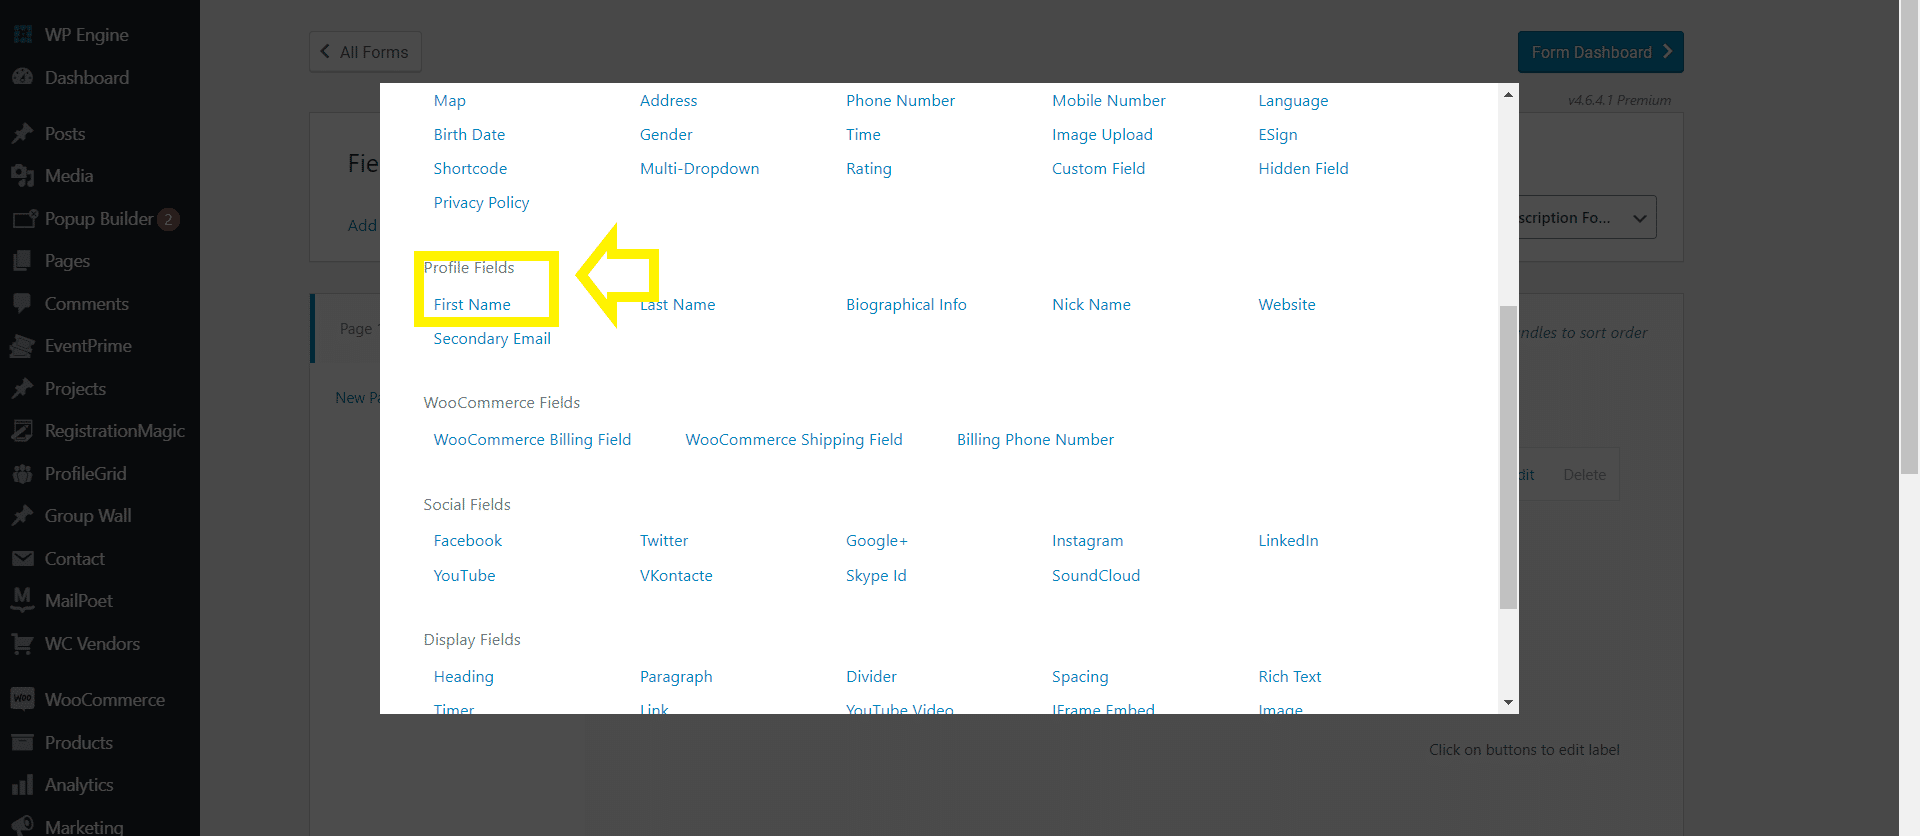
After clicking on the ‘First Name’ option, add a label to the field ‘Name’.
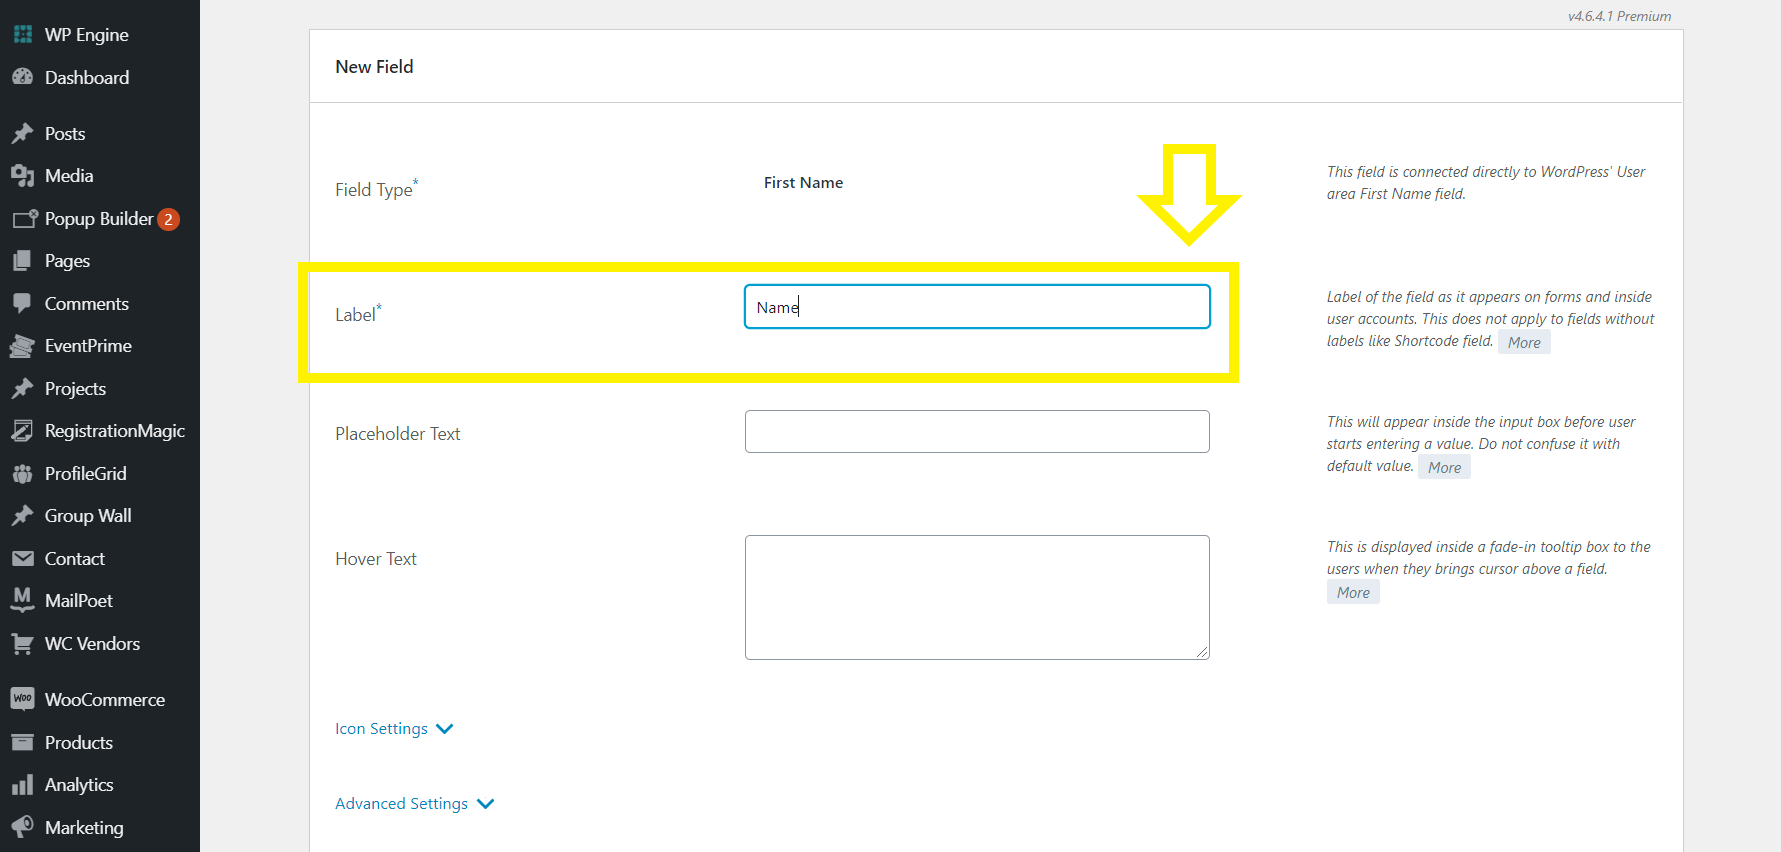
Once labeled, scroll down and add the field to the form using the ‘Add to form’ option.
Now we need to add a field for customer book preferences and newsletter content preferences.
From the ‘Add field’ option, click on the ‘checkbox’ and label it ‘You’d like to receive newsletter for:’
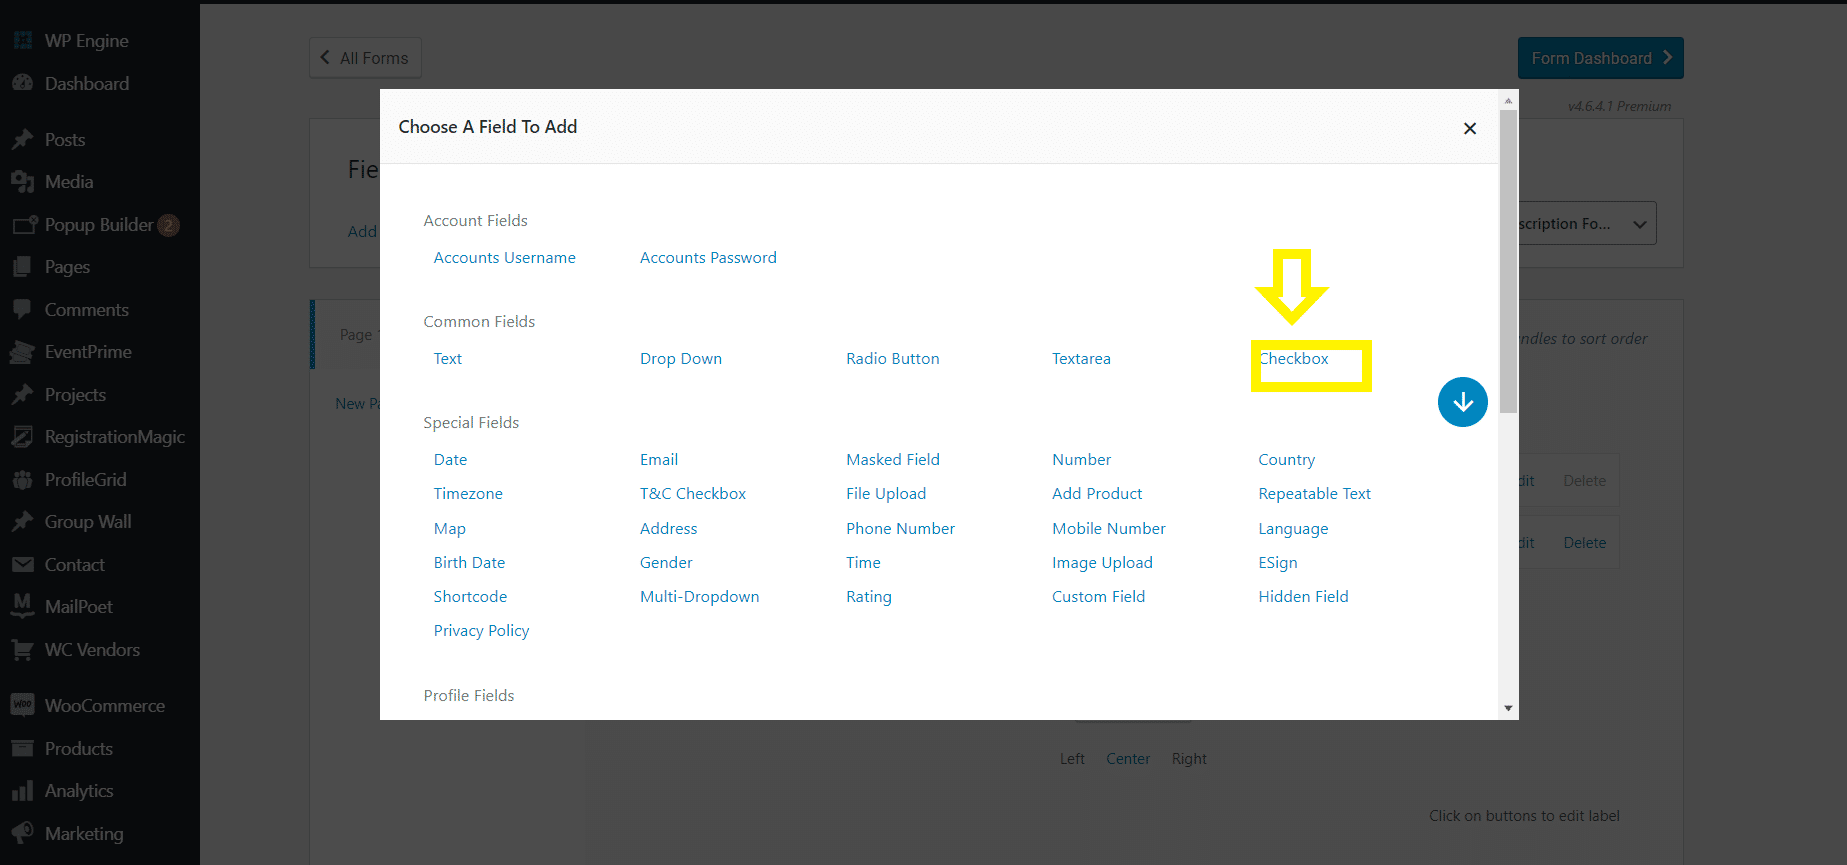
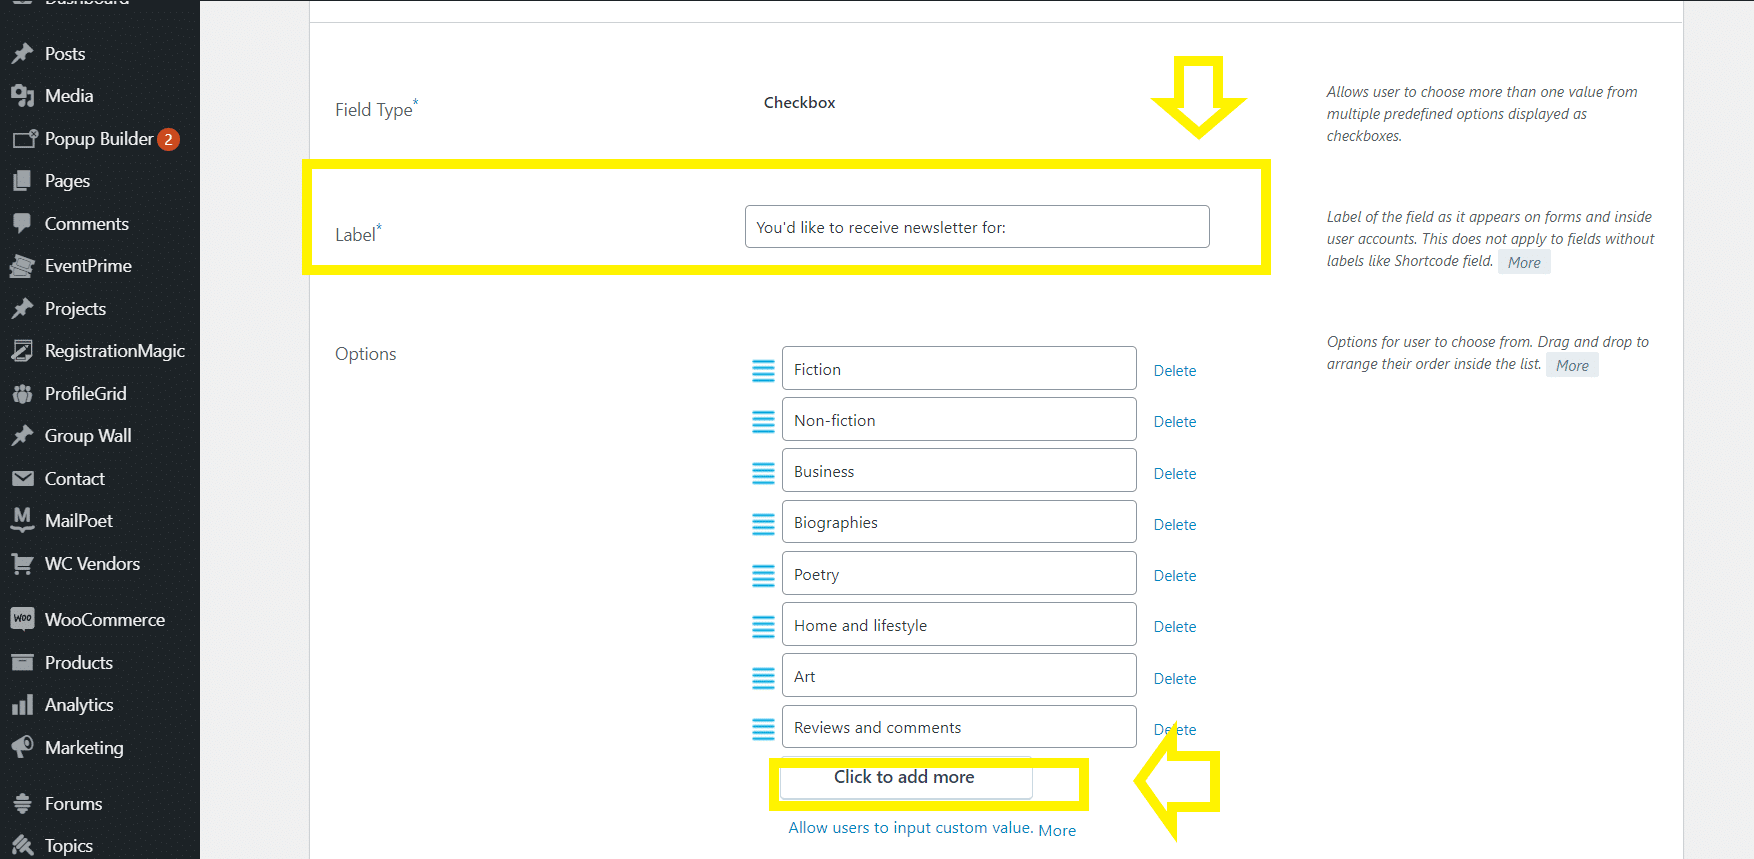
You’ll notice the ‘Click to add more option on the image above. Keep clicking on that till you’re satisfied with the number of checkbox categories.
Here you can observe that for example, we have added various categories here: fiction, non-fiction, business, biographies, poetry, art, reviews, etc. The subscribers can select one or all of the above if they like. This is the preference businesses use for their content customizations.
Once this is done, add this to the form through the option below.
This is of course the basic structure of a newsletter form. You can add as many fields as necessary. You can add text to display for some message that you want to convey or for a coupon code etc. For now, we’ll stick to fundamentals.
With that, your form structure is done leading us to the next step.
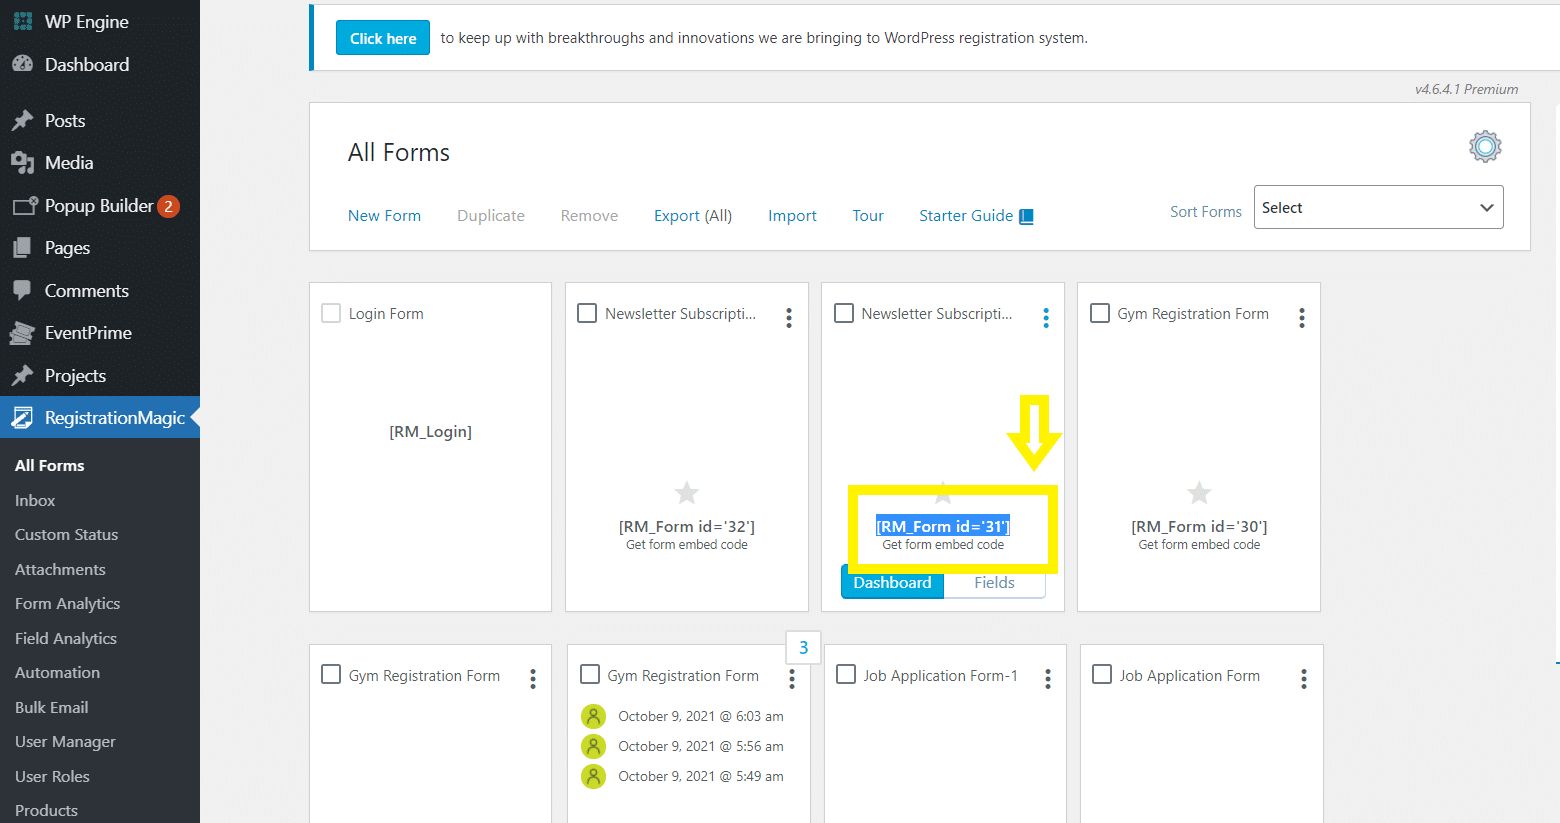
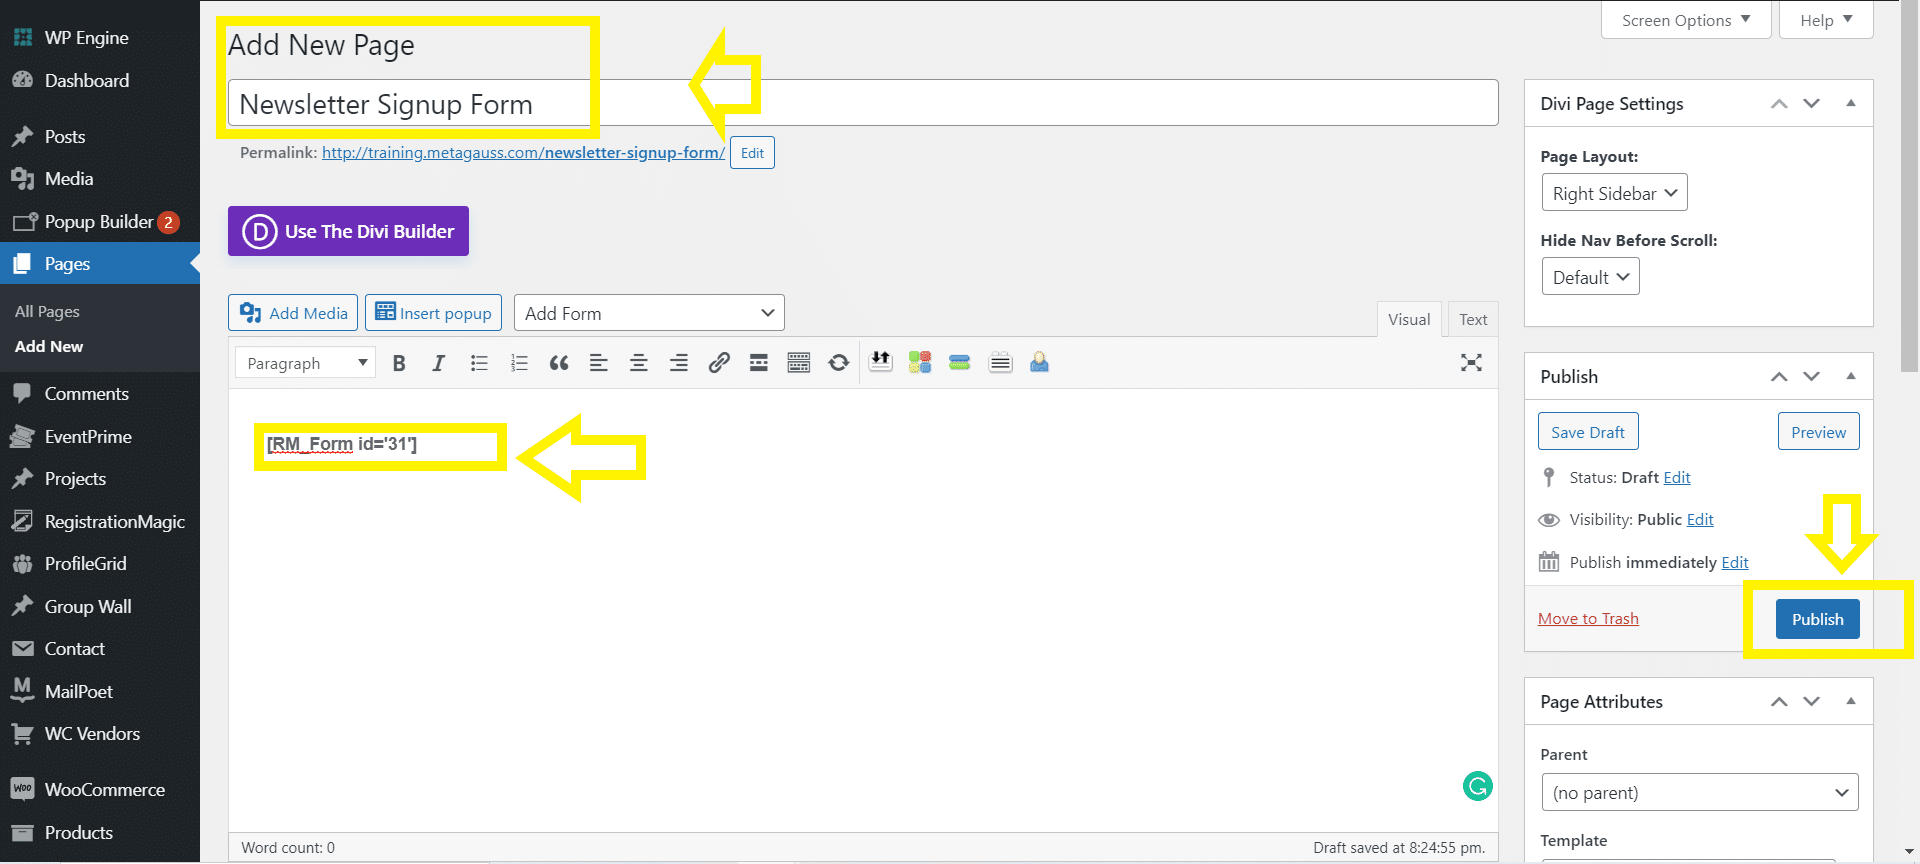
Step 4: Copy the shortcode to a new page
Go back to the ‘All forms’ section. Copy the shortcode of the form.
Now go to the ‘Pages’ section of the website backend. Click on ‘New page’
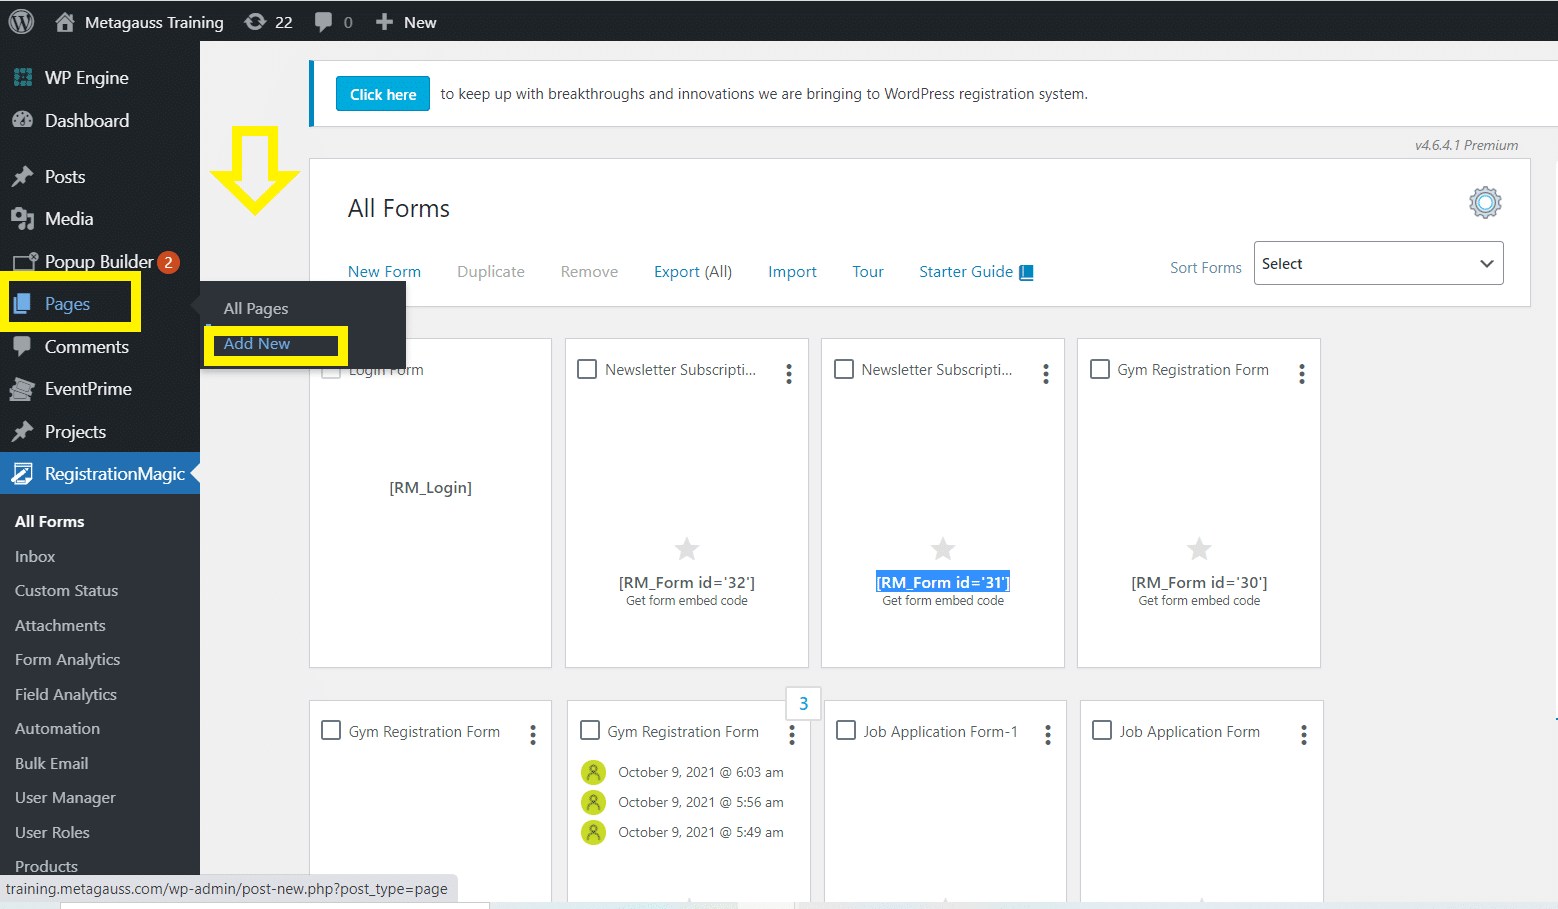
Add the actual title of your form in the ‘Title’ section and paste the shortcode in the ‘Main body’ of the page and click on ‘Publish’
With that, the entire form publishing process is complete. However, if you wish to add this to the main menu of your website, you can go to the ‘Appearance’ option on the website backend options and add this form to the menu and save it. As simple as that!
Frontend view of newsletter signup form sample
In conclusion, the seamless integration of RegistrationMagic into your WordPress website effortlessly aligns with your theme, eliminating the need for additional customization. Meanwhile, the premium ProfileGrid plugin takes user management to the next level, not only handling profiles but also seamlessly organizing memberships. By harnessing the data collected through RegistrationMagic, ProfileGrid enables the creation of event-specific groups, fostering interaction and socialization among members. Imagine the possibilities—your go-to plugin not just for managing events but also for sparking engaging discussions within your community. With this dynamic duo, crafting a vibrant and interactive online space has never been more accessible.
- How to Manage User Registration Status in WordPress - August 8, 2023
- Send Emails to Registered Users in WordPress with Ease - August 6, 2023
- How to Create a User Registration Form on WordPress - September 22, 2022
- Registration Based WordPress Contact Form Plugins - September 15, 2022
- Create a Job Application Form on WordPress Website- In Depth Guide - September 14, 2022
- How to create an efficient Marriage Registration Form in WordPress - November 26, 2021
- How to make a flexible vendor registration form for your business - November 24, 2021
- Creating a Smart Membership Form for Your WordPress Website - November 22, 2021
- How to create a digital Preschool Registration Form - November 18, 2021
- How to make a creative Dance Registration Form with RegistrationMagic - November 16, 2021