Add Image Widget to WordPress Forms with RegistrationMagic
If you add image to WordPress form you can boost its appearance as well as functionality. The image can define or give more clarity about the form or it can just add to the visual appeal.
A blog, content or any webpage with an image is engaging. Most of the traffic drawn by sites are from appealing pictures. Images attract users of every age group. This is the reason why people prefer infographics more over long tail content. When you can add image to WordPress form it will help you to connect with your user in a better way. In order to add image to WordPress form, you need a WordPress form builder plugin. RegistrationMagic is one such plugin that will help you add any custom widget or field on your form. These custom widgets can turn your default form into dynamic ones that can take extensive user data.
The image widget is a read only field in your WordPress forms where your users cannot input any data. This is an image file that you can upload from your WordPress image gallery to adorn your form.
So, let me go ahead and help you add image to WordPress form with RegistrationMagic.
Navigating to the Image Widget
First, install the RegistrationMagic plugin on your dashboard. After activating it you will find the plugin menu on your menu panel.
From there, click on the All Forms link.
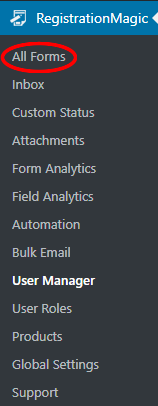
Then you will land on the All Forms page. Here you will find all the forms that you create through this plugin. On every form cover in this page, you will find two links: Fields and Dashboard.
The Dashboard link lets you take care of the WordPress form design, security, payment etc.
While the Fields link lets you add custom Fields and Widgets to your default form.
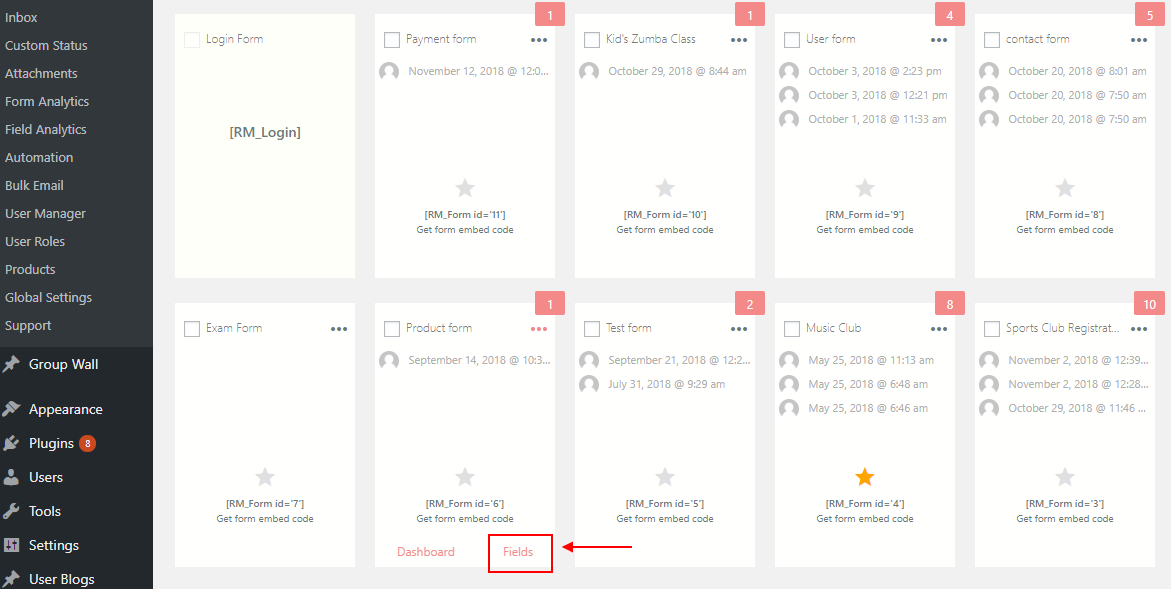
Click on the Fields link, to land on the Fields Manager page.
Here you will find all the Fields that you add to a certain form. Besides, all the Fields and Widgets that add to each form remain unique to it.
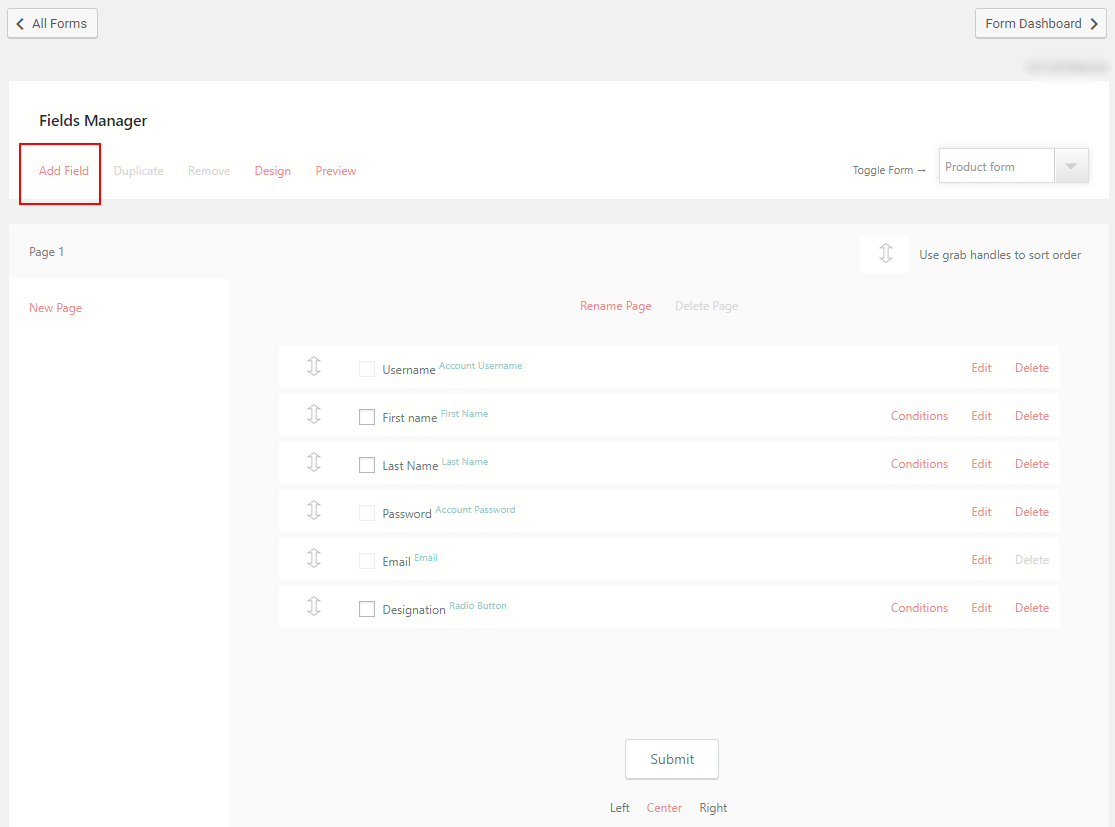
Now, click on the All Field link at the top left corner of the page. You will find a pop-up with all the preset fields and widgets of the plugin.
From here, click on the Image Widget under Display Fields to add an image of your choice to WordPress forms.
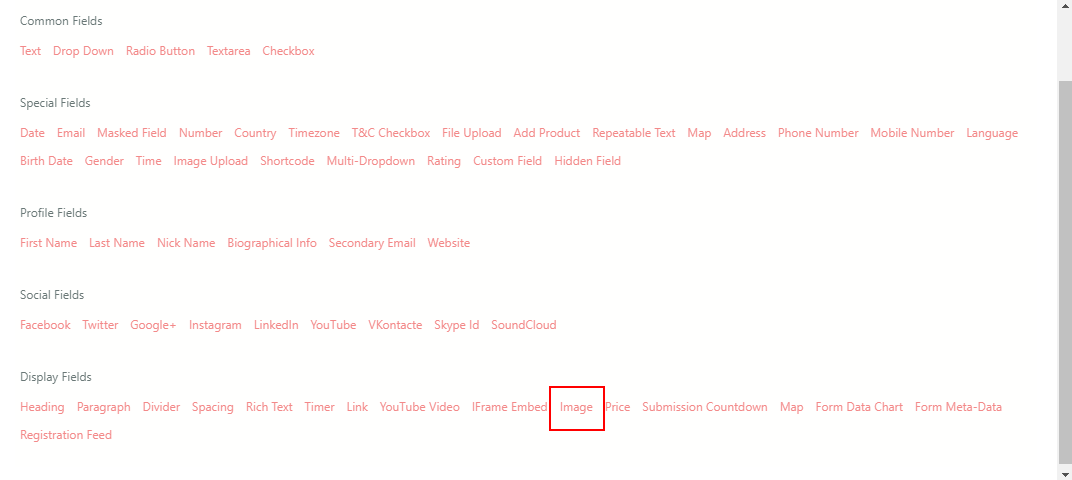
The Display Field generally contains all the WordPress widgets that can add visual read-only elements to the form.
There are other Display Widgets such as maps, links, price, form meta data, timer etc that can make your default form fit for any industry usage.
Now, after selecting the Image Widget you will land on the Image Widget Settings page. From here you can upload any image from your WordPress image gallery to add to your form.
Setting up the Image Widget
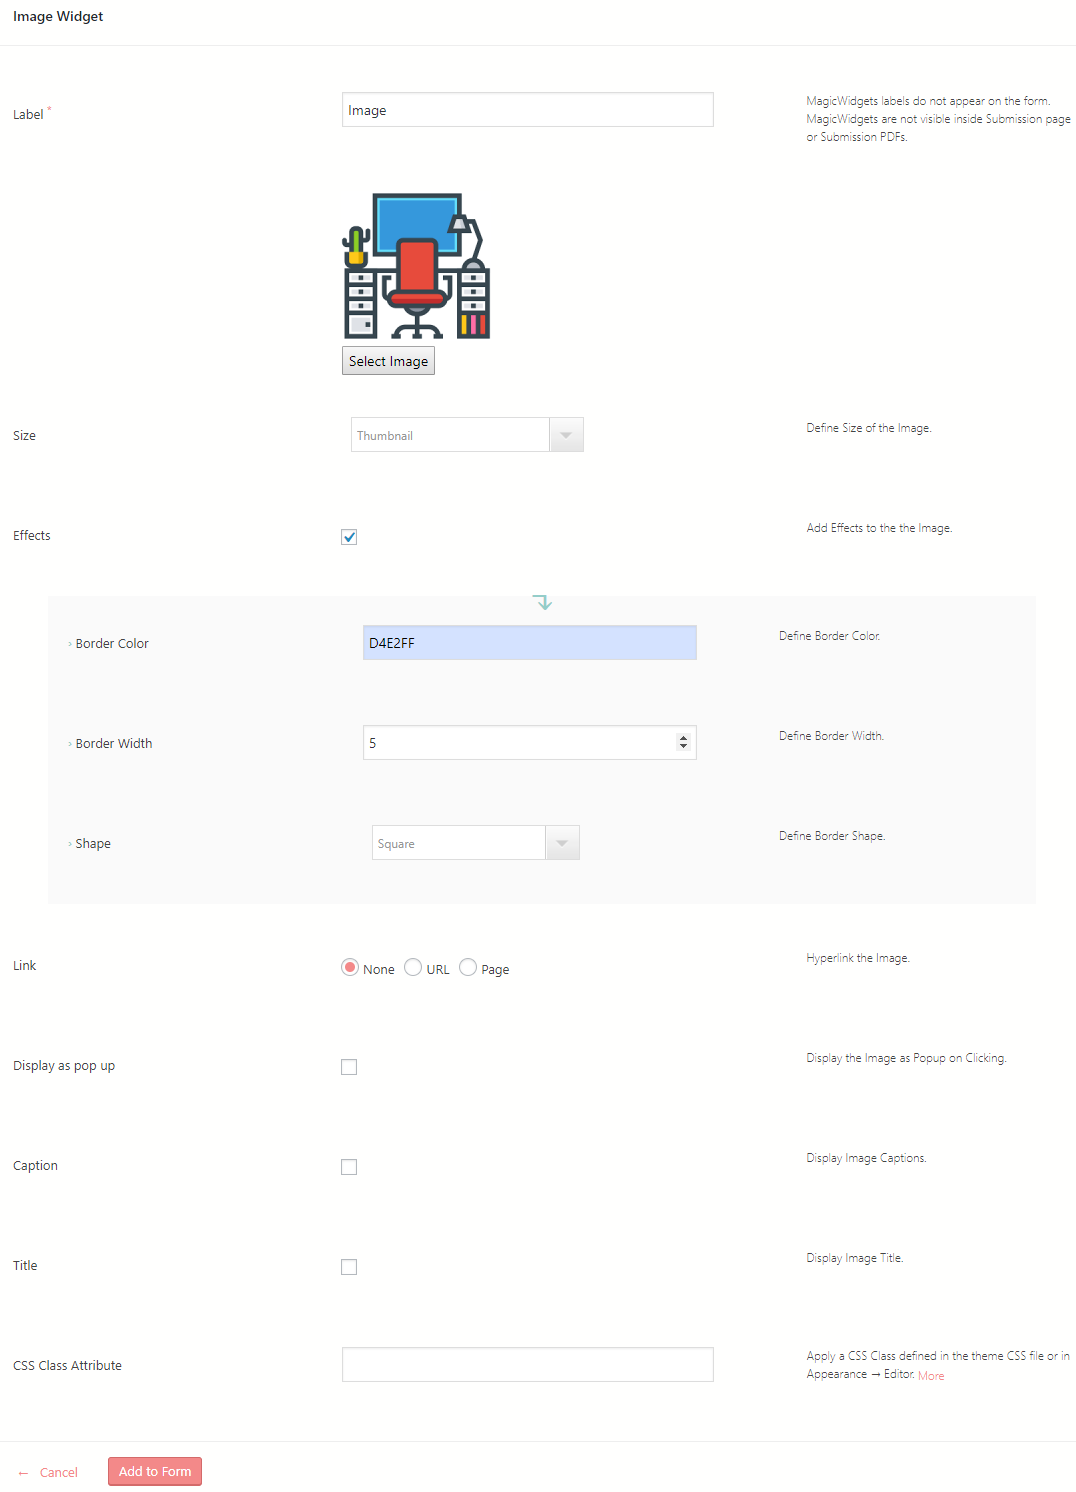
At the Image Widget page, you will find the following options to add and define the image that you want to add to WordPress forms.
First, assign the Label with the term “Image”. The name that you add here will not appear on the form. This Label will only define this image widget in the Field Manager page.
Next, select the Image from your WordPress image gallery. This will be the image that you want to add to your form. Upload the image and embed it on your form.
Then go to the next setting and set the size of the image from there. You will be able to see a drop-down with options such as Thumbnail, 50%, and 100%. These options define the size your image will take in your form.
Once you assign the size, go to the next settings. On checking the Effects Box, you can apply effects to your image. Likewise, you can set the border color, width and shape of your image.
Then the Link field lets you add a URL or page link to your image as per your choice. Clicking on the image will take your users to the page of your choice.
Next, check the “Display as popup” option if you want. On checking the box your image will appear as a pop up when users click on it.
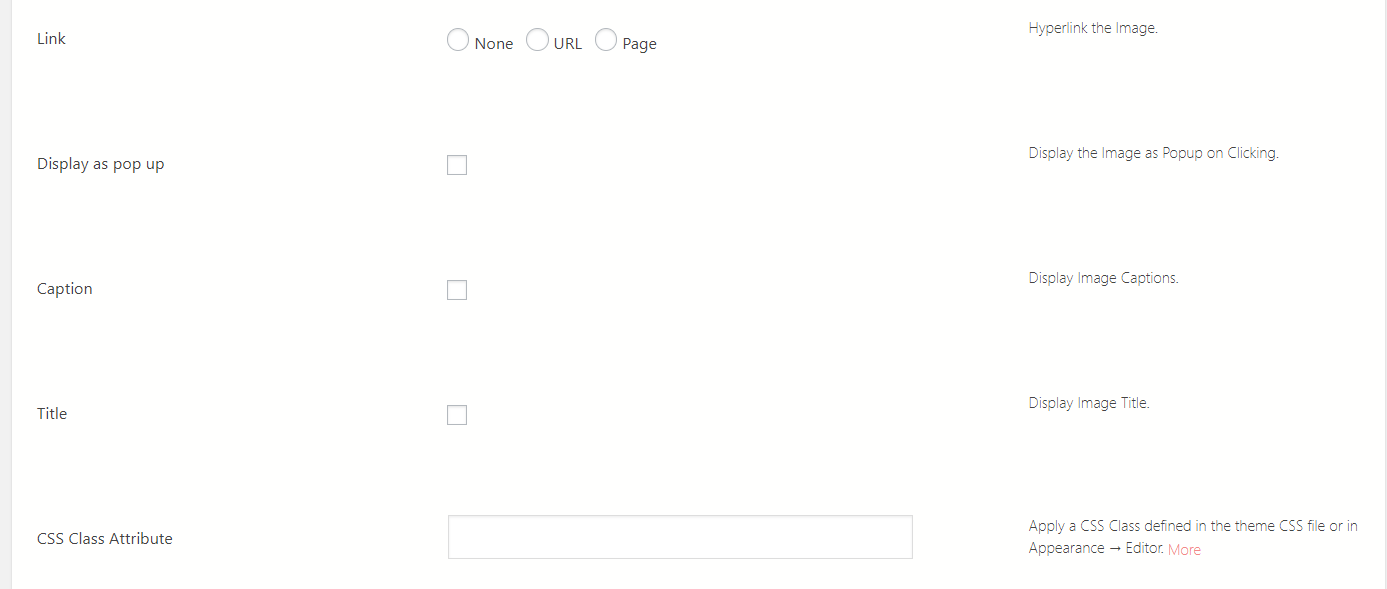
Then the Caption and the Title fields assign captions below and titles above the image. Both options are not mandatory. But if you want to define your image in the form then you can add a title or caption to it.
A CSS modifies the way a page looks. However, you must define the CSS class inside the coded file. Remember to add the class with an HTML code.
The Image Widget on WordPress Forms
Lastly, as you click on Add to Form you got just one last thing to do before you see your image on your form.
RegistrationMagic makes it really simple to publish forms on your site. You can display WordPress form using shortcode with this plugin. On the All Forms page, you will find each form has a unique shortcode.

Just copy the shortcode from the form cover. Go to the All Pages section from the WordPress menu.
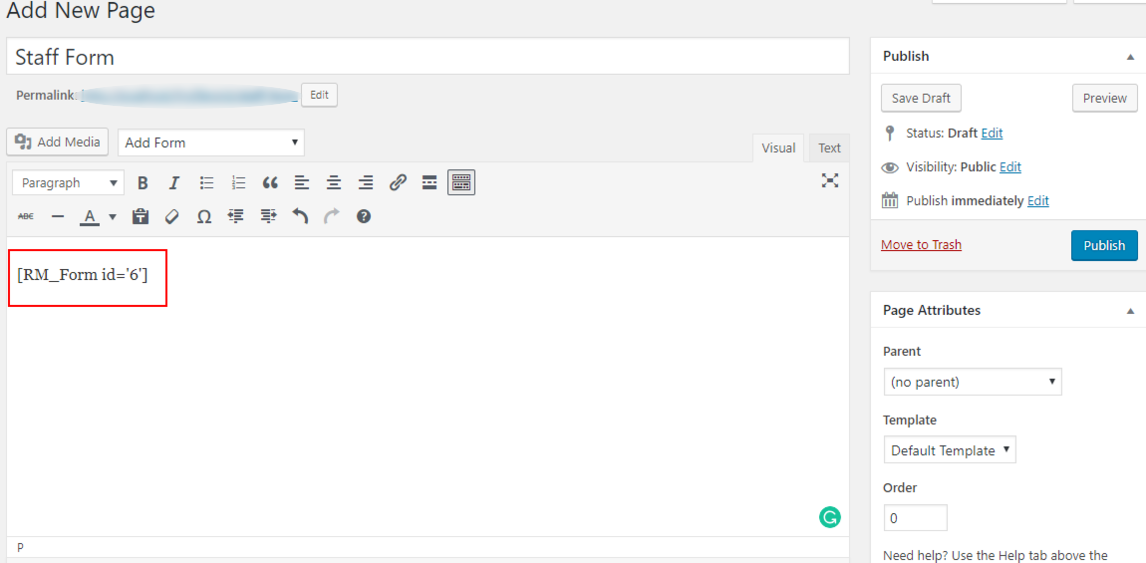
Paste the shortcode in the body section of a new page, name it and click on Publish.
Now go to the frontend of your site to find your form with the image widget of your choice.
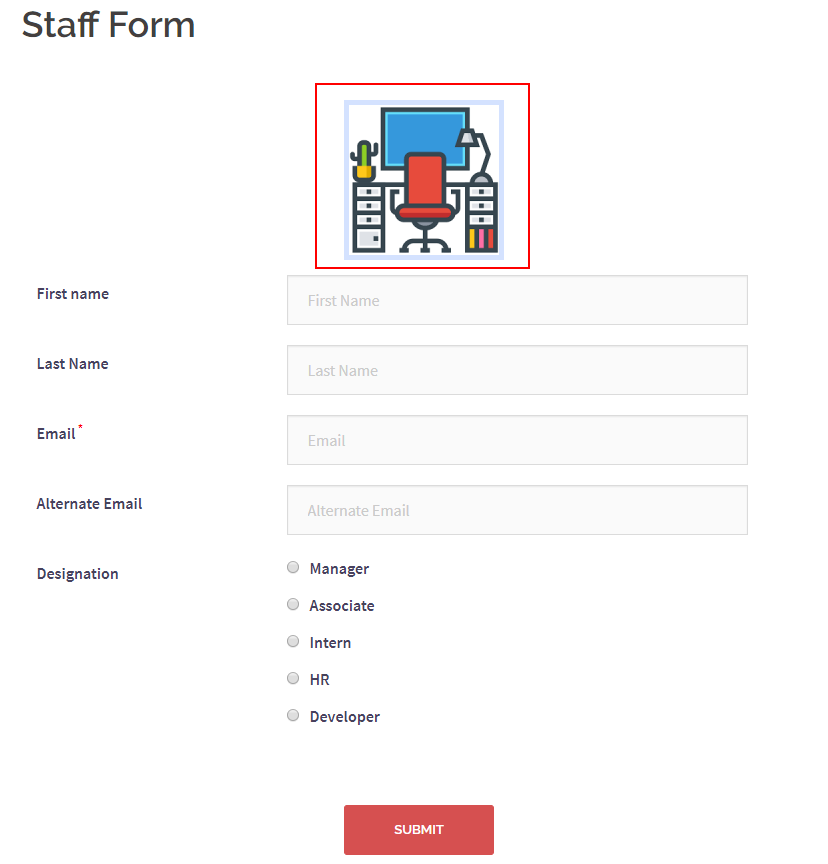
In the above image, you can see my form with the Image widget marked in red. The image is shaped as a thumbnail and appears at the top of all the custom fields of this WordPress form builder plugin. You can also change the position of this image as per your choice from the Field Manager page. There, you will find a two header arrow handler with which you can move a field or widget anywhere you want. Besides, you can add as many image widgets as you want in your form.
Custom Forms with WordPress Widgets
So, you saw, how easily we could add image to WordPress form with RegistrationMagic. The option to add image to WordPress form opens up a lot of scope for your site. For a class, gym or workshop sign up form you can add your class or facility images. This will give clarity about your business to your users. Also, your form will become more efficient since it will stand out from other default forms.
If you are hosting an event especially for kids then an appealing form with images will attract more users. Besides, for real estate companies, an image can be an added boon to show your sites and project images on your form.
So, make more use of the WordPress form builder plugin, RegistrationMagic and make your forms fit more efficient and for professional uses.
- Complete Automation Guide for WordPress Forms - July 20, 2024
- WordPress User Management Plugin Guide - July 18, 2024
- Add CAPTCHA in WordPress Login and Registration Form? - July 16, 2024
- How to Send Automated Welcome Emails in WordPress - July 15, 2024
- WordPress User Roles, Permissions & Role Editor [Complete Guide] - July 14, 2024
- How to Display Custom Success Message in WordPress Forms - July 12, 2024
- Publish Registration Forms and Display Registered Users - July 11, 2024
- How to Approve WordPress User Accounts Without Logging Into Dashboard - January 25, 2021
- How to Set up Two Factor Authentication in WordPress - April 4, 2019
- How to Edit or Replace Default WordPress Registration Form - April 2, 2019
