
Add Heading to WordPress Form with RegistrationMagic
When you can add heading to WordPress form, your form gets a structured look. You get the scope to define what the form is about in the heading.
The Heading section in WordPress form gives clarity to a user who is going to fill up the form. So if you add heading to WordPress form you can define its purpose, topic, usage, etc. on it.
So, to add heading to WordPress form, you need a WordPress user registration plugin to transform your default form. RegistrationMagic is such a custom form builder plugin which can make your default form display custom user data fields.
This plugin can add custom Fields and Widgets to your form to make it dynamic and efficient.
The Heading widget primarily adds a bigger font sized read-only text to the form. One can use it for creating custom headings. Moreover, one can add this Heading Widget of the plugin at any section of the form. It is not necessary to always keep the heading at the top of the form.
It allows you to customize the heading as per your need. So that you can differentiate one section from another with a heading in between them.
It’s important to keep in mind that a well thought heading would entice more users to register through that form. Also, a properly formatted heading would always be more pleasing to users than a casual one.
So come let’s discuss how to add heading to WordPress form with the Heading Widget of RegistrationMagic.
Exploring the Plugin and Widgets
First, install the RegistrationMagic plugin on your dashboard. After activating it you will find the plugin menu on your menu panel.
From there, click on the All Forms link.
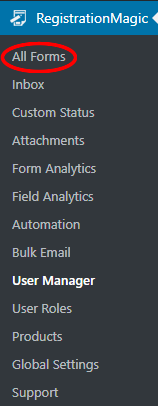
Then you will land on the All Forms page. Here you will find all the forms that you create through this plugin. On every form cover in this page, you will find two links: Fields and Dashboard.
The Dashboard link lets you take care of the WordPress form design, security, payment etc.
While the Fields link lets you add custom Fields and Widgets to your default form.
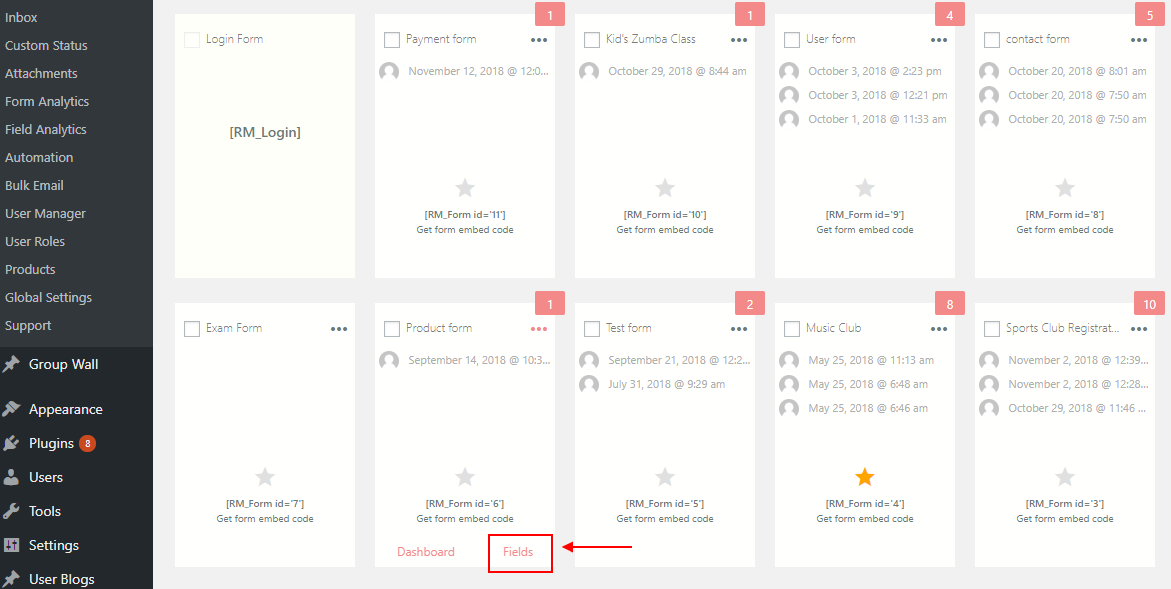
Click on the Fields link, to land on the Fields Manager page.
Here you will find all the Fields that you add to a certain form. Besides, all the Fields that add to each form remain unique to it.
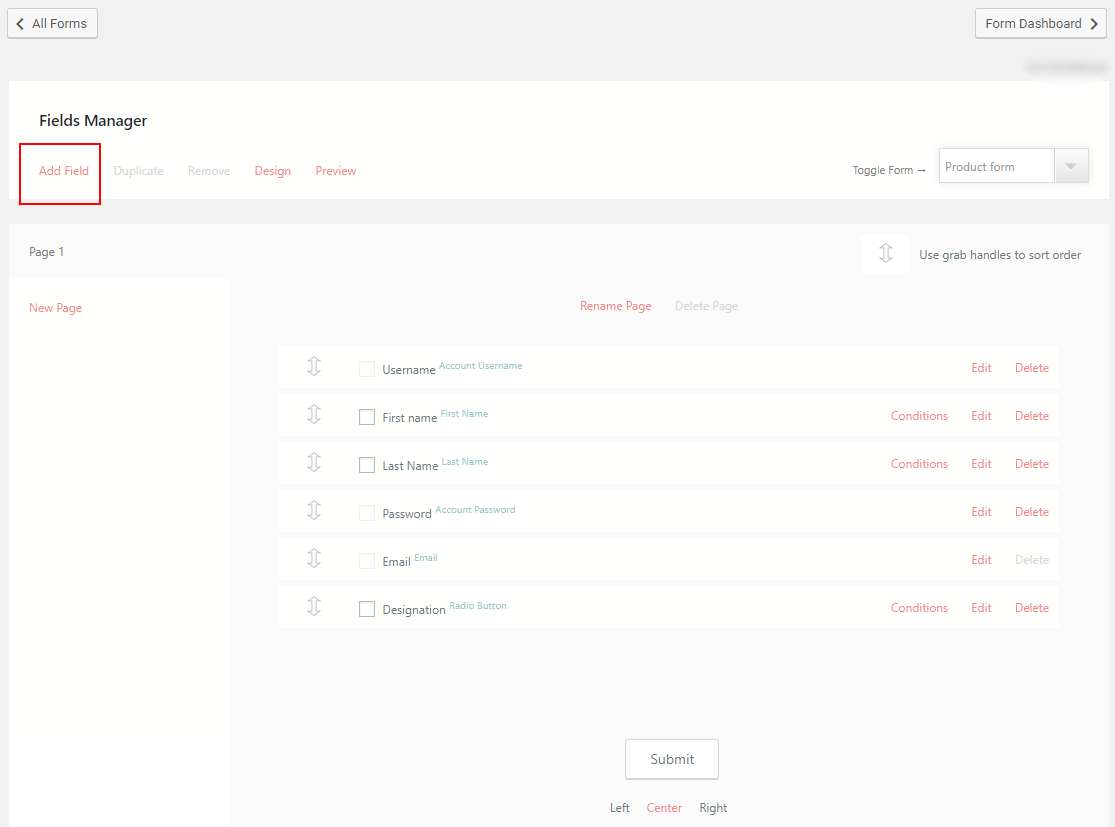
Now, click on the All Field link at the top left corner of the page. You will find a pop-up with all the preset fields and widgets of the plugin.
From here, click on the Heading Widget under Display Fields to format HTML heading styles on your form.
The Display Field generally contains all the widgets that can add visual read-only elements to the form.
Now, after selecting the Heading Widget you will land on the Heading Widget Settings page. From here you can define how the HTML Heading styles should appear on your form.
Heading Widget Features
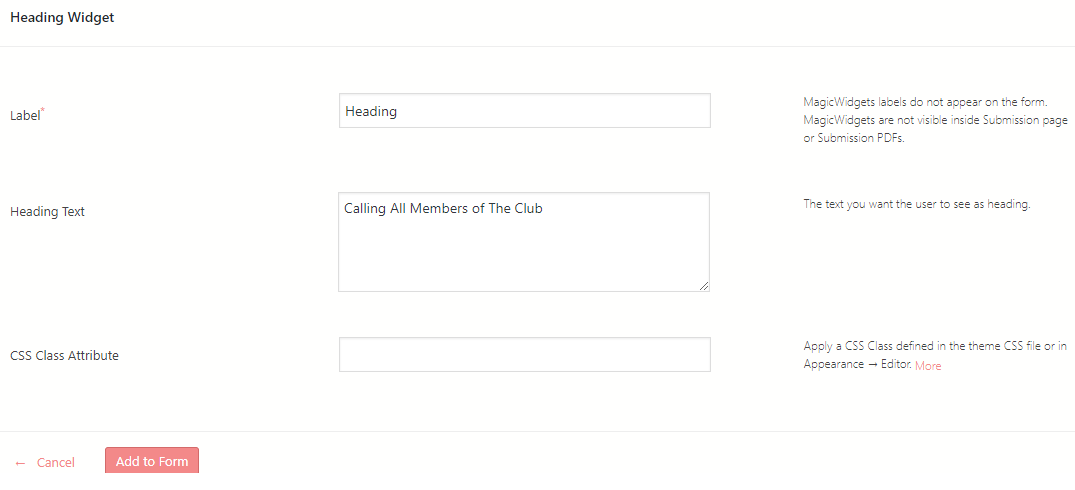
At the Heading Widget page, you will find the following options to add heading to WordPress form.
First, Label lets you add a text to this field that will help you define the widget on the backend. The Label of the Heading Widget does not appear on the frontend form.
Next, the Heading Text will let you write the content that you want as the heading tags SEO on your form.
Then the CSS Class Attribute is optional to define in the Appearance or the theme CSS file.
After filling up all the mandatory fields and go ahead and click on the Add to Form button.
The fun thing about the custom fields and widgets of this plugin is that you can place them wherever you want.
There are two arrow handlers beside every field in the Field Manager page. Just drag and drop the fields or widgets anywhere you want by clicking on those handlers.
Heading Widget on Frontend Form
After formatting, the heading of your WordPress form publish the form to see how it looks.
RegistrationMagic makes it really simple to publish forms on your site. You can display WordPress form using shortcode with this plugin. On the All Forms page, you will find each form has a unique shortcode.

Just copy the shortcode from the form cover. Go to the All Pages section from the WordPress menu.
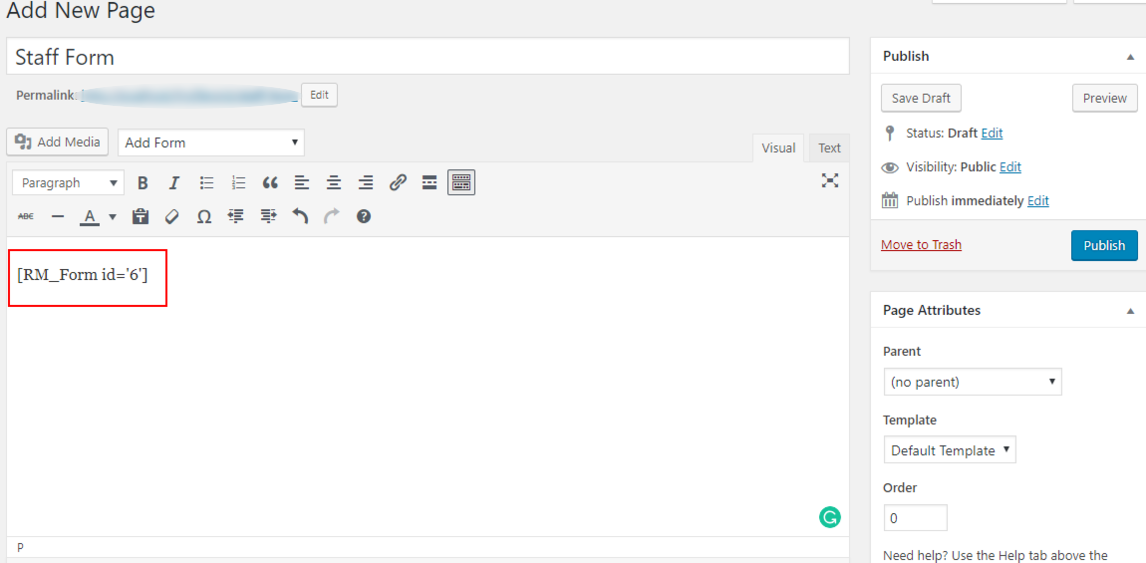
Paste the shortcode in the body section of a new page, name it and click on Publish.
Now go to the frontend of your site to find your form with the heading tags SEO of your choice.
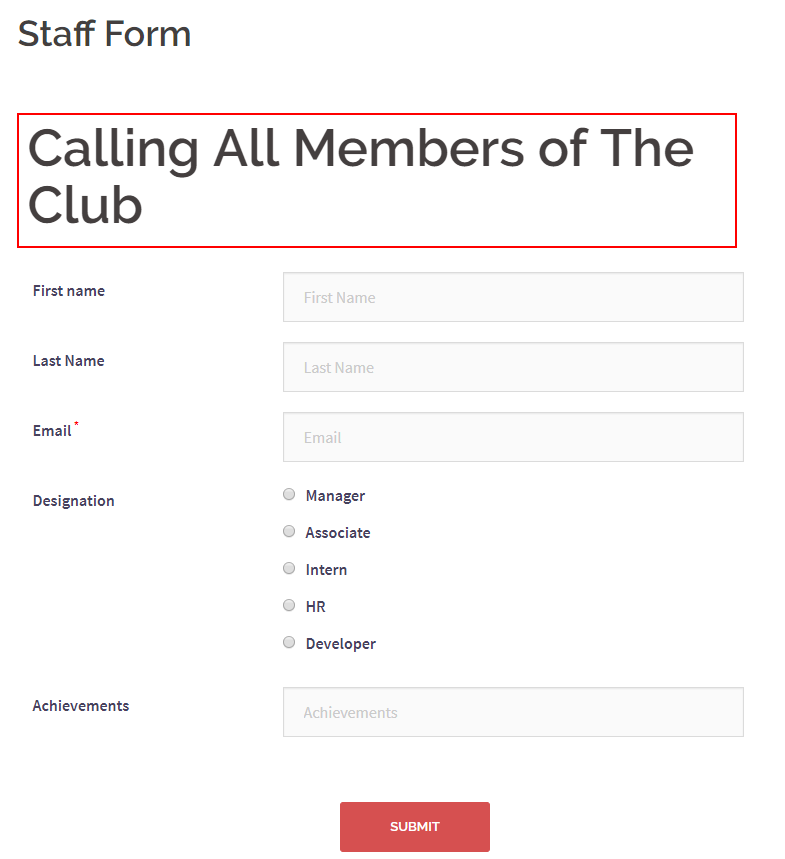
In the above image, you can see my form with the Heading text marked in red. The Heading style here is H1 so that it appears enough bigger than the other texts.
You can see the addition of heading to WordPress form in action here.
However, WordPress offers a default process to add heading to WordPress form. For that, you need to go to the backend page of the form where you pasted the shortcode.
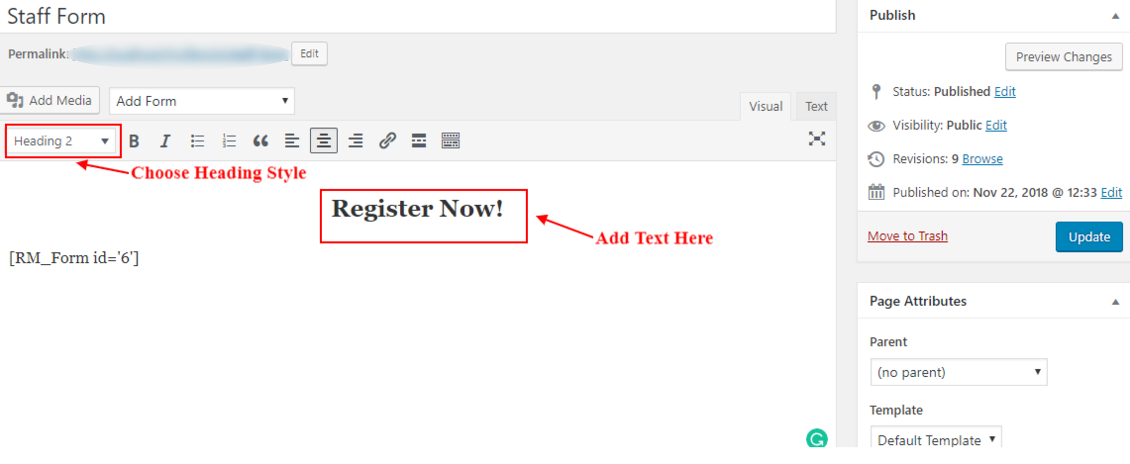
Choose a Heading Style from the panel on top. Write your Heading Text on the body section. You can also define the alignment and style of the font. Then click on Update.
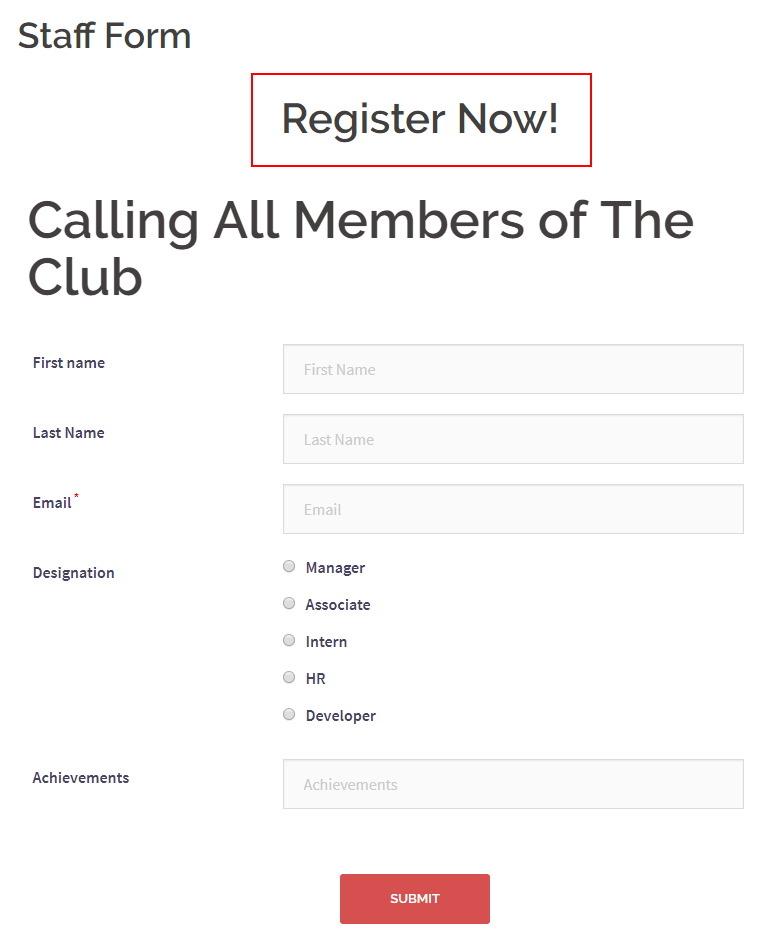
In the above image, you can see the default heading style marked in red on my WordPress form. Unlike the RegistrationMagic heading widget, there isn’t any option to alter the position of the heading. Users can even apply heading in between fields with this plugin.
Usage of the Heading Widget in Forms
When you add heading to WordPress form, you can also set the H1 tag SEO of your site. Hyper Text Markup Language (HTML), is the language used to display web pages in a browser. H1 H2 tags are generally the most prominent HTML heading styles. There are other styles such as H3, H4, H5, H6 which are comparatively smaller in size.
If users apply keywords to their H1 H2 tags, they can help search engines know what the site is all about. Also, heading tags SEO help your users easily navigate through your pages.
Your heading can make a text stand out in your WordPress form. Be it a disclaimer or a content aimed at attracting users. Since you can apply the RegistrationMagic Heading Widget between other fields. You can use this heading widget to even break up the form in different sections.
So, this plugin makes sure your form is easy for users to read. Thus making it efficient and applicable for professional usage.
- Complete Automation Guide for WordPress Forms - July 20, 2024
- WordPress User Management Plugin Guide - July 18, 2024
- Add CAPTCHA in WordPress Login and Registration Form? - July 16, 2024
- How to Send Automated Welcome Emails in WordPress - July 15, 2024
- WordPress User Roles, Permissions & Role Editor [Complete Guide] - July 14, 2024
- How to Display Custom Success Message in WordPress Forms - July 12, 2024
- Publish Registration Forms and Display Registered Users - July 11, 2024
- How to Approve WordPress User Accounts Without Logging Into Dashboard - January 25, 2021
- How to Set up Two Factor Authentication in WordPress - April 4, 2019
- How to Edit or Replace Default WordPress Registration Form - April 2, 2019
