
Add Metadata to WordPress Form with RegistrationMagic
When you can add metadata to WordPress form you can show various information about the form to your users. This creates a transparency about your site thus making it more reliable to your users.
Visible metadata on WordPress forms makes your registration page look more efficient. But adding a user meta is not possible in default Google forms or free online form templates. So installing a WordPress user registration plugin would be a good idea.
RegistrationMagic is one such plugin that can help you create custom forms to serve diverse purposes. This plugin offers numerous custom fields to add to WordPress forms. WordPress metadata is one such field among its wide range of preset fields.
This WordPress metadata field displays various properties of the form on the frontend. It keeps count of the number of submissions and the time of the last submission. The user meta field also keeps track of all the activities carried out in relation to the form. Besides, when you add metadata to WordPress form, it helps to analyze the form in a better way.
So, let’s go ahead and learn how to add metadata to WordPress form with the RegistrationMagic plugin.
Navigating to the Form Meta Data widget
Right after installing RegistrationMagic, you will find the plugin menu on your site dashboard.
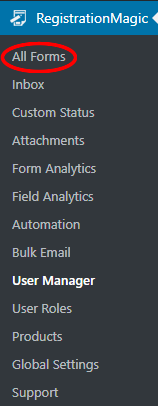
On the plugin menu, click on All Forms to land on a page where you will find all the forms that you create through RegistrationMagic.
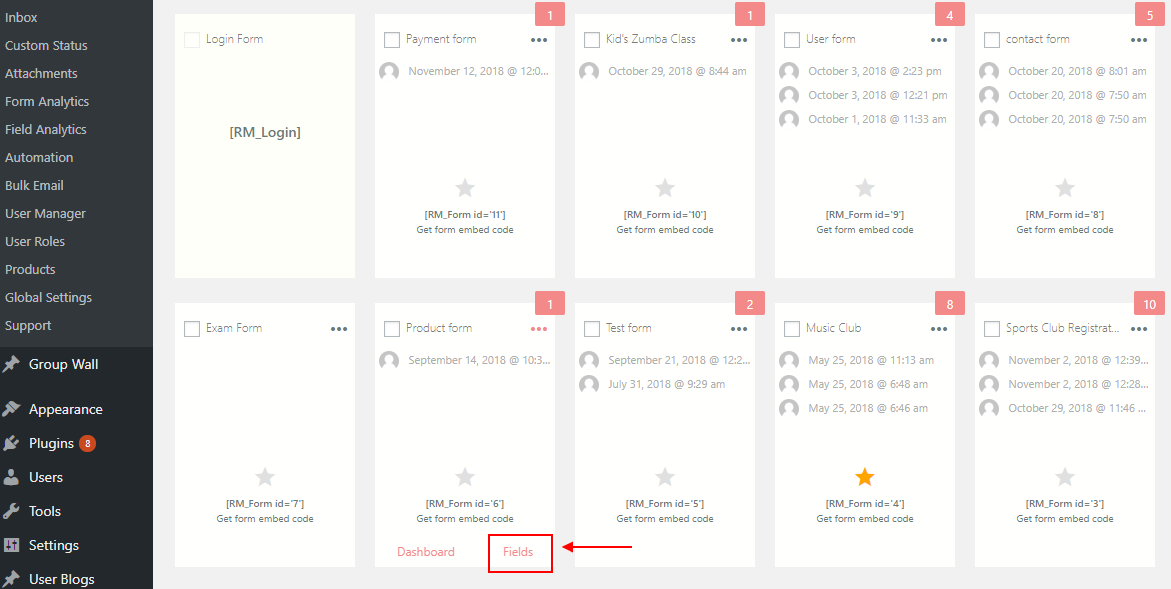
From here, hover on any existing form. You will find two links – Dashboard and Fields at the two bottom corners of a form cover.
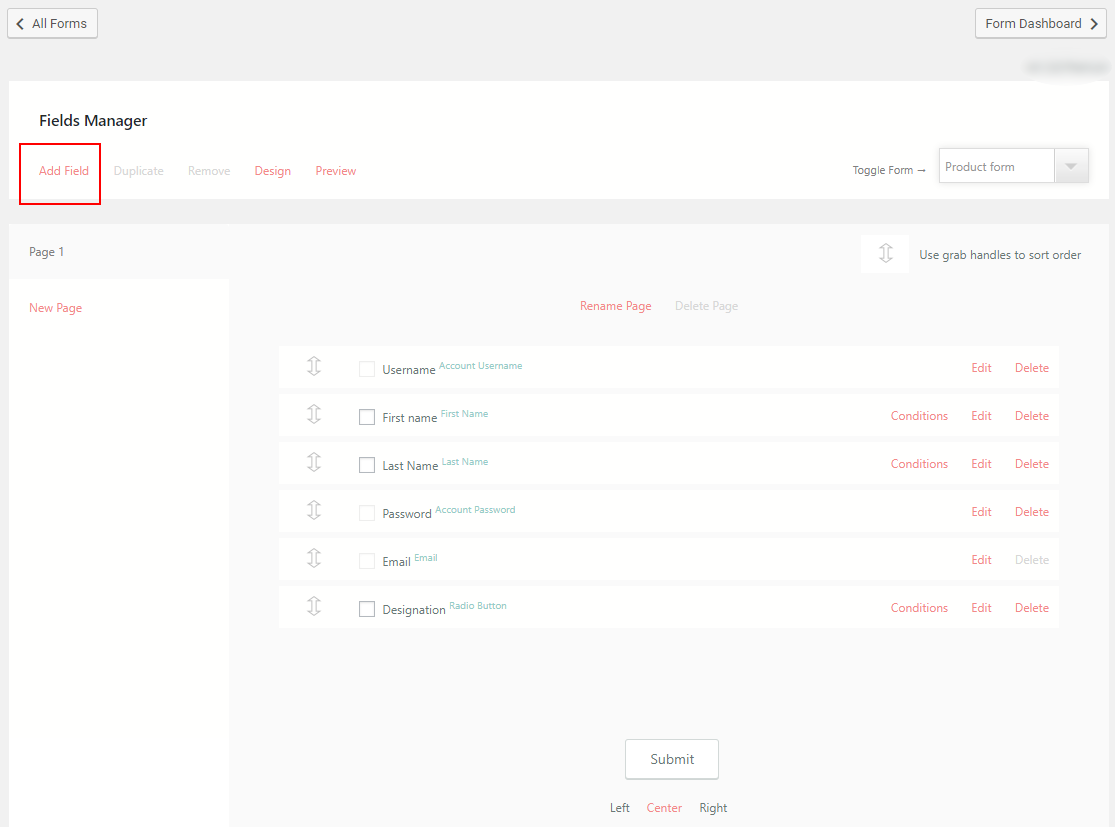
Click on the Fields link, to land on the Field Manager page. In this page, you will find an Add Field link at the top corner. From this field, users can start adding new custom fields to WordPress forms.
By clicking on the Add Field link, a pop up will appear with all the preset custom fields of this plugin.
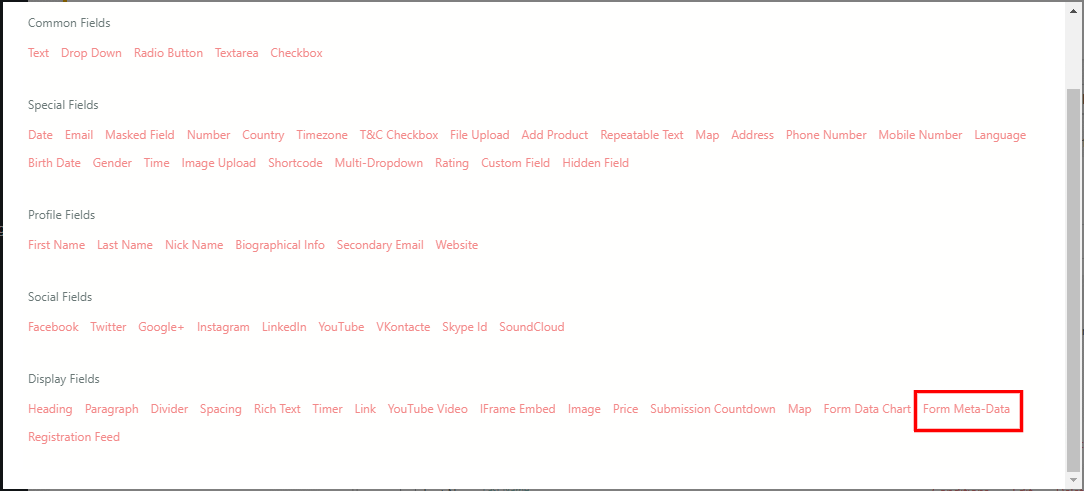
From this pop up, as you can see, select the Form Meta Data field under the Display Fields heading. After doing so, you will land on the Form Data settings page.
Form Data Settings Page Features
The Form Data page contains a lot of interesting modules that you can add to your form.
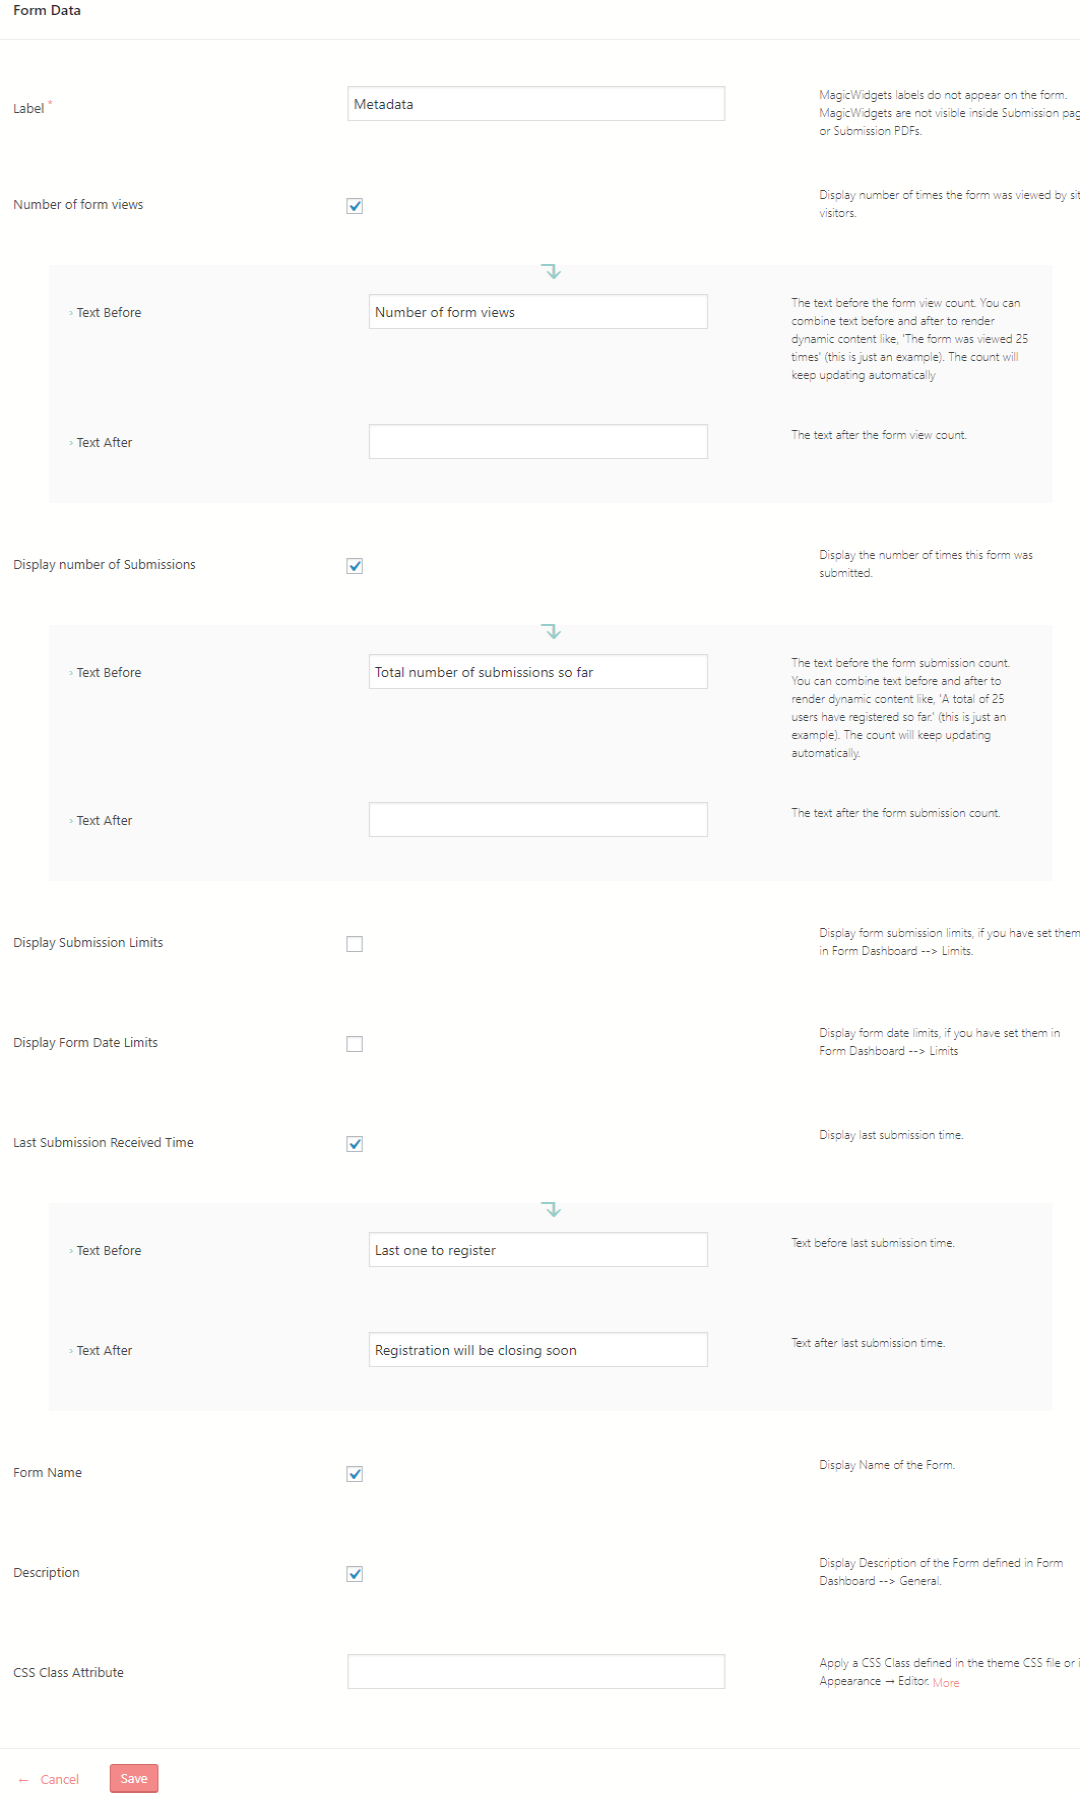
Firstly, name the label as User Data. The label for most of the display fields do not appear on the form.
Below the Label field, there are other settings with checkboxes. The “Number of form views” option displays the number of times the form has been viewed. Upon checking it, a text field will appear where you can insert a text related to the form view count.
In our example, we wrote the “Number of Form Views” to the ‘Text Before’ field. You can also add new text, which will appear after the form view count.
The next field displays the number of times the form has been submitted. Checking it, a text field will appear where you can insert a text related to the form submission count. In our example, we added “The total number of submissions so far” to the ‘Text Before’ field. You can also add new text, which will appear after the form submission count.
Scroll Down and you will find a checkbox with the option to “Display form submission limits”. Make sure you have set them on Form Dashboard. The next field, “Display Form Date Limits” will record a timeline of form submissions. This data also has to be set accordingly in the Form Dashboard.
The next option is “The last submission received time”. This indicates the time at which the form was last submitted. You can even include new text, which can appear both before and after the last submission time data.
You can also include the form name and a brief description of your form.
Lastly, you can apply a CSS Class that is predefined in the CSS coding file.
Frontend View
Now the only thing left is to publish the form on the frontend to see if the WordPress user meta field is working on our form. Since RegistrationMagic makes it really simple to publish forms with shortcodes, we will copy this form shortcode from the from cover.

Then we will go to the All Pages section of the WordPress dashboard and paste the shortcode on a new page. Name it whatever you want and click on Publish.
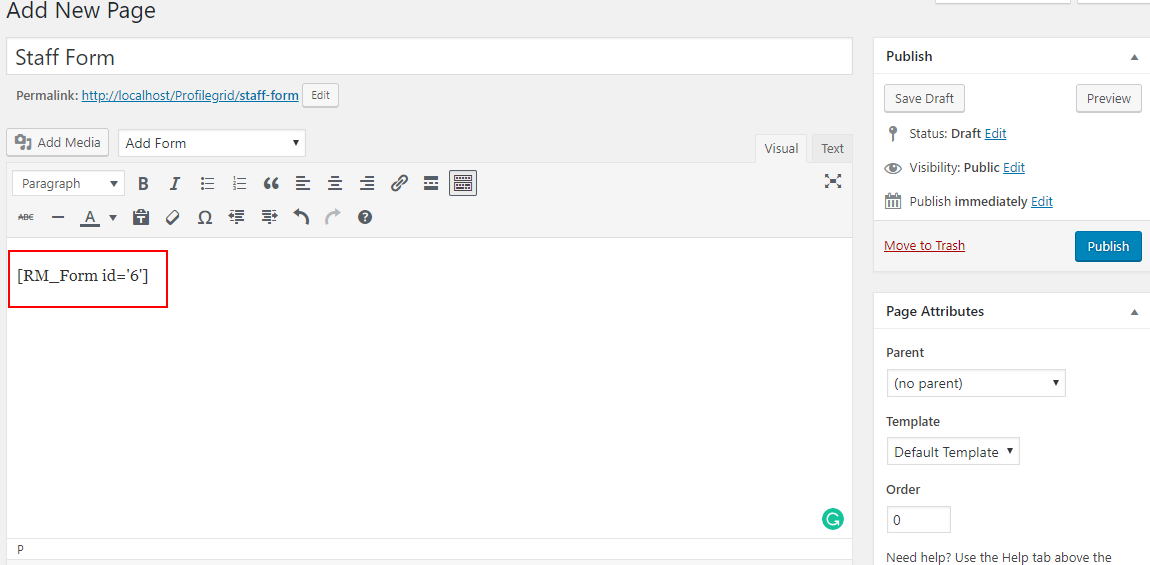
Then go to site frontend to see if you could add WordPress metadata to WordPress form.
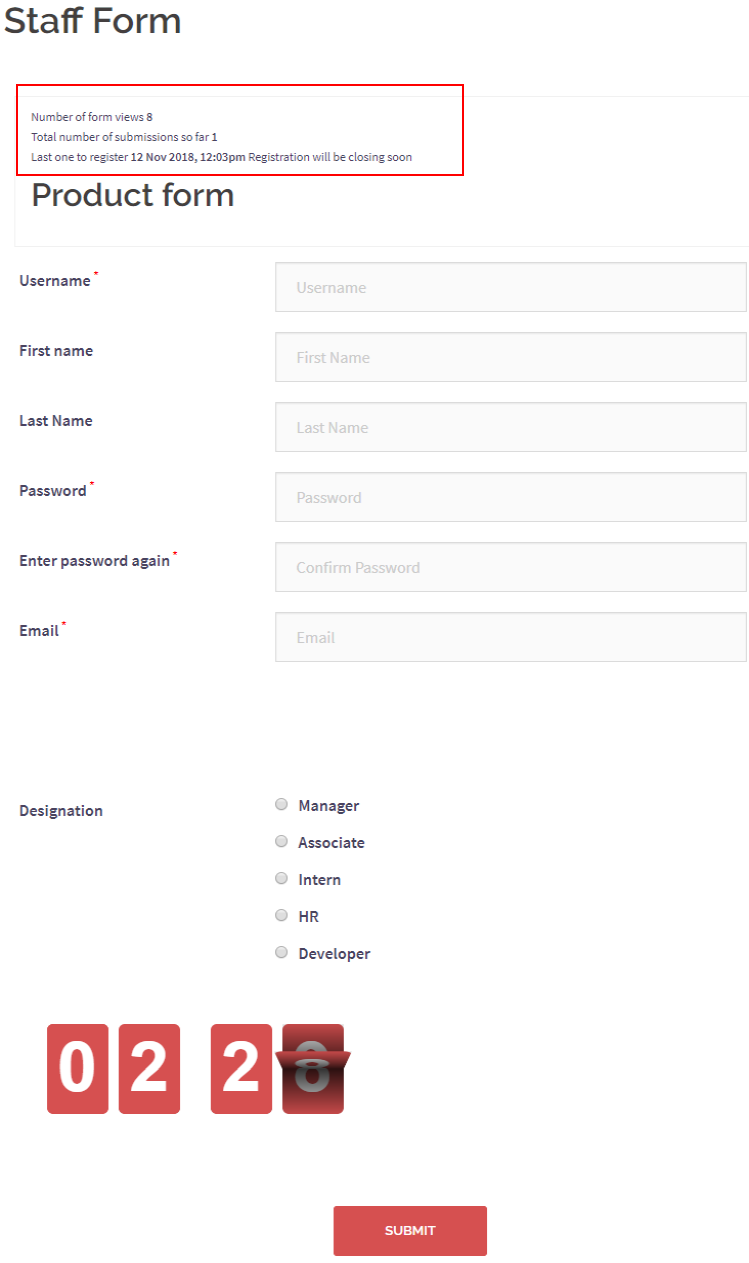
You can see on the above form, there is WordPress forms meta at the top of it. It shows the number of views, submissions etc. the way we configured at the backend. This number will update on itself.
To get insight about the multiple login options of RegistrationMagic, refer to the WordPress user login plugin guide.
All About WordPress User Meta Tags
The meta description tag is a part of the meta elements of a web page. The meta description stays hidden from your visitors when they view your site but is accessible by the bots. One can display the contents of their meta tag description in the search results of the search engines or in a site description in a directory or data site where they scan your meta tag description.
One Plugin, Multiple Utility
RegistrationMagic not only lets users add metadata to WordPress form. Its large spread of custom fields lets users create extensive forms with even payment options and product addition. So, users have numerous options to transform their sites into efficient online stores or membership communities.
- Complete Automation Guide for WordPress Forms - July 20, 2024
- WordPress User Management Plugin Guide - July 18, 2024
- Add CAPTCHA in WordPress Login and Registration Form? - July 16, 2024
- How to Send Automated Welcome Emails in WordPress - July 15, 2024
- WordPress User Roles, Permissions & Role Editor [Complete Guide] - July 14, 2024
- How to Display Custom Success Message in WordPress Forms - July 12, 2024
- Publish Registration Forms and Display Registered Users - July 11, 2024
- How to Approve WordPress User Accounts Without Logging Into Dashboard - January 25, 2021
- How to Set up Two Factor Authentication in WordPress - April 4, 2019
- How to Edit or Replace Default WordPress Registration Form - April 2, 2019
