Add Divider to WordPress Form with RegistrationMagic
When you add divider to WordPress form you can create different sections on it and define them neatly. Usually, content heavy forms need space and dividers for the ease of reading. Moreover, you create the first impression of your site among users with your WordPress forms. So why not build neat and structured forms that can attract more users with its efficiency.
A Divider not only adds to the visual appeal of your form. It will help you add various user data fields yet not make your WordPress forms look cluttered. If you add divider to WordPress form you can add multiple sections like: Personal, Professional, Hobbies, Qualifications etc.
Generally, if you create a functional form you need to work on default WordPress forms to add extensive user data. Be it job application forms, gym or class registration ones or an online shopping site form complete with payment methods. A divider will help you fit multiple fields and sections on your form yet keep it looking neat and structured.
To add divider to WordPress form, you need a divider widget to separate fields with a horizontal line separating two fields. RegistrationMagic is one such WordPress form builder plugin that offers custom fields and widgets to add to forms.
The divider widget of this plugin, allows you to place a divider in order to break the form into a different sections. So let us go ahead and add divider to WordPress form with RegistrationMagic.
Step by Step Tutorial
First, install the RegistrationMagic plugin on your dashboard. After activating it you will find the plugin menu on your menu panel.
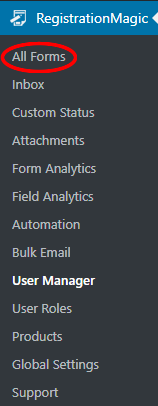
From there, click on the All Forms link.
Then you will land on the All Forms page. Here you will find all the forms that you create through this plugin. On every form cover in this page, you will find two links: Fields and Dashboard.
The Dashboard link lets you take care of the WordPress form security, design, payment etc.
While the Fields link lets you add custom Fields and Widgets to your default form.

Click on the Fields link, to land on the Fields Manager page.
Here you will find all the Fields that you add to a certain form. Besides, all the Fields that add to each form remain unique to it.
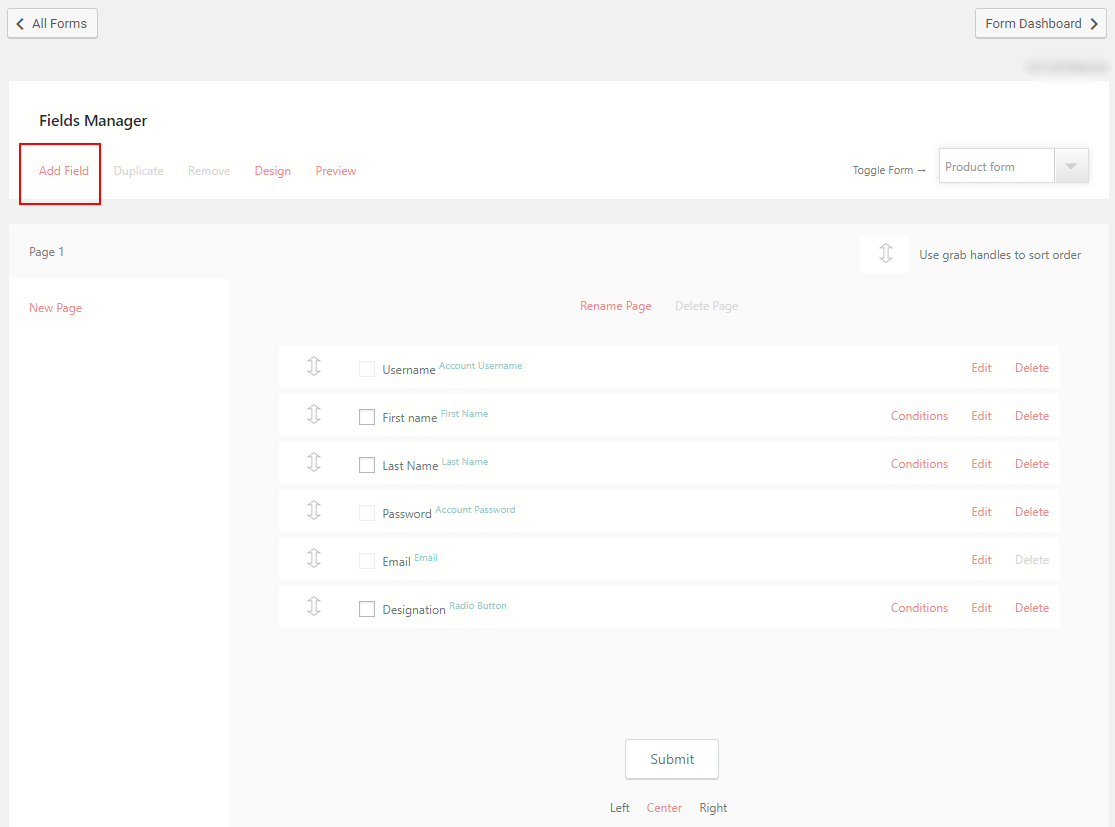
Now, click on the All Field link at the top left corner of the page. You will find a pop-up with all the preset fields and widgets of the plugin. The Fields can take user inputs on WordPress forms. While the Widgets cannot, they add necessary elements like price, timer, registration feed to your forms. Thus the widgets help you display data on your forms which your users cannot edit.
From here, click on the Heading Widget under Display Fields to format HTML heading styles on your form.
The Display Field generally contains all the widgets that can add visual read-only elements to the form.
Setting Up the Divider Widget
Now, after selecting the Divider Widget you will land on the Divider Widget Settings page. From here you can set the Divider Widget on your WordPress forms.
Now, there are not many options to configure the Divider Widget since the plugin formats the divider height and length on its own.
So, here you only have to assign the Label and the CSS Class attribute of this widget. The First field being Label, fill it with a text of your choice. This Label will not appear on your form. But it will help you define this widget on the Field Manager page.
Then, one can only add the CSS class attribute if the class is preset in the coding file.
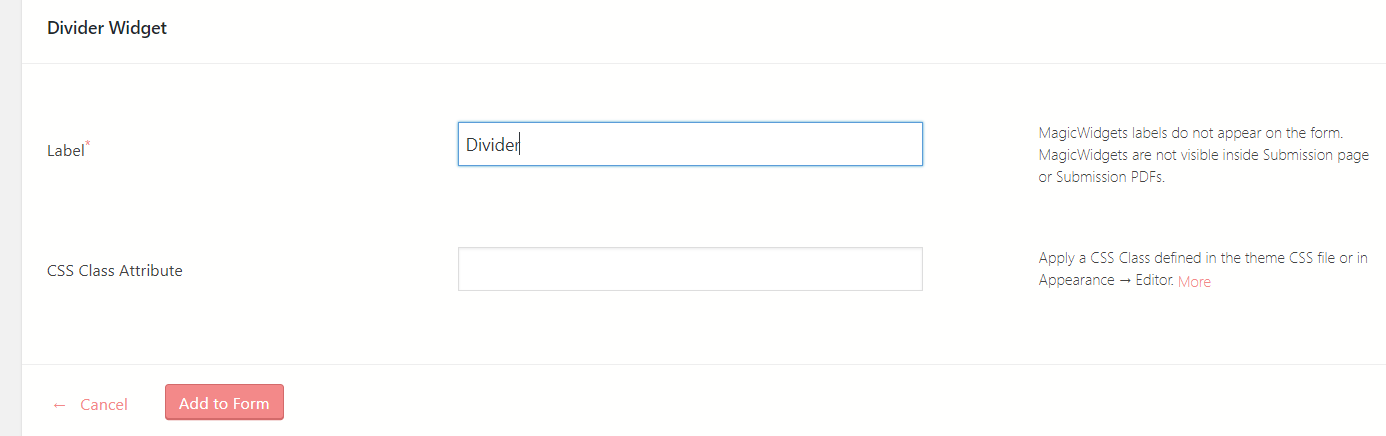
Lastly, click on Add to Form to add divider to WordPress form.
Divider On WordPress Forms
After you are done adding the divider widget of your WordPress form publish the form to see how it looks.
RegistrationMagic makes it really simple to publish forms on your site. You can display WordPress form using shortcode with this plugin. On the All Forms page, you will find each form has a unique shortcode.
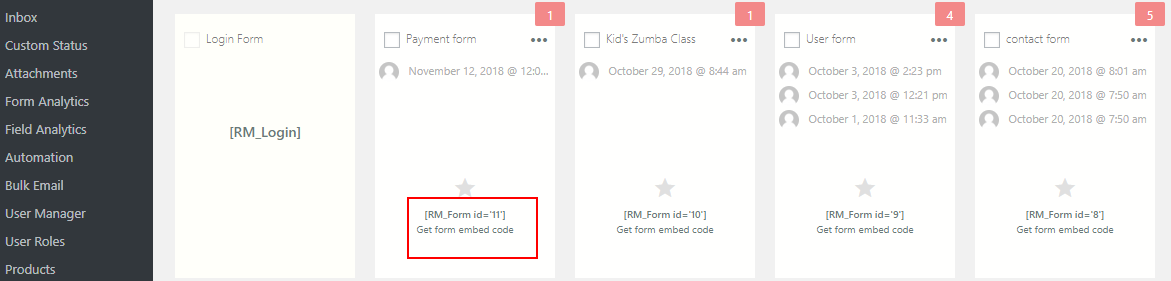
Just copy the shortcode from the form cover. Go to the All Pages section from the WordPress menu.
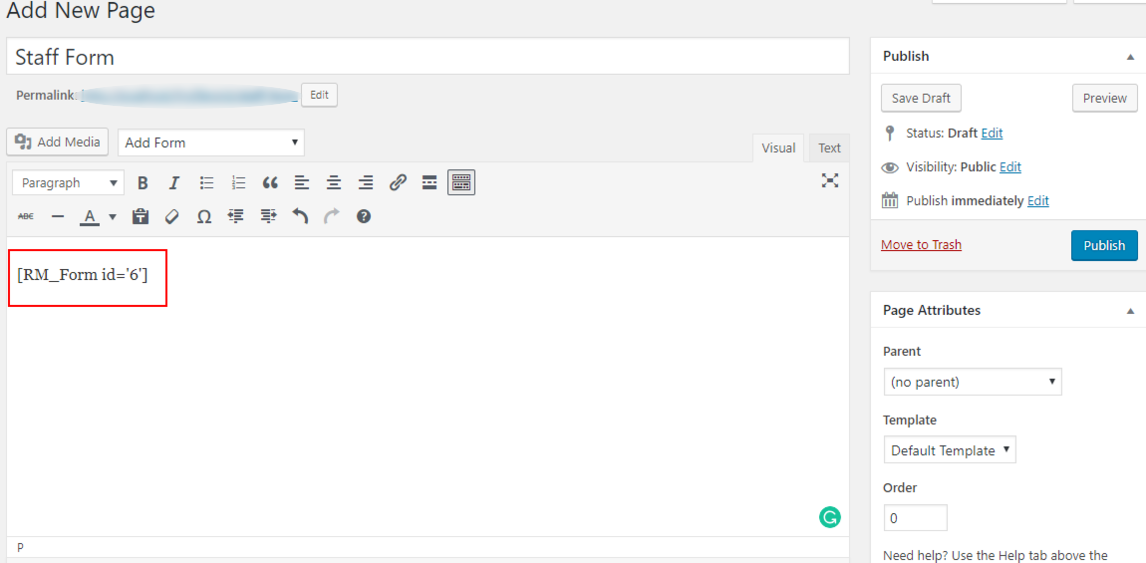
Paste the shortcode in the body section of a new page, name it and click Publish.
Now go to the frontend of your site to find your form with the custom divider widget on it.
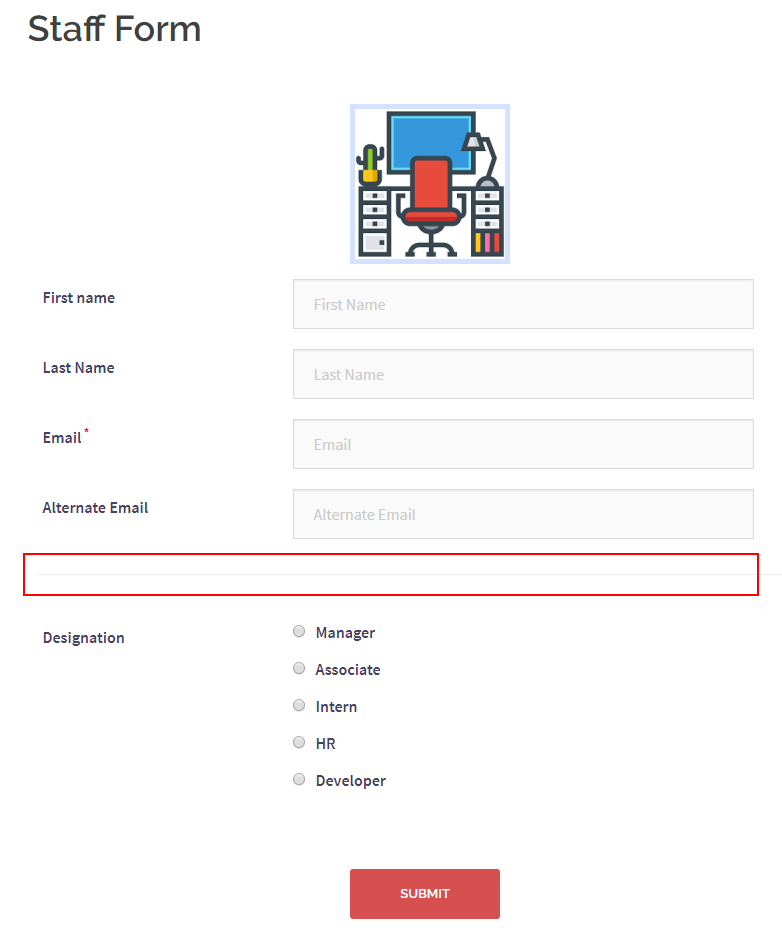
As you can in the above form, the divider widget is marked in red and appears between two data fields. Here the divider is a grey line between the Email and Designation fields. It acts as a line dividing the two fields, thus offering clarity in reading.
One can add one or more dividers in one form, as per their need with this WordPress form builder. There is also the option to place this divider anywhere in the form body. You can move the widget from the Field Manager page with the two headed arrow handler beside it. One can also, edit, delete or duplicate widgets from this page.
So, you see, if you add divider to WordPress form, your form gets a neater look. The user data fields find prominence as they remain in their own sections. Thus giving your users the ease in reading them and filling them up. Besides, you can fit in various fields on your form and still make it look clean.
- Complete Automation Guide for WordPress Forms - July 20, 2024
- WordPress User Management Plugin Guide - July 18, 2024
- Add CAPTCHA in WordPress Login and Registration Form? - July 16, 2024
- How to Send Automated Welcome Emails in WordPress - July 15, 2024
- WordPress User Roles, Permissions & Role Editor [Complete Guide] - July 14, 2024
- How to Display Custom Success Message in WordPress Forms - July 12, 2024
- Publish Registration Forms and Display Registered Users - July 11, 2024
- How to Approve WordPress User Accounts Without Logging Into Dashboard - January 25, 2021
- How to Set up Two Factor Authentication in WordPress - April 4, 2019
- How to Edit or Replace Default WordPress Registration Form - April 2, 2019